Installing the BayStack 400-ST1 Cascade Module - CXtec
Installing the BayStack 400-ST1 Cascade Module - CXtec
Installing the BayStack 400-ST1 Cascade Module - CXtec

Create successful ePaper yourself
Turn your PDF publications into a flip-book with our unique Google optimized e-Paper software.
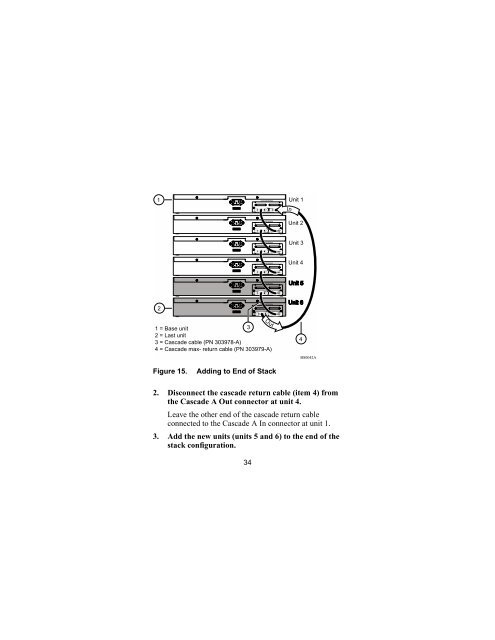
1<strong>Cascade</strong> <strong>Module</strong><strong>Cascade</strong> <strong>Module</strong>Unit 1InUnit 2<strong>Cascade</strong> <strong>Module</strong>Unit 3<strong>Cascade</strong> <strong>Module</strong>Unit 4<strong>Cascade</strong> <strong>Module</strong>2<strong>Cascade</strong> <strong>Module</strong>Out1 = Base unit32 = Last unit3 = <strong>Cascade</strong> cable (PN 303978-A)4 = <strong>Cascade</strong> max- return cable (PN 303979-A)4BS0042AFigure 15.Adding to End of Stack2. Disconnect <strong>the</strong> cascade return cable (item 4) from<strong>the</strong> <strong>Cascade</strong> A Out connector at unit 4.Leave <strong>the</strong> o<strong>the</strong>r end of <strong>the</strong> cascade return cableconnected to <strong>the</strong> <strong>Cascade</strong> A In connector at unit 1.3. Add <strong>the</strong> new units (units 5 and 6) to <strong>the</strong> end of <strong>the</strong>stack configuration.34