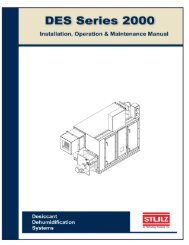
Mini-Space Series Installation, Operation & Maintenance Manual
Mini-Space Series Installation, Operation & Maintenance Manual
Mini-Space Series Installation, Operation & Maintenance Manual

You also want an ePaper? Increase the reach of your titles
YUMPU automatically turns print PDFs into web optimized ePapers that Google loves.
<strong>Mini</strong>-<strong>Space</strong> <strong>Series</strong> <strong>Installation</strong>, <strong>Operation</strong> & <strong>Maintenance</strong> <strong>Manual</strong>4.1.1.3 Drain PanTo ensure proper drainage, inspect the drain pan regularly.Make sure the drain pan outlet is always freeof debris and ensure the drain pan does not leak.4.1.1.4 CoilsCoil(s) should be inspected semiannually andcleaned as required following standard coil cleaningpractices. Using a brush, clean the coil fins of all debristhat will inhibit airflow. This can also be done withcompressed air or with a commercial coil cleaner.Check for bent or damaged coil fins and repair asnecessary. Check all piping for signs of leaks.4.1.1.5 Heat/ReheatThe heat/reheat equipment should be inspectedsemi-annually to ensure it is operational. If you haveelectric heat/reheat, inspect the heating elements toensure they are free of debris.4.1.1.6 HumidifierThe steam cylinder has a limited lifetime and must bereplaced periodically. Because water conditions andhumidifier usage rates vary greatly, it is difficult toestablish intervals for changing the cylinder. Individualmaintenance schedules must be determinedfor each location, based upon periodic examination ofthe humidifier. A change cylinder light on the humidifier cabinet will illuminate (red) when the cylinderrequires replacement.NOTEThe red light may illuminate during initial startupbut it doesn’t necessarily mean the cylinderneeds to be replaced.4.1.2 Condenser<strong>Maintenance</strong> access to the condenser is through oneor two removable panels (depending on model). Forair-cooled condensers, clean the condenser coil of alldebris that will inhibit airfl ow. This can be done withcompressed air or with a commercial coil cleaner.Check for bent or damaged coil fi ns and repair asnecessary. On outdoor units in winter, do not permitsnow to accumulate on or around the condensingunit. Check all refrigerant lines and capillaries forvibration isolation and support as necessary. Checkall refrigerant and coolant lines for signs of leaks.CAUTIONThe compressor crankcase heater is energizedas long as power is applied to the unit. If themain switch is disconnected for, long periodsdo not attempt to start a condensing unit until 8hours after applying power. This allows enoughtime for all liquid refrigerant to be driven out ofthe compressor. This is especially important atlow ambient conditions.4.1.3 Pump PackageRoutinely examine the areas around the pumpmotor(s) and inlets and outlets. Check coolant andpiping for signs of leaks. Examine all wiring for signsof chafi ng, loose connections or other obvious damage.Examine brackets, motor mounts and hardwarefor loose or missing parts or other damage. Lubricatemotor bearings if applicable. (See the instructionmanual provided with the pump package.)Refer to the humidifier operator’s manual suppliedunder separate cover for detailed instructions onchanging the cylinder.4.1.1.7 Condensate PumpThe condensate pump should be inspected semi-annuallyand cleaned. Ensure that the float works freely.Wipe the float with a wet cloth and detergent to removedirt. Clean the tank bottom. Check the dischargeline to ensure it is open and water can pass throughit freely.(©April, 2008)4-4Air Technology Systems, Inc.