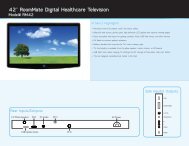
13.3” LOW VOLTAGE BedMate II DTV Operations Manual - Hci
13.3” LOW VOLTAGE BedMate II DTV Operations Manual - Hci
13.3” LOW VOLTAGE BedMate II DTV Operations Manual - Hci

You also want an ePaper? Increase the reach of your titles
YUMPU automatically turns print PDFs into web optimized ePapers that Google loves.
----------------------------------------------------------------------------------<strong>BedMate</strong> <strong>II</strong> OPERATIONS MANUAL<br />
3. Press the “ENTER” button.<br />
4. Enter the Virtual Channel number using the keypad then press enter.<br />
5. To clear a Virtual Channel number select the Virtual Channel in the NUM column<br />
and press the ENTER button twice.<br />
NOTE: Each time you enter a Virtual Channel number the TV does a check to make sure the Virtual<br />
Channel number has not already been used. If the Virtual Channel number has been used an error<br />
message will be displayed and the entry cleared. Select a different Virtual Channel number if this<br />
occurs.<br />
Advanced Advanced channel settings<br />
Setting<br />
Channel Current Channel. Use the left/right arrow button to change the current channel<br />
Number without leaving the menu screen.<br />
In Channel When checked the current channel is in the channel list and can be tuned to.<br />
List When un-checked current channel is not in the list and con not be tuned to.<br />
Use this feature to add and delete channels.<br />
Virtual CH When on the channel lineup is determined by the Virtual channel list. See page 34.<br />
No. When off the standard channel list is used. Selections are:<br />
On - Off<br />
Real Channel When on, the OSD channel will show both the Virtual Channel number and the real<br />
Display channel number. This is useful for setting up and testing the virtual channel lineup.<br />
When set to off only the virtual channel number is displayed This feature is only<br />
active when Virtual CH No. is set to On. Selections are:<br />
On – Off<br />
Source Enables or disable input sources based on the current tier setting. A check in the<br />
Bank box indicates the source is enabled for the tier. If the box is un-checked the source is<br />
disabled for that tier. Only enabled sources can be selected using the SOURCE or<br />
INPUT buttons.<br />
Blue When select displays blue back ground if no signal is present. Press the “ENTER” button to<br />
Back select/un-select.<br />
Signal Selects the signal source. Use the left/right arrow buttons to change. Selections are:<br />
Type<br />
Cable – Air<br />
Cable Select if the signal source is from a cable company<br />
Air Select if the signal source is from an off-air antenna.<br />
Auto Automatically finds active channels and add them to the channel list. Non-active channels are removed<br />
Channel form the channel list. Make sure “Signal Type” is properly set then press the “ENTER” button to begin<br />
Search search.<br />
CH Turns channel roll On or Off. When On the auxiliary inputs such as VGA will be included in the channel<br />
Roll line up. The auxiliary inputs can be selected by using the channel up/down buttons between the highest<br />
and lowest channels. Example: if you are on channel 2 and press the channel down button USB input will<br />
be selected.<br />
Power Turns Power Roll on or off. When on set will turn off when using the Channel Up button from the highest<br />
Roll programmed channel and the Channel Down button when on the lowest programmed channel. Use the<br />
Left/Right arrow buttons to change.<br />
HealthCare Information, LLC 20