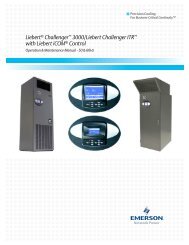
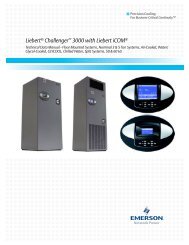
Liebert Challenger 3000
Liebert Challenger™ 3000 Operation & Maintenance Manual - DCES
Liebert Challenger™ 3000 Operation & Maintenance Manual - DCES

Create successful ePaper yourself
Turn your PDF publications into a flip-book with our unique Google optimized e-Paper software.
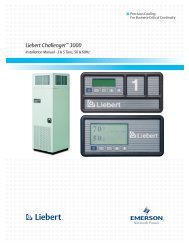
2.5.4 Change PasswordsOperation with Advanced Microprocessor ControlsThe display prompts you to enter a three digit password when making changes. The system includestwo (2) passwords, one for setpoints and one for setup. The system allows the passwords to be changedby first entering the present password, factory set as “123” for setpoints and “321” for setup. The passwordfunction provides system security, so only personnel authorized to make changes should knowthe passwords. If unauthorized changes are being made, the passwords may be compromised and newones should be selected. The password function can be disabled by setting DIP switch 8 to OFF.2.6 Date and TimeThe current date and time is available through the display. This feature allows the date and time tobe read or changed and is accessed by selecting “DATE AND TIME” from the Main Menu.The “DATE AND TIME” is used only by the control for recording the Alarm History.2.7 Status DisplayNOTEThe clock uses the 24 hour system (For example: 17:00 would be 5:00 PM). The date and timeare backed up by battery.The Status Display selected from the Main Menu is the same Status Display that is normally on thescreen. While the Main Menu is displayed, you can press the MENU/ESC key to return to the StatusDisplay.NOTEThe system automatically returns to the Status Display in five minutes if nocontrol keys are pressed.2.8 Control Circuit BoardThe control circuit board is located inside the unit behind the LCD display and control key panel.Open the front panel for access to the board.The control board includes an adjustment for LCD display contrast, nonvolatile memory, DIPswitches (which should not require customer changes), control output LEDs and jumpers for boardconfiguration. The jumpers should be placed as follows:P5—removedP12—removedP19—installed on Pins 1 and 2P47—installed on Pins 1 and 2P48—installed on Pins 1 and 2P50—all jumpers installed for 4-20 mA analog inputs. See 4.5.1 - Connecting the Analog Sensorsfor other configurationsP51—removed2.8.1 LCD Display ContrastThe level of contrast due to viewing angle of the LCD display can be adjusted using a small thumbwheel at the upper left of the control board just under the cable going to the display. The control islabeled R6.NOTEThe LED backlighting on the text (4 x 20) display is always lit.13