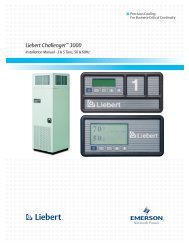
Liebert Challenger 3000
Liebert Challenger™ 3000 Operation & Maintenance Manual - DCES
Liebert Challenger™ 3000 Operation & Maintenance Manual - DCES
You also want an ePaper? Increase the reach of your titles
YUMPU automatically turns print PDFs into web optimized ePapers that Google loves.
3.2 Status DisplayOperation with Advanced Microprocessor with Graphics ControlThe normal status screen is divided into two sections, a right half and a left half. The left half displaysthe return air temperature and humidity readings in large characters.The right half of the screen is divided into four quadrants (top to bottom). In the four quadrants, sixdifferent graphic symbols may be displayed depending on the unit status. At the top there will be amoving hammer striking a bell that appears when an alarm is present. The word “Alarm” alsoappears next to the hammer and bell. The second quadrant down displays a rotating fan as long asthe unit is turned on and the fan is running. The words “Unit on” appear next to the fan symbol. Thethird quadrant may display one of two symbols relating to heating or cooling. If the control is callingfor cooling, a growing snowflake is shown next to the word “Cooling.” If the control is calling for heating,three moving heat rays are displayed next to the word “Heating.” In the bottom quadrant, theremay be one of two symbols relating to humidification and dehumidification. If the control is calling forhumidification, a growing water drop is shown next to the word “Humidification.” If the control is callingfor dehumidification, a shrinking water drop is shown next to the word “Dehumidification.”3.3 Main Menu Press the MENU/ESC key to display the Main Menu. The Menu selections include:• VIEW/SET ALARMS• OPERATING STATUS• VIEW/SET CONTROL SETPOINTS• SYSTEM SETUP• RUN DIAGNOSTICS• DATE AND TIME• PLOT GRAPHS• ANALOG/DIGITAL INPUTS• VIEW RUN HOURS LOGPressing the MENU/ESC key while the Main Menu is displayed will return the screen to the StatusDisplay.3.4 View/Set AlarmsNOTEThe display can also be set to display the temperature and humidity setpoints.See 3.7.7 - Set Status Display.Selecting VIEW/SET ALARMS will step to the following menu:• ACTIVE ALARMS• ALARM HISTORY LOG• SETUP ALARMS• SETUP CUSTOM ALARMS• VIEW WATER DETECT FLOOR PLAN• SETUP WATER DETECT FLOOR PLAN3.4.1 Active AlarmsThis screen displays any active alarm. The alarms are numbered, #1 being the most recent. The typeof alarm (Urgent or Warning) is also displayed. If there are no active alarms, then “NO ALARMSPRESENT” will be displayed.3.4.2 Alarm History LogA history of the 60 most recent alarms is kept in nonvolatile memory complete with the type of alarm,the alarm name, and the date and time it occurred. The first alarm in the history is the most recentand the last (up to 60) is the oldest. If the Alarm History is full (60 alarms) and a new alarm occurs,the oldest is lost and the newest is saved in alarm history location 1. The rest are moved down the listby 1. Alarm history on new units may show the results of factory testing.17


