


You also want an ePaper? Increase the reach of your titles
YUMPU automatically turns print PDFs into web optimized ePapers that Google loves.
Linksys <strong>E3000</strong><br />
Chapter 2: Advanced Configuration<br />
Click Save Settings to apply your changes, or click Cancel<br />
Changes to clear your changes. Click Close to exit the<br />
screen.<br />
Delete To delete a shared folder, click this option.<br />
Format Disk<br />
Disk To format a disk and create a new partition, select<br />
the disk you want to format, and then click Format Disk. (If<br />
your disk was formatted with multiple partitions, then the<br />
formatting will delete them and create a single partition.<br />
Format Disk > Claim Disk<br />
Enter a partition’s name Create a name for the partition.<br />
(If your disk was formatted with multiple partitions, then<br />
formatting will delete them and create a single partition.)<br />
To format the disk as FAT32, click Format and follow the<br />
on‐screen instructions. To cancel the formatting, click<br />
Cancel.<br />
WARNING: Formatting a disk erases all data on<br />
the disk. Be sure to save any files that you want<br />
to keep from the disk onto another computer or<br />
drive before formatting a disk.<br />
UPnP Media Server<br />
Setup<br />
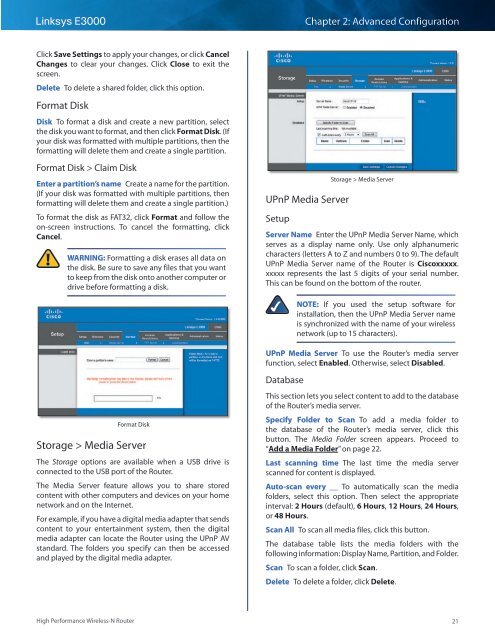
Storage > Media Server<br />
Server Name Enter the UPnP Media Server Name, which<br />
serves as a display name only. Use only alphanumeric<br />
characters (letters A to Z and numbers 0 to 9). The default<br />
UPnP Media Server name of the Router is Ciscoxxxxx.<br />
xxxxx represents the last 5 digits of your serial number.<br />
This can be found on the bottom of the router.<br />
NOTE: If you used the setup software for<br />
installation, then the UPnP Media Server name<br />
is synchronized with the name of your wireless<br />
network (up to 15 characters).<br />
UPnP Media Server To use the Router’s media server<br />
function, select Enabled. Otherwise, select Disabled.<br />
Database<br />
Format Disk<br />
Storage > Media Server<br />
The Storage options are available when a USB drive is<br />
connected to the USB port of the Router.<br />
The Media Server feature allows you to share stored<br />
content with other computers and devices on your home<br />
network and on the Internet.<br />
For example, if you have a digital media adapter that sends<br />
content to your entertainment system, then the digital<br />
media adapter can locate the Router using the UPnP AV<br />
standard. The folders you specify can then be accessed<br />
and played by the digital media adapter.<br />
This section lets you select content to add to the database<br />
of the Router’s media server.<br />
Specify Folder to Scan To add a media folder to<br />
the database of the Router’s media server, click this<br />
button. The Media Folder screen appears. Proceed to<br />
“Add a Media Folder” on page 22.<br />
Last scanning time The last time the media server<br />
scanned for content is displayed.<br />
Auto-scan every __ To automatically scan the media<br />
folders, select this option. Then select the appropriate<br />
interval: 2 Hours (default), 6 Hours, 12 Hours, 24 Hours,<br />
or 48 Hours.<br />
Scan All To scan all media files, click this button.<br />
The database table lists the media folders with the<br />
following information: Display Name, Partition, and Folder.<br />
Scan To scan a folder, click Scan.<br />
Delete To delete a folder, click Delete.<br />
High Performance Wireless-N Router<br />
21