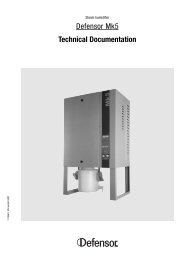
K Control panel
K Control panel
K Control panel

You also want an ePaper? Increase the reach of your titles
YUMPU automatically turns print PDFs into web optimized ePapers that Google loves.
All the connections shall be made to the terminal block provided<br />
for that purpose in the boiler control <strong>panel</strong>.<br />
Proceed as follows to open the control <strong>panel</strong>:<br />
➀ Remove the boiler top <strong>panel</strong>.<br />
➁ Unhook the intermediate front <strong>panel</strong>.<br />
➂ Remove the upper front <strong>panel</strong>.<br />
Make the connections as shown opposite.<br />
1<br />
The very low voltage sensor cables must<br />
be separated from the 230 V main supply<br />
cables in order to avoid electromagnetic<br />
interference problems.<br />
Inside the boiler<br />
- Boilers with one cable channel:<br />
Place the 230 V main supply cables on one side of the<br />
cable channel and the sensor cables on the other. The<br />
cables shall be held in place on either side using<br />
plastic ties.<br />
- Boilers with two cable channels:<br />
Place the 230 V main supply cables in one cable<br />
channel and the sensor cables in the other. The cables<br />
shall be held in place using plastic ties.<br />
7<br />
8<br />
6<br />
9<br />
5<br />
4<br />
3<br />
7<br />
8<br />
6<br />
9<br />
5<br />
4<br />
3<br />
2<br />
3<br />
8358N024<br />
9<br />
POMPE DE RECYCLAGE<br />
KESSELKREISPUMPE<br />
SHUNT PUMP<br />
1 2 3 4 5 6 7 8 9 10 11 12 13 14 15 16<br />
L N L N L N L N L N<br />
ALI<br />
CS VA - TS VS<br />
230V 50Hz<br />
ALIMENTATION<br />
STROMZUFÜHR<br />
MAIN SUPPLY<br />
6<br />
VOYANT ALARME TS<br />
TS ALARMLEUCHTE<br />
➃ Remove the connection board cover.<br />
➄ After removing the 4 fastening screws, tilt the front<br />
cover to open the control <strong>panel</strong>.<br />
➅ Fasten the cables to the board supporting plate using<br />
cable clamps (6 cable clamps supplied in a bag) that<br />
are to be assembled as shown opposite.<br />
230V<br />
Main supply<br />
3x 0,75 mm 2 mini.<br />
Outside the boiler<br />
TS ALARM INDICATOR<br />
SAFETY CONTACT<br />
VOYANT ALARME TS<br />
TS ALARMLEUCHTE<br />
TS ALARM INDICATOR<br />
VANNE DE SECURITE<br />
SICHERHEITSVENTIL<br />
SAFETY VALVE<br />
CONTACT DE SECURITE<br />
SICHERHEITSKONTACT<br />
Heating<br />
pump<br />
3x 0,75 mm 2 mini.<br />
230V 50Hz<br />
ALI<br />
CS VA-TS VS<br />
L N L N L N<br />
L N L N<br />
1 2 3 4 5 6 7 8 9 10 11 12 13 14 15 16<br />
Use 2 cable ducts or channels with a minimum<br />
distance of 10 cm between them.<br />
Failure to comply with these instuctions may lead<br />
to interference and regulator malfunction, or even<br />
damage the electronic circuitry.<br />
4<br />
5<br />
8502N127<br />
8502N086