You also want an ePaper? Increase the reach of your titles
YUMPU automatically turns print PDFs into web optimized ePapers that Google loves.
efore using your Kenwood appliance<br />
● Read these instructions carefully and retain for future reference.<br />
● Remove all packaging and any labels.<br />
safety<br />
● The blades and discs are very sharp, handle with care. Always hold by<br />
the finger grip at the top, away from the cutting edge, both<br />
when handling and cleaning.<br />
● Do not lift or carry the processor by the handle - or the handle may break<br />
resulting in injury.<br />
● Always remove the knife blade before pouring contents from the bowl.<br />
● Keep hands and utensils out of the processor bowl and liquidiser goblet<br />
whilst connected to the power supply.<br />
● Switch off and unplug:-<br />
● before fitting or removing parts;<br />
● when not in use;<br />
● before cleaning.<br />
● Never use your fingers to push food down the feed tube. Always use the<br />
pusher/s supplied.<br />
● Before removing the lid from the bowl or liquidiser/mill from the power unit:-<br />
● switch off;<br />
● wait until the attachment/blades have completely stopped;<br />
● be careful not to unscrew the liquidiser goblet or mill jar from the blade<br />
assembly.<br />
● Liquids should be allowed to cool to room temperature before blending.<br />
● Do not use the lid to operate the processor, always use the on/off speed<br />
control.<br />
● This appliance will be damaged and may cause injury if the<br />
interlock mechanism is subjected to excessive force.<br />
● Never use an unauthorised attachment.<br />
● Never leave the appliance unattended when it is operating.<br />
● Never use a damaged appliance. Get it checked or repaired: see ‘service &<br />
customer care’.<br />
● Never let the power unit, cord or plug get wet.<br />
● Don’t let excess cord hang over the edge of a table or worktop or touch hot<br />
surfaces.<br />
● Do not exceed the maximum capacities stated in the recommended speed<br />
chart.<br />
● This appliance is not intended for use by persons (including children) with<br />
reduced physical, sensory or mental capabilities, or lack of experience and<br />
knowledge, unless they have been given supervision or instruction<br />
concerning use of the appliance by a person responsible for their safety. 57<br />
● Children should be supervised to ensure that they do not play with the57<br />
appliance.<br />
57<br />
● Only use the appliance for its intended domestic use. Kenwood 57 will not<br />
accept any liability if the appliance is subject to improper use, 57 or failure to<br />
comply with these instructions.<br />
57<br />
● Misuse of your processor/liquidiser can result in injury. 57<br />
Refer to the relevant section under “using the attachments” 57 for additional<br />
safety warnings for each individual attachment. 57<br />
57<br />
before plugging in<br />
57<br />
● Make sure your electricity supply is the same as the one shown on the<br />
57<br />
underside of your machine.<br />
● This appliance conforms to EC directive 2004/108/EC on Electromagnetic<br />
Compatibility and EC regulation no. 1935/2004 of 27/10/2004 on materials<br />
intended for contact with food.<br />
before using for the first time<br />
1 Remove the plastic blade covers from the knife blade. Take care the<br />
blades are very sharp. These covers should be discarded as they are to<br />
protect the blade during manufacture and transit only.<br />
2 Wash the parts see ‘care & cleaning’.<br />
57<br />
57<br />
2<br />
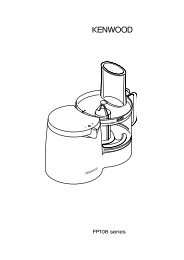
key<br />
processor<br />
power unit<br />
detachable drive shaft<br />
bowl<br />
lid<br />
wide feed tube<br />
pushers<br />
safety interlocks<br />
cord storage<br />
power on light<br />
speed control<br />
Auto button<br />
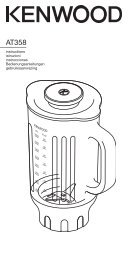
glass liquidiser<br />
sealing ring<br />
blade unit<br />
goblet<br />
filler cap<br />
lid<br />
glass multi mill<br />
sealing ring<br />
blade unit<br />
glass jar<br />
attachments<br />
Not all of the attachments listed below may be included with your food<br />
processor. Attachments are dependent upon the model variant.<br />
knife blade<br />
dough tool<br />
twin beater geared metal whisk<br />
maxi-blend canopy<br />
thick slicing disc (4mm)<br />
thin slicing disc (2mm)<br />
57 coarse shredding disc<br />
fine shredding disc<br />
rasping/parmesan disc (optional)<br />
geared citrus press (optional)<br />
multi mill (optional)<br />
mini bowl (optional)<br />
midi bowl (optional)<br />
centrifugal juicer (optional)<br />
attachment storage box<br />
spatula