You also want an ePaper? Increase the reach of your titles
YUMPU automatically turns print PDFs into web optimized ePapers that Google loves.
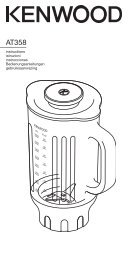
to use your liquidiser<br />
1 Fit the sealing ring into the blade unit - ensuring the seal is located<br />
correctly in the grooved area.<br />
● Leaking will occur if the seal is damaged or incorrectly fitted.<br />
2 Hold the underside of the blade unit and insert the blades into the goblet<br />
- turn anti-clockwise to lock .<br />
3 Put your ingredients into the goblet.<br />
4 Fit the lid to the goblet and push down to secure . Fit the filler cap.<br />
● Before fitting the liquidiser to the power unit check that the<br />
speed control is in the 0 position and the Auto light is off. If<br />
the speed control is not in the 0 position or the Auto is<br />
selected the liquidiser will operate as soon as the liquidiser is<br />
fitted.<br />
5 Place the liquidiser onto the power unit with the handle situated to the right<br />
hand side and turn clockwise to lock .<br />
● The appliance will not operate if the liquidiser is incorrectly<br />
fitted to the interlock.<br />
6 Use the Auto button or select a speed (refer to the recommended speed<br />
chart) or use the pulse control.<br />
safety<br />
● Liquids should be allowed to cool to room temperature before<br />
blending.<br />
● Always take care when handling the blade assembly and avoid touching the<br />
cutting edge of the blades when cleaning.<br />
● Only operate the liquidiser with the lid in place.<br />
● Only use the goblet with the blade assembly supplied.<br />
● Never run the liquidiser empty.<br />
● To ensure the long life of your liquidiser, do not run it continuously for longer<br />
than 60 seconds.<br />
● Smoothie recipes - never blend frozen ingredients that have formed a solid<br />
mass during freezing, break it up before adding to the goblet.<br />
hints<br />
● When making mayonnaise, put all the ingredients, except the oil, into the<br />
liquidiser. Remove the filler cap. Then, with the appliance running, add the<br />
oil slowly through the hole in the lid.<br />
● Thick mixtures, e.g. pâtés and dips, may need scraping down. If the mixture is<br />
difficult to process, add more liquid.<br />
● Ice crushing - operate the pulse in short bursts until crushed to the desired<br />
consistency.<br />
● The appliance will not work if the liquidiser is incorrectly fitted.<br />
● To blend dry ingredients - cut into pieces, remove the filler cap, then with<br />
the appliance running, drop the pieces down one by one. Keep your hand<br />
over the opening. For best results empty regularly.<br />
● Don’t use the liquidiser as a storage container. Keep it empty before and after<br />
use.<br />
● Never blend more than 1.5 litres (2pts 12floz) - less for frothy liquids like<br />
milkshakes.<br />
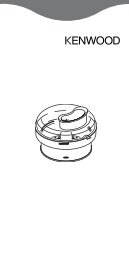
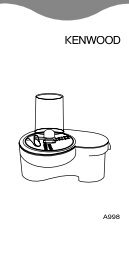
multi mill (if supplied)<br />
Use the mill for processing dry ingredients such as nuts, coffee beans and it<br />
is also suitable for processing a range of spices such as: -<br />
Black peppercorns, cardamom seeds, cumin seeds, coriander seeds, fennel<br />
seeds, fresh ginger root, fresh chillies and whole cloves.<br />
to use your multi mill<br />
1 Put your ingredients into the jar. Fill it no more than half full.<br />
2 Fit the sealing ring to the blade unit .<br />
3 Hold the underside of the blade unit and insert the blades into the jar – turn<br />
anti-clockwise to lock .<br />
4 Place the mill onto the power unit and turn clockwise to lock .<br />
5 Use the Auto button, or select a speed (refer to the recommended speed<br />
chart).<br />
safety<br />
● Never fit the blade unit to your food processor without the jar fitted.<br />
● Never unscrew the jar while the mill is fitted to your appliance.<br />
● Do not touch the sharp blades – Keep the blade unit away from children.<br />
● Never remove the mill until the blades have completely stopped.<br />
● To ensure the long life of your mill, do not run it continuously for longer than<br />
60 seconds. Switch off as soon as you have got the right consistency.<br />
57<br />
4<br />
● The appliance will not work if the mill is incorrectly fitted.<br />
● Do not process turmeric root in the mill as it is too hard and may damage the<br />
blades.<br />
hints<br />
● For optimum performance when processing spices we recommend that you<br />
do not process more than 100g at a time in the mill.<br />
● Whole spices retain their flavour for a much longer time than ground spices<br />
so it is best to grind a small quantity fresh at a time to retain the flavour.<br />
● To release the maximum flavour and essential oils whole spices are best<br />
roasted prior to milling.<br />
● Cut ginger up into small pieces before processing.<br />
● For best results the mini bowl attachment is recommended when chopping<br />
herbs.<br />
using the attachments<br />
knife blade/ dough tool<br />
The knife blade is the most versatile of all the attachments. The length of the<br />
processing time will determine the texture achieved. For coarser textures<br />
use the pulse control.<br />
Use the knife blade for cake and pastry making, chopping raw and cooked<br />
meat, vegetables, nuts, pâté, dips, pureeing soups and to also make<br />
crumbs from biscuits and bread.<br />
Use the dough tool supplied 57<br />
for yeasted mixes.<br />
hints<br />
knife blade<br />
● Cut food such as meat, bread, vegetables into cubes approximately<br />
2cm/ 3 ⁄4in before processing.<br />
● Biscuits should be broken into pieces and added down the feed tube whilst<br />
the machine is running.<br />
● When making pastry use fat straight from the fridge cut into 2cm/ 3 ⁄4in.cubes.<br />
● Take care not to over-process.<br />
dough tool<br />
● Place the dry ingredients in the bowl and add the liquid down the feed tube<br />
whilst the machine is running. Process until a smooth elastic ball of dough is<br />
formed this will take 45 - 60 secs.<br />
● Re-knead by hand only. Re-kneading in the bowl is not recommended as it<br />
may cause the processor to become unstable.<br />
twin beater geared whisk<br />
Use for light mixtures only eg egg whites, cream, evaporated milk and for<br />
whisking eggs and sugar for fatless sponges. Heavier mixtures such as fat<br />
and flour will damage it.<br />
using the whisk<br />
1 Fit the detachable drive shaft and bowl onto the power unit.<br />
2 Push each beater securely into the drive head .<br />
3 Fit the whisk by carefully turning until it drops over the drive shaft.<br />
4 Add the ingredients.<br />
5 Fit the lid - ensuring the end of the shaft locates into the centre of the lid.<br />
6 Select auto.<br />
important<br />
● The whisk is not suitable for making one-stage cakes or creaming fat and<br />
sugar as these mixes will damage it. Always use the knife blade for cake<br />
making.<br />
hints<br />
● Best results are obtained when the eggs are at room temperature.<br />
● Ensure the bowl and whisks are clean and free from grease before whisking.