

Sony STR-DN840 - STR-DN840 Istruzioni per l'uso Inglese
Sony STR-DN840 - STR-DN840 Istruzioni per l'uso Inglese
Sony STR-DN840 - STR-DN840 Istruzioni per l'uso Inglese

You also want an ePaper? Increase the reach of your titles
YUMPU automatically turns print PDFs into web optimized ePapers that Google loves.
Notes<br />
• When you unplug the HDMI cable or change the<br />
connection, <strong>per</strong>form the steps given in “If your<br />
TV is compatible with the “Control for HDMI-<br />
Easy Setting” function” (page 74) or “If your<br />
TV is not compatible with the “Control for<br />
HDMI-Easy Setting” function” (page 74).<br />
• Before you <strong>per</strong>form the “Control for HDMI-<br />
Easy Setting” on your TV, be sure to turn on the<br />
TV and other connected equipment including<br />
the receiver first.<br />
• If the playback equipment cannot function after<br />
you have made the settings for “Control for<br />
HDMI-Easy Setting”, check the Control for<br />
HDMI setting of the playback equipment.<br />
• If the connected equipment does not support the<br />
“Control for HDMI-Easy Setting”, but still<br />
supports the Control for HDMI, then you need<br />
to set the Control for HDMI function for the<br />
connected equipment before you <strong>per</strong>form the<br />
“Control for HDMI-Easy Setting” from the TV.<br />
One-Touch Play<br />
Tip<br />
You can also select a connected equipment, such<br />
as Blu-ray Disc player or DVD player from the<br />
TV menu. The receiver and TV will automatically<br />
switch to the appropriate HDMI input.<br />
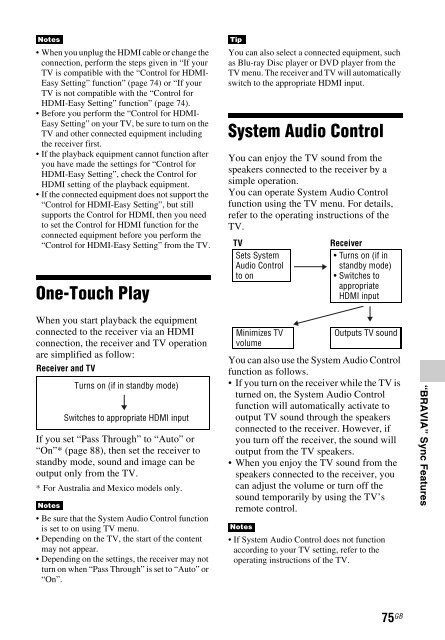
System Audio Control<br />
You can enjoy the TV sound from the<br />
speakers connected to the receiver by a<br />
simple o<strong>per</strong>ation.<br />
You can o<strong>per</strong>ate System Audio Control<br />
function using the TV menu. For details,<br />
refer to the o<strong>per</strong>ating instructions of the<br />
TV.<br />
TV<br />
Sets System<br />
Audio Control<br />
to on<br />
Receiver<br />
• Turns on (if in<br />
standby mode)<br />
• Switches to<br />
appropriate<br />
HDMI input<br />
When you start playback the equipment<br />
connected to the receiver via an HDMI<br />
connection, the receiver and TV o<strong>per</strong>ation<br />
are simplified as follow:<br />
Receiver and TV<br />
If you set “Pass Through” to “Auto” or<br />
“On”* (page 88), then set the receiver to<br />
standby mode, sound and image can be<br />
output only from the TV.<br />
* For Australia and Mexico models only.<br />
Notes<br />
Turns on (if in standby mode)<br />
Switches to appropriate HDMI input<br />
• Be sure that the System Audio Control function<br />
is set to on using TV menu.<br />
• Depending on the TV, the start of the content<br />
may not appear.<br />
• Depending on the settings, the receiver may not<br />
turn on when “Pass Through” is set to “Auto” or<br />
“On”.<br />
Minimizes TV<br />
volume<br />
Outputs TV sound<br />
You can also use the System Audio Control<br />
function as follows.<br />
• If you turn on the receiver while the TV is<br />
turned on, the System Audio Control<br />
function will automatically activate to<br />
output TV sound through the speakers<br />
connected to the receiver. However, if<br />
you turn off the receiver, the sound will<br />
output from the TV speakers.<br />
• When you enjoy the TV sound from the<br />
speakers connected to the receiver, you<br />
can adjust the volume or turn off the<br />
sound temporarily by using the TV’s<br />
remote control.<br />
Notes<br />
• If System Audio Control does not function<br />
according to your TV setting, refer to the<br />
o<strong>per</strong>ating instructions of the TV.<br />
“BRAVIA” Sync Features<br />
75 GB


