MapInfo Professional 11.5 Install Guide - Product Documentation ...
MapInfo Professional 11.5 Install Guide - Product Documentation ...
MapInfo Professional 11.5 Install Guide - Product Documentation ...
Create successful ePaper yourself
Turn your PDF publications into a flip-book with our unique Google optimized e-Paper software.
Chapter 2: <strong>Install</strong>ing <strong>MapInfo</strong> <strong>Professional</strong><br />
<strong>Install</strong>ing Data<br />
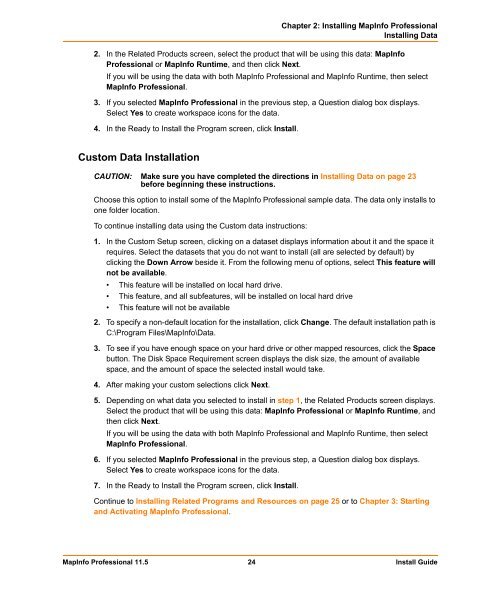
2. In the Related <strong>Product</strong>s screen, select the product that will be using this data: <strong>MapInfo</strong><br />
<strong>Professional</strong> or <strong>MapInfo</strong> Runtime, and then click Next.<br />
If you will be using the data with both <strong>MapInfo</strong> <strong>Professional</strong> and <strong>MapInfo</strong> Runtime, then select<br />
<strong>MapInfo</strong> <strong>Professional</strong>.<br />
3. If you selected <strong>MapInfo</strong> <strong>Professional</strong> in the previous step, a Question dialog box displays.<br />
Select Yes to create workspace icons for the data.<br />
4. In the Ready to <strong>Install</strong> the Program screen, click <strong>Install</strong>.<br />
Custom Data <strong>Install</strong>ation<br />
CAUTION: Make sure you have completed the directions in <strong>Install</strong>ing Data on page 23<br />
before beginning these instructions.<br />
Choose this option to install some of the <strong>MapInfo</strong> <strong>Professional</strong> sample data. The data only installs to<br />
one folder location.<br />
To continue installing data using the Custom data instructions:<br />
1. In the Custom Setup screen, clicking on a dataset displays information about it and the space it<br />
requires. Select the datasets that you do not want to install (all are selected by default) by<br />
clicking the Down Arrow beside it. From the following menu of options, select This feature will<br />
not be available.<br />
• This feature will be installed on local hard drive.<br />
• This feature, and all subfeatures, will be installed on local hard drive<br />
• This feature will not be available<br />
2. To specify a non-default location for the installation, click Change. The default installation path is<br />
C:\Program Files\<strong>MapInfo</strong>\Data.<br />
3. To see if you have enough space on your hard drive or other mapped resources, click the Space<br />
button. The Disk Space Requirement screen displays the disk size, the amount of available<br />
space, and the amount of space the selected install would take.<br />
4. After making your custom selections click Next.<br />
5. Depending on what data you selected to install in step 1, the Related <strong>Product</strong>s screen displays.<br />
Select the product that will be using this data: <strong>MapInfo</strong> <strong>Professional</strong> or <strong>MapInfo</strong> Runtime, and<br />
then click Next.<br />
If you will be using the data with both <strong>MapInfo</strong> <strong>Professional</strong> and <strong>MapInfo</strong> Runtime, then select<br />
<strong>MapInfo</strong> <strong>Professional</strong>.<br />
6. If you selected <strong>MapInfo</strong> <strong>Professional</strong> in the previous step, a Question dialog box displays.<br />
Select Yes to create workspace icons for the data.<br />
7. In the Ready to <strong>Install</strong> the Program screen, click <strong>Install</strong>.<br />
Continue to <strong>Install</strong>ing Related Programs and Resources on page 25 or to Chapter 3: Starting<br />
and Activating <strong>MapInfo</strong> <strong>Professional</strong>.<br />
<strong>MapInfo</strong> <strong>Professional</strong> <strong>11.5</strong> 24 <strong>Install</strong> <strong>Guide</strong>


