Config Panel (2.40) - Guntermann und Drunck GmbH
Config Panel (2.40) - Guntermann und Drunck GmbH
Config Panel (2.40) - Guntermann und Drunck GmbH

You also want an ePaper? Increase the reach of your titles
YUMPU automatically turns print PDFs into web optimized ePapers that Google loves.
<strong>Guntermann</strong> & <strong>Drunck</strong> <strong>GmbH</strong><br />
www.gdsys.de<br />
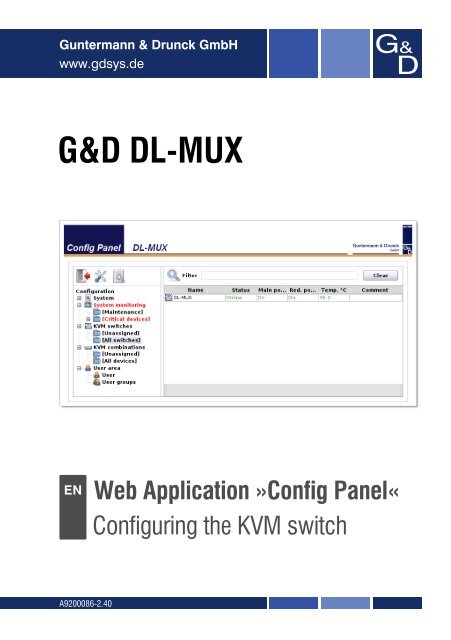
G&D DL-MUX<br />
EN Web Application »<strong>Config</strong> <strong>Panel</strong>«<br />
A9200086-<strong>2.40</strong><br />
<strong>Config</strong>uring the KVM switch
About this guide<br />
This guide is authored with special diligence and verified by the state of the art for<br />
correctness.<br />
G&D neither explicitly nor implicitly takes guarantee or responsibility for the quality,<br />
efficiency and marketability of the product when used for a certain purpose that<br />
differs from the scope of service covered by this guide.<br />
For losses, which directly or indirectly result from the use of the documentation as<br />
well as for incidental damages or subsequent damages, G&D is liable only in the<br />
cases of intent or gross negligence.<br />
Warranty exclusion<br />
In the following cases, G&D will not accept warranty claims:<br />
The devices were not used as intended.<br />
The devices were repaired or modified by unauthorized personnel.<br />
The devices offer extensive external damage that was not reported at time of<br />
delivery.<br />
The devices were damaged by third-party accessories.<br />
G&D will assume no liability for any consequential damages that may arise from<br />
the use of the products.w<br />
Trademark credits<br />
All product and company names mentioned in this guide and other documents you<br />
have received with your G&D product may be trademarks or trade names of their<br />
respective owners.<br />
Imprint<br />
© <strong>Guntermann</strong> & <strong>Drunck</strong> <strong>GmbH</strong> 2011. All rights reserved.<br />
Version <strong>2.40</strong> – 28/06/2011<br />
Firmware: 1.4.1_2552<br />
<strong>Guntermann</strong> & <strong>Drunck</strong> <strong>GmbH</strong><br />
Dortm<strong>und</strong>er Str. 4a<br />
57234 Wilnsdorf<br />
Germany<br />
Phone +49 2739 8901-100<br />
Fax +49 2739 8901-120<br />
http://www.GDsys.de<br />
sales@GDsys.de<br />
i · G&D DL-MUX
Contents<br />
Chapter 1: Basic functions<br />
Contents<br />
System requirements ......................................................................................... 2<br />
Supported web browsers .................................................................................... 2<br />
Java Runtime Environment ............................................................................... 2<br />
Initial configuration of the network settings ..................................................... 3<br />
Getting started .................................................................................................. 4<br />
Starting the web application ............................................................................... 4<br />
Security advices of the web browser ................................................................... 4<br />
User login against the web application ................................................................ 5<br />
Operating the web application ............................................................................ 6<br />
User interface ................................................................................................6<br />
Frequently used buttons .................................................................................7<br />
User logout ........................................................................................................ 7<br />
Selecting the default language of the web application .......................................... 8<br />
Basic configuration of the web application ....................................................... 9<br />
Network settings ................................................................................................ 9<br />
<strong>Config</strong>uring the network settings ....................................................................9<br />
<strong>Config</strong>uring the global network settings ........................................................ 10<br />
Updating the stored SSL certificate ................................................................... 10<br />
Adjusting a common database for all devices .................................................... 12<br />
Backup and restore function ............................................................................. 13<br />
Firmware update ............................................................................................. 14<br />
Restoring the default settings ............................................................................ 14<br />
Network functions of the devices .................................................................... 15<br />
Creating and administering netfilter rules ......................................................... 15<br />
Creating a new netfilter rule ......................................................................... 15<br />
Editing existing netfilter rules ....................................................................... 16<br />
Deleting existing netfilter rules ..................................................................... 18<br />
Changing the order/priority of existing netfilter rules .................................... 18<br />
NTP server ...................................................................................................... 19<br />
Time sync with an NTP server ..................................................................... 19<br />
Setting time and date manually .................................................................... 19<br />
Logging syslog messages .................................................................................. 20<br />
Locally logging the syslog messages.............................................................. 20<br />
Sending syslog messages to a server .............................................................. 21<br />
Viewing and saving local syslog messages..................................................... 22<br />
User authentication against directory services ................................................... 23<br />
G&D DL-MUX · ii
Contents<br />
Monitoring functions ...................................................................................... 24<br />
Viewing monitoring values ............................................................................... 25<br />
Listing values by applying monitoring sets ....................................................25<br />
Listing individual values of critical devices ....................................................25<br />
Advanced function regarding the administration of critical devices ................... 26<br />
Messages regarding the critical status of the devices.......................................26<br />
Viewing the list of critical devices..................................................................26<br />
Marking the messages from a critical device as read.......................................27<br />
Administering monitor groups .......................................................................... 28<br />
Adding a monitoring group ..........................................................................28<br />
Changing name and/or comment of a monitoring group ...............................29<br />
Defining members of a monitoring group ......................................................29<br />
Duplicating a monitoring group ....................................................................30<br />
Deleting a monitoring group.........................................................................30<br />
Administering monitoring sets .......................................................................... 31<br />
Adding a monitoring set ...............................................................................31<br />
Changing name and/or comment of a monitoring set ....................................32<br />
Defining members of a monitoring set...........................................................32<br />
Selecting a monitoring set in the folder configuration.....................................33<br />
Duplicating a monitoring set.........................................................................33<br />
Deleting a monitoring set..............................................................................34<br />
Device monitoring via SNMP ......................................................................... 35<br />
Practical use of the SNMP protocol .................................................................. 35<br />
<strong>Config</strong>uring the SNMP agent ........................................................................... 35<br />
<strong>Config</strong>uring SNMP traps .................................................................................. 37<br />
Logbook .......................................................................................................... 40<br />
The dialog boxes of the logbook ....................................................................... 40<br />
The »Logbook configuration« dialog .............................................................40<br />
Viewing a logbook entry in details.................................................................41<br />
Basic logbook functions .................................................................................... 41<br />
Creating a new logbook entry .......................................................................41<br />
Changing a logbook entry.............................................................................42<br />
Deleting a logbook entry...............................................................................43<br />
Advanced functions ......................................................................................... 43<br />
Printing logbook entries................................................................................43<br />
Exporting logbook entries .............................................................................44<br />
Copying the logbook entries..........................................................................45<br />
Shared editing ................................................................................................. 46<br />
Users and Groups ............................................................................................ 47<br />
Efficient rights administration ........................................................................... 47<br />
The effective right.........................................................................................47<br />
Efficient user group administration ...............................................................48<br />
iii · G&D DL-MUX
Contents<br />
Administering user accounts ............................................................................ 48<br />
Creating a new user account......................................................................... 49<br />
Renaming the user account .......................................................................... 50<br />
Changing the user account password ............................................................ 50<br />
Changing the user account rights .................................................................. 51<br />
Changing a user account’s group membership............................................... 51<br />
(De)activating a user account ....................................................................... 52<br />
Deleting a user account ................................................................................ 52<br />
Administering user groups ............................................................................... 52<br />
Creating a new user group............................................................................ 53<br />
Renaming a user group ................................................................................ 53<br />
Changing the user group rights ..................................................................... 54<br />
Administering user group members .............................................................. 54<br />
(De)activating a user group .......................................................................... 55<br />
Deleting a user group ................................................................................... 55<br />
System rights ................................................................................................... 55<br />
Rights for full access (Superuser) .............................................................................. 55<br />
Right to log in to the web application............................................................ 56<br />
Rights to change own password.................................................................... 56<br />
The »KVM combinations« folder .................................................................... 57<br />
Folder administration ...................................................................................... 57<br />
Creating a new folder................................................................................... 57<br />
Assigning a device to a folder ....................................................................... 58<br />
Deleting a device from a folder..................................................................... 58<br />
Renaming a folder ....................................................................................... 59<br />
Deleting a folder .......................................................................................... 59<br />
Advanced functions of the KVM system ......................................................... 60<br />
Temporarily (de)activating SNMP traps (Maintenance mode) ........................... 60<br />
(De)activating the maintenance mode........................................................... 60<br />
Viewing a list of devices in maintenance mode.............................................. 60<br />
Identifying a device by activating the Identification LED ...................................... 61<br />
Saving and restoring the data of the KVM system ............................................. 61<br />
Activating the purchased additional functions ................................................... 62<br />
Overview of the monitoring values ................................................................. 63<br />
»DL-MUX« KVM switch ................................................................................. 63<br />
G&D DL-MUX · iv
Contents<br />
Chapter 2: KVM Switches<br />
Basic configuration of KVM switches ............................................................. 65<br />
Renaming a KVM switch ................................................................................. 65<br />
Changing the comment of a KVM switch .......................................................... 65<br />
Deleting a KVM switch from the G&D system ................................................. 66<br />
<strong>Config</strong>uration settings of KVM switches ........................................................ 66<br />
Changing the hotkey ........................................................................................ 66<br />
Changing the select key sets .............................................................................. 67<br />
Changing the setup key .................................................................................... 68<br />
Activating the hotkey delay .............................................................................. 68<br />
(De)activating the switching ............................................................................. 69<br />
Selecting the values to be monitored ................................................................. 69<br />
Settings for special hardware ............................................................................ 70<br />
Support for Multimedia and Sun special keys ................................................70<br />
Support for special keyboards .......................................................................72<br />
Changing the scancode set of a PS/2 keyboard..............................................72<br />
Advanced functions for KVM switches ........................................................... 73<br />
Switching the channel ...................................................................................... 73<br />
(De)activating channels .................................................................................... 73<br />
Administering and using EDID profiles ............................................................ 74<br />
Importing the EDID profile of a monitor.......................................................74<br />
Defining the EDID profile for a channel........................................................75<br />
Overview of the stored EDID profiles ...........................................................76<br />
Viewing the status information of a KVM switch .............................................. 76<br />
Viewing information on the connection ............................................................ 77<br />
v · G&D DL-MUX
1 Basic functions<br />
The <strong>Config</strong> <strong>Panel</strong> web application offers a graphical user interface to configure the<br />
matrix switches of the KVM system.<br />
This application can operated from any web browser and provides an alternative to<br />
configuring the devices connected to the system through the on-screen display or the<br />
setup mode (if available) of the different devices.<br />
ADVICE: The web application can be used in the whole network independently<br />
from the locations of the devices and consoles connected to the KVM system.<br />
Thanks to its enhanced possibilities, the graphical user interface provides the following<br />
comfortable features:<br />
well-arranged user interface<br />
comfortable operation through the drag & drop function<br />
monitoring of various system features<br />
advanced network functions (netfilter, syslog, …)<br />
backup and restore function<br />
G&D DL-MUX · 1
System requirements<br />
System requirements<br />
The <strong>Config</strong> <strong>Panel</strong> web application is an application for the Java platform. It can be<br />
applied on a computer with installed Java Runtime Environment. Use one of the supported<br />
web browsers to run this application.<br />
IMPORTANT: Before operating the web application via web browser, connect the<br />
device on which the web application is operated to the local network (see installation<br />
guide).<br />
Now, adjust the network settings as described on page 3.<br />
Supported web browsers<br />
The following web browsers support the web application:<br />
Internet Explorer 6<br />
Internet Explorer 7<br />
Mozilla Firefox 3.6<br />
Java Runtime Environment<br />
The web application is carried out in Java Runtime Environment (JRE). The start of<br />
the web application requires the installation of version 6 (update 19).<br />
A free download of this version is available at the following homepage:<br />
http://java.sun.com/javase/downloads/<br />
NOTE: Mind the special advice when the Java Runtime Environment is applied with a<br />
64-bit browser for Windows:<br />
http://www.java.com/en/download/faq/java_win64bit.xml<br />
IMPORTANT: The OpenJDK open source implementation of the Java platform is not<br />
supported.<br />
2 · G&D DL-MUX
Initial configuration of the<br />
network settings<br />
Initial configuration of the network settings<br />
As a basic requirement to access the web application, the network settings of the<br />
device on which the web application is operated have to be configured.<br />
The following table lists the default settings of the Network A network interface:<br />
IP allocation: static<br />
IP address: 192.168.0.1<br />
Subnet mask: 255.255.255.0<br />
Connection type: Auto<br />
NOTE: In the default, the Network B interface is deactivated.<br />
How to configure the network settings before integrating the device into the local<br />
network:<br />
1. Connect the network interface of any computer to the device’s Network A interface.<br />
Use a category 5 (or better) twisted pair cable for this purpose.<br />
2. Ensure that the IP address of the computer’s network interface is part of the subnet<br />
to which the device’s IP address belongs to.<br />
NOTE: Use the IP address 192.168.0.100, for example.<br />
3. Switch on the device.<br />
4. Start the computer’s web browser and enter the URL 192.168.0.1 in the address bar.<br />
5. <strong>Config</strong>ure the network interface(s) and the global network settings as described in<br />
the paragraph Network settings on page 9 f.<br />
IMPORTANT: It is not possible to operate both network interfaces within one<br />
subnet!<br />
6. Remove the twisted pair cable connection between computer and device.<br />
7. Integrate the device into the local network.<br />
G&D DL-MUX · 3
Getting started<br />
Getting started<br />
This chapter describes basic steps to operate the web application.<br />
NOTE: The following chapters give a detailed overview of all functions and configuration<br />
settings.<br />
Starting the web application<br />
The web application can be applied on a computer with installed Java Runtime Environment.<br />
Use one of the supported web browsers to run this application.<br />
NOTE: Information regarding the system requirements of the web application can<br />
be fo<strong>und</strong> on page 2.<br />
How to start the web application:<br />
1. Enter the following address to call the web application:<br />
https://[ip address of the device]<br />
NOTE: If the web application is started via a “simple” http connection, a message<br />
informs the user that the connection can only be established via a secure https<br />
connection.<br />
After 10 seconds, the user is automatically forwarded to a secure https connection.<br />
Security advices of the web browser<br />
The device on which the web application is used stores an SSL certificate that enables<br />
the user or the web browser to authenticate the opposite site.<br />
The provided certificate contains the following features:<br />
MD5 fingerprint:<br />
47:F0:FF:87:96:84:D7:C8:63:43:6D:77:26:64:59:CD<br />
SHA1 fingerprint:<br />
68:92:9F:83:04:CD:7A:12:ED:2B:FE:34:0F:DF:BA:4B:0C:EF:47:30<br />
Related topics:<br />
Updating the stored SSL certificate on page 10<br />
4 · G&D DL-MUX
User login against the web application<br />
After the certificates have been authenticated, the login mask appears.<br />
How to log in to the web application:<br />
1. Enter the following data to the login mask:<br />
Username: Enter your username.<br />
Password: Enter your user account password.<br />
2. Click the Login button.<br />
Getting started<br />
Select language: Select the language to be displayed on the user interface:<br />
(Default): apply default setting<br />
German<br />
English<br />
IMPORTANT: Change the preset password of the administrator account.<br />
Use the administrator account to log in to the web application and change the<br />
password (see page 50).<br />
These are the preset access data for the administrator account:<br />
Username: Admin<br />
Password: 4658<br />
G&D DL-MUX · 5
Getting started<br />
Operating the web application<br />
User interface<br />
The user interface of the web application consists of four main sections:<br />
Figure 1: User interface<br />
The different sectors of the user interface perform various tasks. The following table<br />
lists the intended use of each sector:<br />
Toolbar : The toolbar allows the user to end a session and access the basic<br />
configuration of the web application. Furthermore, the user is<br />
enabled to view version information as well as licence texts.<br />
Tree view : The tree view shows the setting options.<br />
Filter function : The filter function can be used to limit the elements that are<br />
displayed in the main view.<br />
Enter a part of the name of the searched element to the text<br />
field. Now, only names that contain this text are displayed in<br />
the main view.<br />
Click Delete to cancel the filtering.<br />
Main view : After an element has been selected in the tree view , the<br />
main view displays the superior elements.<br />
6 · G&D DL-MUX
Frequently used buttons<br />
Getting started<br />
The user interface uses different buttons to carry out operations. The following table<br />
provides information on the names and functions of the buttons that are used in<br />
many interfaces.<br />
Reload: Reload window values from the system’s database. Changes that<br />
have been carried out by the user are overwritten.<br />
OK: Save entered data.<br />
Afterwards, the opened window is closed.<br />
Apply: Save entered data.<br />
The opened window is still displayed.<br />
Cancel: Cancel entered data and close window.<br />
Print: Call print interface in order to select printer, page orientation and<br />
further settings.<br />
After the settings have been selected, the interface information<br />
(e.g. the cascade information) can be printed.<br />
Close: Close opened window.<br />
User logout<br />
Use the Logout button to end the current session of the web application.<br />
IMPORTANT: Always use the Logout function to end your current session in order<br />
to protect the web application against unauthorised access.<br />
How to end the current session of the web application:<br />
1. Click the Logout button (see figure on the right) to end the current session<br />
of the web application.<br />
After you have been successfully logged out, the login mask is displayed again.<br />
G&D DL-MUX · 7
Getting started<br />
Selecting the default language of the web application<br />
How to change the default language of the web application:<br />
1. Click the System entry in the tree view.<br />
2. Right-click the System entry and afterwards click the <strong>Config</strong>uration entry in the context<br />
menu.<br />
3. Click the System tab.<br />
4. Use the Language field to select the default language to be displayed to all users of<br />
the web application that select the (Default) language:<br />
German<br />
English<br />
5. Click the OK button to save your settings.<br />
8 · G&D DL-MUX
Basic configuration of the<br />
web application<br />
Basic configuration of the web application<br />
The tool symbol in the toolbar enables you to access the basic configuration of the<br />
web application.<br />
Here, you can change the network settings of the device on which the web application<br />
is operated as well as backup and restore these settings. Furthermore, a<br />
firmware update can be performed.<br />
Network settings<br />
The devices with integrated web application are provided with two network interfaces<br />
(Network A and Network B). These network interfaces enable you to integrate the<br />
device into two separate networks.<br />
IMPORTANT: Please mind the separate instructions regarding the Initial configuration<br />
of the network settings on page 3.<br />
<strong>Config</strong>uring the network settings<br />
<strong>Config</strong>ure the network settings to connect the device to a local network.<br />
How to configure the settings of a network interface:<br />
IMPORTANT: It is not possible to operate both network interfaces within one subnet!<br />
1. Click the tools symbol in the toolbar.<br />
2. Click the tabs <strong>Config</strong>uration > Interfaces.<br />
3. Use paragraphs Interface A or Interface B to enter the following data:<br />
Operational<br />
mode:<br />
4. Click OK to save the data.<br />
Use the pull-down menu to select the operational mode of<br />
Interface A or Interface B:<br />
Off: switches off network interface.<br />
Static: uses static settings.<br />
DHCP: obtains the settings from a DHCP server.<br />
IP address: Only if the Static operating mode has been selected: Enter the<br />
interface IP address.<br />
Netmask: Only if the Static operating mode has been selected: Enter the<br />
network netmask.<br />
Connection<br />
type:<br />
Select if the network interface and the remote station are to<br />
negotiate the connection type automatically (Auto) or if one<br />
of the available types is to be applied.<br />
G&D DL-MUX · 9
Basic configuration of the web application<br />
<strong>Config</strong>uring the global network settings<br />
The global network settings ensure even in complex networks that the web application<br />
is available from all sub networks.<br />
How to configure the global network settings:<br />
1. Click the tools symbol in the toolbar.<br />
2. Click the tabs <strong>Config</strong>uration > Interfaces.<br />
3. Collect the following data in the section Global network settings:<br />
Global preferences:<br />
4. Click OK to save your data.<br />
Updating the stored SSL certificate<br />
The web browser is connected to the web application via an SSL-secured connection.<br />
An SSL certificate, which enables the user or the web browser to authenticate<br />
the opposite site is stored in the device on which the web application is operated.<br />
If the device’s IP address differs from the IP address given in the certificate, the web<br />
browser sends a message. It is therefore recommended to import an individual certificate<br />
to ensure that the device IP address complies with the IP address given in the<br />
certificate.<br />
10 · G&D DL-MUX<br />
Use the pull-down menu to select the operational mode:<br />
Static: uses static settings.<br />
DHCP: obtains the settings from a DHCP server.<br />
In the DHCP operational mode, the following settings are obtained automatically.<br />
Inputs are therefore not possible.<br />
Hostname: Enter the device hostname.<br />
Domain: Enter the domain the device is to belong to.<br />
Gateway: Enter the gateway IP address.<br />
DNS Server 1: Enter the DNS server IP address.<br />
DNS Server 2: Optionally, enter the IP address of another DNS server.
Basic configuration of the web application<br />
A certificate given by the certification authority can be imported as well as one that<br />
has been created by the user (for example with the open source toolkit OpenSSL).<br />
NOTE: The required .pem file contains the following three components:<br />
server certificate<br />
private server key<br />
certificate of the certification authority<br />
If these three components are available separately, enter one after the other to the<br />
Clear text field before updating the certificate stored in the device.<br />
How to update the SSL certificate stored in the device:<br />
1. Click the tools symbol in the toolbar.<br />
2. Click the tabs <strong>Config</strong>uration > Certificate.<br />
3. Copy the certificate’s content or import the .pem file in the interface<br />
Clear text: Copy the clear text of the server certificate, the private server<br />
key as well as the certificate of the certification authority to<br />
this text field.<br />
ADVICE: If the certificates and the private key are provided in a .pem file,<br />
use the Import certificate from file... function described below.<br />
Import certificate<br />
from file...<br />
4. Click Update now.<br />
5. Click OK to leave the interface.<br />
If the certificates and the key are provided in a .pem file, click<br />
this interface. Afterwards, select the .pem file in the file window.<br />
The clear text of the feature key automatically appears in the<br />
Clear text field.<br />
G&D DL-MUX · 11
Basic configuration of the web application<br />
Adjusting a common database for all devices<br />
In the default setting (Master), each device administers its own database. In order to<br />
be able to use the web application to administer and configure all devices of the<br />
KVM system, it is recommended to use a shared database.<br />
After the optional DevCon-Center appliance has been integrated into the KVM system,<br />
the individual devices of the system can be adjusted so that they can use the<br />
database of a master device.<br />
IMPORTANT: By default, all devices are configured as Master database. This setting<br />
causes the device to save the configuration settings in its own database.<br />
By changing the database setting to Forwarder and entering the IP address of the<br />
appliamce, the database of a device can be shifted to the appliance.<br />
How to define a device’s database settings:<br />
1. Click the tool symbol in the toolbar.<br />
2. Click the tabs <strong>Config</strong>uration > Device.<br />
3. An dieser Stelle fehlt eine neue Ergänzung für die unterscheidung DevCon <strong>und</strong><br />
Rest der Geräte innerhalb des KVM-Systems.<br />
4. Use the GDCD <strong>Config</strong> paragraph to enter the following data:<br />
Type: Select in which device the database is administered:<br />
Master: The database of the KVM system is stored in this<br />
device.<br />
Slave: The database of the KVM system is stored in another<br />
device.<br />
Port: Enter the port (usually 27996) of this device.<br />
gdcd IP: If you selected the Slave option, enter the IP address of the device<br />
which administers the database.<br />
gdcd Port: If you selected the Slave option, enter the port (usually 27996)<br />
of the device which administers the database.<br />
5. Click OK to save your settings.<br />
IMPORTANT: Those steps need to be carried out in the web application of all<br />
devices that are to be accessing the common database.<br />
ADVICE: Clicking the Traceroute button displays the database location. This view<br />
shows which G&D devices are used to transmit data packets to the database.<br />
12 · G&D DL-MUX
Backup and restore function<br />
Basic configuration of the web application<br />
The network settings of the device on which the web application is operated can be<br />
stored using the backup function. The restore function enables the user to restore the<br />
saved data.<br />
NOTE: The chapter Saving and restoring the data of the KVM system on page 61 provides<br />
information regarding saving and restoring the system settings.<br />
How to backup the network settings:<br />
1. Click the tools symbol in the toolbar.<br />
2. Click the tabs Tools > Backup/Restore.<br />
3. Click the Backup button and, if desired, enter a Comment as well as a Password to<br />
secure the backup file.<br />
4. Click OK.<br />
5. Use the date window to define the location and the File name of the backup file.<br />
6. Click Save.<br />
7. Click OK to close the window.<br />
How to restore the network settings:<br />
1. Click the tools symbol in the toolbar.<br />
2. Click the tabs Tools > Backup/Restore.<br />
3. Enter the storage location and the name of the backup file into the Path field.<br />
ADVICE: Use the file button to select the storage location and the name of the<br />
backup file in the file interface.<br />
4. Click Check file to check the validity of the backup file.<br />
IMPORTANT: Use the information provided in the Date and Comment fields to<br />
check if you have selected the correct backup file.<br />
5. Click Restore.<br />
6. Click OK to leave the interface.<br />
G&D DL-MUX · 13
Basic configuration of the web application<br />
Firmware update<br />
The firmware of each device can be comfortably updated via the web application.<br />
IMPORTANT: This function only updates the firmware of the device on which the<br />
web application has been started!<br />
How to update the firmware:<br />
1. Open the web application of the device whose firmware you want to update.<br />
2. Click the tools symbol in the toolbar.<br />
3. Click the tabs Tools > Firmware update.<br />
4. Enter the storage location and the name of the backup file into the Path field.<br />
IMPORTANT: Use the information provided in the Device and Comment fields to<br />
check if you have selected the correct device file.<br />
ADVICE: Use the file dialog to select the location and the name of the update file.<br />
5. Click Update now.<br />
6. Click OK to leave the interface.<br />
Restoring the default settings<br />
This function enables the user to restore the default settings of the device on which<br />
the web application is operated.<br />
How to restore the default settings:<br />
IMPORTANT: All settings are reset.<br />
1. Click the tools symbol in the toolbar.<br />
2. Click the Tools > System defaults tab.<br />
IMPORTANT: Use the information provided in the Date and Comment fields to<br />
check if you have selected the correct backup file.<br />
3. Click System Defaults to reset the current configuration.<br />
4. Click OK to leave the interface.<br />
14 · G&D DL-MUX
Network functions of the devices<br />
Network functions of the devices<br />
The different devices within the KVM system (e.g. extenders and matrix switches)<br />
provide separate network functions.<br />
The following function can be configured for each of the devices within the KVM<br />
system:<br />
Authentication against directory services (LDAP, Active Directory, RADIUS,<br />
TACACS+)<br />
Time synchronisation via NTP server<br />
Forwarding of log messages to syslog servers<br />
Creating and administering netfilter rules<br />
In the default settings of the devices, all network computers have access to the<br />
<strong>Config</strong> <strong>Panel</strong> web application (open system access).<br />
NOTE: The open system access enables unrestricted connections via the following<br />
ports: 80/TCP (HTTP), 443/TCP (HTTPS) and 161/UDP (SNMP).<br />
When a netfilter rule is created, the open system access is deactivated and all incoming<br />
data packets are compared to the netfilter rules. The list of the netfilter rules is<br />
hereby processed according to the stored order. As soon as a rule does apply, it is<br />
carried out and the following rules are ignored.<br />
Creating a new netfilter rule<br />
How to create a new netfilter rule:<br />
1. Use the tree view to click on KVM switches > [All switches].<br />
2. Right-click the device to be configured. Now, click the <strong>Config</strong>uration entry in the<br />
context menu.<br />
3. Click the Network tab.<br />
4. Click the Netfilter tab and enter the data described on the following page.<br />
Interface: Use the pull-down menu to select on which network interfaces<br />
the data packets are to be trapped and manipulated:<br />
All<br />
Interface A<br />
Interface B<br />
G&D DL-MUX · 15
Network functions of the devices<br />
Option: Use the pull-down menu to select how the rule’s sender<br />
information are to be interpreted:<br />
Normal: The rule applies for data packets whose sender<br />
information does comply with the indicated IP address or<br />
MAC address.<br />
Inverted: The rule applies for data packets whose sender<br />
information does not comply with the indicated IP address<br />
or MAC address.<br />
IP address/<br />
Netmask:<br />
5. Click Add to save the data in a new filter rule.<br />
The new filter rule is now added to the end of the list of the existing filter rules.<br />
6. Click OK to close the window.<br />
Editing existing netfilter rules<br />
How to edit an existing netfilter rule:<br />
1. Use the tree view to click on KVM switches > [All switches].<br />
2. Right-click the device to be configured. Now, click the <strong>Config</strong>uration entry in the<br />
context menu.<br />
3. Click the Network >Netfilter tabs.<br />
4. Mark the rule to be changed in the list of the existing netfilter rules.<br />
16 · G&D DL-MUX<br />
Enter the data packet IP address or use the Netmask field to<br />
enter the address space of the IP addresses.<br />
Examples:<br />
192.168.150.187: for IP address 192.168.150.187<br />
192.168.150.0/24: IP addresses of section 192.168.150.x<br />
192.168.0.0/16: IP addresses of section 192.168.x.x<br />
192.0.0.0/8: IP addresses of section 192.x.x.x<br />
0.0.0.0/0: all IP addresses<br />
NOTE: The IP address and/or a MAC address can be specified within a rule.<br />
MAC address: Enter the MAC address to be considered in this filter rule.<br />
NOTE: The IP address and/or a MAC address can be specified within a rule.<br />
Filter rule: Drop: Data packets whose sender information comply with<br />
the IP address or MAC address are not processed.<br />
Accept: Data packets whose sender information comply<br />
with the IP address or MAC address are processed.
Network functions of the devices<br />
5. The current rule settings are displayed in the upper part of the window. Check<br />
and change the data described on the following page.<br />
Interface: Use the pull-down menu to select on which network interfaces<br />
the data packets are to be trapped and manipulated:<br />
All<br />
Interface A<br />
Interface B<br />
Option: Use the pull-down menu to select how the rule’s sender<br />
information are to be interpreted:<br />
Normal: The rule applies for data packets whose sender<br />
information does comply with the indicated IP address or<br />
MAC address.<br />
Inverted: The rule applies for data packets whose sender<br />
information does not comply with the indicated IP address<br />
or MAC address.<br />
IP address/<br />
Netmask:<br />
6. Click Change to save the changed data.<br />
7. Click OK to close the window.<br />
Enter the data packet IP address or – using the Netmask field –<br />
the address space of the IP addresses.<br />
Examples:<br />
192.168.150.187: for the IP address 192.168.150.187<br />
192.168.150.0/24: IP addresses of section 192.168.150.x<br />
192.168.0.0/16: IP addresses of section 192.168.x.x<br />
192.0.0.0/8: IP addresses of section 192.x.x.x<br />
0.0.0.0/0: all IP addresses<br />
Either the IP address and/or a MAC address can be indicated within a rule.<br />
MAC address: Enter the MAC address to be considered in this filter rule.<br />
Either the IP address and/or a MAC address can be indicated within a rule.<br />
Filter rule: Drop: Data packets whose sender information comply with<br />
the IP address or MAC address are not processed.<br />
Accept: Data packets whose sender information comply<br />
with the IP address or MAC address are processed.<br />
G&D DL-MUX · 17
Network functions of the devices<br />
Deleting existing netfilter rules<br />
How to delete existing netfilter rules:<br />
1. Use the tree view to click on KVM switches > [All switches].<br />
2. Right-click the device to be configured. Now, click the <strong>Config</strong>uration entry in the<br />
context menu.<br />
3. Click the Network >Netfilter tabs.<br />
4. Mark the rule to be deleted in the list of the existing netfilter rules.<br />
5. Click Remove.<br />
6. Confirm the appearing security request by pressing Yes or cancel the process by<br />
clicking No.<br />
7. Click OK to close the window.<br />
Changing the order/priority of existing netfilter rules<br />
The list of netfilter rules is processed in their stored order. As soon as a rule applies,<br />
the respective action is carried out and all following rules are ignored.<br />
IMPORTANT: Please mind the order or priority of the single rules especially when<br />
adding new rules.<br />
1. Use the tree view to click on KVM switches > [All switches].<br />
2. Right-click the device to be configured. Now, click the <strong>Config</strong>uration entry in the<br />
context menu.<br />
3. Click the Network >Netfilter tabs.<br />
4. Mark the rule whose order/priority is to be changed in the list of the existing netfilter<br />
rules.<br />
5. Click the button (arrow up) to increase the priority or the button (arrow down)<br />
to decrease the priority.<br />
6. Click OK to close the window.<br />
18 · G&D DL-MUX
NTP server<br />
Network functions of the devices<br />
The device’s time and date settings can either adjust be adjusted manually or automatically<br />
by synchronizing the settings with an NTP server (Network Time Protocol).<br />
Time sync with an NTP server<br />
How to change the NTP time sync settings:<br />
1. Use the tree view to click on KVM switches > [All switches].<br />
2. Right-click the device to be configured. Now, click the <strong>Config</strong>uration entry in the<br />
context menu.<br />
3. Click the Network tab.<br />
4. Click the NTP server tab and enter the following data:<br />
NTP time sync: Select the respective entry from the pull-down menu to<br />
(de)activate the time sync:<br />
Disabled<br />
Enabled<br />
NTP server 1: Enter the IP address of a time server.<br />
NTP server 2: Optionally enter the IP address of a second time server.<br />
Time zone: Use the pull-down menu to select the time zone of your<br />
location.<br />
5. Click OK to close the window.<br />
Setting time and date manually<br />
How to manually set the time and date of the KVM matrix system:<br />
1. Use the tree view to click on KVM switches > [All switches].<br />
2. Right-click the device to be configured. Now, click the <strong>Config</strong>uration entry in the<br />
context menu.<br />
3. Click the Network > NTP server tabs.<br />
4. If necessary, disable the NTP time sync option. Otherwise, you might not be able to<br />
set time and date manually.<br />
5. Use the Time field to enter the current time (hh:mm:ss).<br />
6. Use the Date field to enter the current time (DD.MM.YYYY).<br />
ADVICE: Click on Accept local date to accept the current system date of the computer<br />
on which the <strong>Config</strong> <strong>Panel</strong> web application has been started.<br />
7. Click OK.<br />
G&D DL-MUX · 19
Network functions of the devices<br />
Logging syslog messages<br />
The syslog protocol is used to transmit log messages in networks. The log messages<br />
are transmitted to a syslog server that logs the log messages of many devices in the<br />
computer network.<br />
Among other things, eight different severity codes have been defined to classify the<br />
log messages:<br />
0: Emergency<br />
1: Alert<br />
2: Critical<br />
The web application enables you to configure whether the syslog messages are to be<br />
locally logged or sent to up to two syslog servers.<br />
Locally logging the syslog messages<br />
How to locally log the syslog messages:<br />
1. Use the tree view to click on KVM switches > [All switches].<br />
2. Right-click the device to be configured. Now, click the <strong>Config</strong>uration entry in the<br />
context menu.<br />
3. Click the Network tab.<br />
4. Click the Syslog tab and enter the following data in the Syslog local section:<br />
5. Click OK to close the window.<br />
20 · G&D DL-MUX<br />
3: Error<br />
4: Warning<br />
5: Note<br />
6: Info<br />
7: Debug<br />
Syslog server: Select the respective entry from the pull-down menu to define<br />
whether syslog messages are to be sent to a server:<br />
Disabled<br />
Enabled<br />
Log Level: Use the pull-down menu to select from which severity code<br />
on a log message is to be logged.<br />
The selected severity code as well as all lower severity codes<br />
are logged.<br />
If you selected the severity code 2 - Critical, messages for this code as well<br />
as for the severity codes 1 - Alert and 0 - Emergency are being logged.
Sending syslog messages to a server<br />
Network functions of the devices<br />
How to send syslog messages to a server:<br />
1. Use the tree view to click on KVM switches > [All switches].<br />
2. Right-click the device to be configured. Now, click the <strong>Config</strong>uration entry in the<br />
context menu.<br />
3. Click the Network tab.<br />
4. Click the Syslog tab and enter the following data in the Syslog server 1 or<br />
Syslog server 2 section:<br />
Syslog server: Select the respective entry from the pull-down menu to<br />
define whether syslog messages are to be sent to a server<br />
or not:<br />
Disabled<br />
Enabled<br />
Log Level: Use the pull-down menu to select from which severity<br />
code on a log message is to be logged.<br />
The selected severity code as well as all lower severity<br />
codes are logged.<br />
If you selected the severity code 2 - Critical, messages for this code as well<br />
as for the severity codes 1 - Alert and 0 - Emergency are being logged.<br />
IP address/<br />
DNS name:<br />
5. Click OK to close the window.<br />
Enter the IP address or the server name to which the syslog<br />
messages are to be sent.<br />
Port: Enter the port – usually 514 – on which the server receives<br />
the incoming messages.<br />
Protocol: Select the protocol – usually UDP – on which the server<br />
receives the incoming messages:<br />
TCP<br />
UDP<br />
G&D DL-MUX · 21
Network functions of the devices<br />
Viewing and saving local syslog messages<br />
If the function to log the local syslog messages is activated, these syslog messages<br />
can be viewed and, if necessary, stored in the information window.<br />
How to view and store the local syslog messages:<br />
1. Click the tools symbol in the symbol bar.<br />
2. Click the tabs Information > SysLog.<br />
3. Click the Fetch syslogs tab.<br />
The matrix switch now calls the local syslog messages. Afterwards, they are displayed<br />
in the text field.<br />
ADVICE: If necessary, click Save to save these messages in a text file. The opening<br />
file window enables you to select the location and a file name.<br />
Afterwards, click Save.<br />
4. Click OK to close the window.<br />
22 · G&D DL-MUX
Network functions of the devices<br />
User authentication against directory services<br />
In in-house networks, the user accounts of different users are often centrally administered<br />
by directory services. The device can access these directory services and<br />
authorise users against the directory service.<br />
How to configure the user account authentication:<br />
NOTE: If no directory service is being applied, the user accounts are administered by<br />
the device.<br />
1. Use the tree view to click on KVM switches > [All switches].<br />
2. Right-click the device to be configured. Now, click the <strong>Config</strong>uration entry in the<br />
context menu.<br />
3. Click the Network > Authentication tabs and enter the following data:<br />
Auth. Server: Select the Local option if the user administration is to be carried<br />
out by the KVM system.<br />
If a particular directory service is to be applied, select the<br />
respective entry from the pull-down menu:<br />
LDAP<br />
Active Directory<br />
Radius<br />
TACACS+<br />
ADVICE: After the directory service has been selected, collect the settings of<br />
the directory service server in the Server settings.<br />
Fallback: Activate this option if the local user administration of the<br />
KVM system is to be applied in case the directory service is<br />
temporarily not available.<br />
4. Click OK to close the window.<br />
G&D DL-MUX · 23
Monitoring functions<br />
Monitoring functions<br />
The current monitoring values of all devices within the KVM system can be viewed in<br />
the device-specific branches (KVM matrix systems, for example) as well as in the KVM<br />
Combinations and Critical Devices branches of the tree view.<br />
The various device information of a device can either be displayed in individual values<br />
or in monitoring groups, which are sorted according to topic. The following figure,<br />
for example, shows the individual Status value as well as three different<br />
monitoring groups:<br />
Figure 2: Detailed view of an exemplary monitoring table<br />
Individual values (the Status value in the figure above) immediately show if the status is<br />
correct (green) or deviating from the normal operating value (red). The text in the column<br />
additionally informs about the current status.<br />
Monitoring groups group various individual values. The column of a monitoring group<br />
displays if all values are correct (OK) or if at least one value is deviating from the normal<br />
operating values (Error).<br />
Clicking the arrow in the column opens a separate window, which displays the various<br />
individual values of the group.<br />
24 · G&D DL-MUX
Viewing monitoring values<br />
Monitoring functions<br />
NOTE: An overview of the possible monitoring values of all different device types<br />
can be fo<strong>und</strong> on page 63 ff.<br />
By applying different monitoring sets, the monitoring values are displayed in the different<br />
branches of the tree view.<br />
Several branches (Critical devices, for example) provide another view to enable the<br />
user to detect critical monitoring values as fast as possible.<br />
Listing values by applying monitoring sets<br />
A monitoring set defines which individual values and groups are to be displayed.<br />
The column, which shows the individual values enables you to read the status and check<br />
whether it is deviating from the normal operating values.<br />
Monitoring groups, however, group various individual values. The column of a monitoring<br />
group displays if all values are correct (OK) or if at least one value is deviating<br />
from the normal operating values (Error).<br />
Clicking the arrow in the column opens a window, which contains detailed information<br />
regarding the individual values of the group.<br />
ADVICE: The following pages of this chapter provide detailed information regarding<br />
monitoring groups and monitoring sets.<br />
Listing individual values of critical devices<br />
If a device shows one deviant value, the device is additionally listed in the Critical<br />
devices branch. This branch displays all deviating (red) values in tabular form to be<br />
able to detect deviating values as fast as possible.<br />
NOTE: To be able to find deviant values as fast as possible, monitoring sets are not<br />
applied here.<br />
G&D DL-MUX · 25
Monitoring functions<br />
Advanced function regarding the administration of<br />
critical devices<br />
As mentioned before, the Critical Devices branch lists the devices, which show at least<br />
one value that exceeds the normal operating values.<br />
NOTE: A sub-branch is displayed for each device class in the KVM system (e. g.<br />
KVM switch).<br />
Messages regarding the critical status of the devices<br />
If one value exceeds the normal operating values, the branch is marked red. A blinking<br />
message <strong>und</strong>er the main view points to this condition.<br />
ADVICE: If the blinking message appears on your screen, press the key combination<br />
Ctrl+Space to open the Critical devices branch immediately.<br />
Click on the blinking message to show the list of the deviating values in a separate<br />
window.<br />
Viewing the list of critical devices<br />
How to view the list of critical devices:<br />
1. Use the tree view to click the folders System monitoring > Critical Devices.<br />
The main view lists all affected devices. The critical values are displayed in the table.<br />
ADVICE: Click a sub-branch of the folder in order to only list the devices of a<br />
particular device class.<br />
26 · G&D DL-MUX
Marking the messages from a critical device as read<br />
Monitoring functions<br />
Many messages require immediate actions by the administrator. Other messages<br />
(the break-down of the red<strong>und</strong>ant power supply, for example), however, point to<br />
possibly uncritical conditions.<br />
In such a case, all peculiar values of a device can be marked as read, which causes<br />
the following:<br />
A device whose deviating values have been marked as read shows no blinking status<br />
bar.<br />
The cells, info dialogs and monitoring windows of all devices, which have been<br />
“read”, are highlighted in yellow.<br />
If a monitoring group contains critical values, which have been marked as read,<br />
the column displays Error. In addition, the column is highlighted in yellow.<br />
NOTE: The system only highlights values that have been deviating from the normal<br />
operating values at the time the function has been executed. The web application<br />
shows if, during operation, another monitoring value of such a device deviates from<br />
the normal operating values.<br />
How to mark the Monitoring messages of a device as read:<br />
1. Use the tree view to click the folders System monitoring > Critical Devices.<br />
2. Right-click the desired device. Now, click the Acknowledge entry of the context menu.<br />
G&D DL-MUX · 27
Monitoring functions<br />
Administering monitor groups<br />
IMPORTANT: All newly-created monitoring groups are only available in the<br />
branch in which they have been created.<br />
If a monitoring group has been created in a device-specific branch, it is no longer<br />
available in the KVM combinations branch!<br />
The <strong>Config</strong> <strong>Panel</strong> web application already provides several preconfigured monitoring<br />
groups. Those groups can neither be edited nor deleted, but they can be duplicated<br />
and individually adjusted to your wishes.<br />
All groups that were preconfigured or created are shown in the monitoring table as<br />
long as they are contained in the applied monitoring set (see page 33 ff.):<br />
Figure 3: Status of different devices in the »Group #2« monitoring group<br />
ADVICE: Due to the high amount of individual values it is recommended to display<br />
the most important values as individual values and group the rest in groups according<br />
to topic.<br />
This provides a quick overview and the values are displayed in a space-saving way.<br />
Adding a monitoring group<br />
How to add a new monitoring group:<br />
1. Right-click the topmost level of a device-specific branch (KVM extenders, for<br />
example) or the KVM combinations branch in the tree view.<br />
2. Click the Monitoring groups entry in the context menu.<br />
3. Click New.<br />
4. Enter the name and an optional comment for the new group.<br />
5. Click OK to create the group.<br />
28 · G&D DL-MUX
Changing name and/or comment of a monitoring group<br />
How to change the name and/or the comment of a monitoring group:<br />
Monitoring functions<br />
1. Right-click the topmost level of a device-specific branch (KVM extenders, for<br />
example) or the KVM combinations branch in the tree view.<br />
2. Click the Monitoring groups entry in the context menu.<br />
3. Select the group to be edited and click Edit.<br />
4. Change the name and/or the optional comment of the group.<br />
5. Click OK to save your settings.<br />
Defining members of a monitoring group<br />
How to define the members of a monitoring group:<br />
1. Right-click the topmost level of a device-specific branch (KVM extenders, for<br />
example) or the KVM combinations branch in the tree view.<br />
2. Click the Monitoring groups entry in the context menu.<br />
3. Select the group to be edited and click Edit.<br />
4. Click the Member tab.<br />
Here, you have the possibility to add members to or delete them from a monitoring<br />
group.<br />
The window consists of two tables, which list the monitoring values of the KVM<br />
system:<br />
Unassigned: lists monitoring values that are not assigned to this group<br />
Assigned: lists monitoring values that are assigned to this group<br />
5. Mark the monitoring value you want to add to or delete from the group.<br />
6. Click (right arrow) to add the monitoring value to the group or (left arrow) to<br />
delete it from the member list.<br />
7. Click OK to save your settings.<br />
G&D DL-MUX · 29
Monitoring functions<br />
Duplicating a monitoring group<br />
The KVM combinations branch as well as many other device-specific branches contain<br />
several preconfigured groups. These groups are displayed in light grey.<br />
IMPORTANT: It is not possible to edit or delete those groups.<br />
If you want to create a new group based on an already existing group, simply duplicate<br />
the existing group and edit the duplicate.<br />
How to duplicate a monitoring group:<br />
1. Right-click the topmost level of a device-specific branch (KVM extenders, for<br />
example) or the KVM combinations branch in the tree view.<br />
2. Click the Monitoring groups entry in the context menu.<br />
3. Select the group to be duplicated and click Edit.<br />
4. Enter the name and an optional comment for the group.<br />
5. Click Duplicate to duplicate the existing group.<br />
6. Edit the new group as described on the previous page or click Close to close the<br />
window.<br />
Deleting a monitoring group<br />
The KVM combinations branch as well as many other device-specific branches contain<br />
several preconfigured groups. These groups are displayed in light grey.<br />
IMPORTANT: It is not possible to edit or delete those groups.<br />
How to delete a monitoring group:<br />
1. Right-click the topmost level of a device-specific branch (KVM extenders, for<br />
example) or the KVM combinations branch in the tree view.<br />
2. Click the Monitoring groups entry in the context menu.<br />
3. Select the group to be deleted and click Delete.<br />
4. Confirm the appearing security request be clicking Yes or cancel the task by<br />
clicking No.<br />
5. Click Close to save your settings.<br />
30 · G&D DL-MUX
Administering monitoring sets<br />
Monitoring functions<br />
A monitoring set defines the individual values and the groups to be displayed in a<br />
subfolder of the KVM combinations branch or a device-specific branch:<br />
Figure 4: Status of the individual Status value and three groups of a monitoring set<br />
The <strong>Config</strong> <strong>Panel</strong> web application already provides several preconfigured monitoring<br />
groups. Those groups can neither be edited nor deleted, but they can be duplicated<br />
and individually adjusted to your wishes.<br />
It is also possible to create and configure a new group.<br />
IMPORTANT: The created monitoring sets are only displayed in the branch in<br />
which they have been created.<br />
If a monitoring set has been created in a device-specific branch, it is no longer displayed<br />
in the KVM combinations branch!<br />
Adding a monitoring set<br />
How to add a monitoring set:<br />
1. Right-click the topmost level of a device-specific branch (KVM extenders, for<br />
example) or the KVM combinations branch in the tree view.<br />
2. Click the Monitoring set entry in the context menu.<br />
3. Click New.<br />
4. Enter the name and an optional comment for the new set.<br />
5. Click OK to create the set.<br />
G&D DL-MUX · 31
Monitoring functions<br />
Changing name and/or comment of a monitoring set<br />
How to change the name and/or the comment of a monitoring set:<br />
1. Right-click the topmost level of a device-specific branch (KVM extenders, for<br />
example) or the KVM combinations branch in the tree view.<br />
2. Click the Monitoring sets entry in the context menu.<br />
3. Select the set to be edited and click Edit.<br />
4. Enter the name and an optional comment for the set.<br />
5. Click OK to save your settings.<br />
Defining members of a monitoring set<br />
IMPORTANT: It is important to define your desired monitoring groups (see<br />
page 28 ff.) before creating a monitoring set!<br />
How to define the members of a monitoring set:<br />
1. Right-click the topmost level of a device-specific branch (KVM extenders, for<br />
example) or the KVM combinations branch in the tree view.<br />
2. Click the Monitoring sets entry in the context menu.<br />
3. Select the set to be edited and click Edit.<br />
4. Click the Member tab.<br />
Here, you have the possibility to add members to or delete them from a monitoring<br />
set.<br />
The box consists of two tables which list the monitoring values of the KVM system.<br />
The values are the divided into the sub categories<br />
Individual values and Groups (Columns).<br />
NOTE: Click on the [-] in the category header to hide the content of this category.<br />
Clicking on [+] shows the contents.<br />
The different values are either listed in the left or the right table:<br />
Unassigned: lists monitoring values that are not assigned to this set<br />
Assigned: lists monitoring values that are assigned to this set<br />
5. Mark the monitoring value you want to add to or delete from the group.<br />
6. Click (right arrow) to add the monitoring value to the set or (left arrow) to<br />
delete it from the member list.<br />
7. Click OK to save your settings.<br />
32 · G&D DL-MUX
Selecting a monitoring set in the folder configuration<br />
Monitoring functions<br />
After a monitoring set has been created, it can be activated in the configuration of<br />
one (or more) folders of the tree view.<br />
How to activate a monitoring set:<br />
1. Right-click a subfolder of a device-specific branch (KVM extenders, for example)<br />
or the KVM combinations branch in the tree view.<br />
2. Click the <strong>Config</strong>uration entry in the context menu.<br />
3. Use the Monitoring set field to select the desired set.<br />
IMPORTANT: The created monitoring sets are only displayed in the branch in<br />
which they have been created.<br />
If a monitoring set has been created in the KVM extenders branch, it is no longer<br />
displayed in the KVM combinations branch!<br />
4. Click OK to activate the selected set.<br />
Duplicating a monitoring set<br />
The KVM combinations branch as well as many other device-specific branches contain<br />
several preconfigured groups. Those groups are displayed in light grey.<br />
IMPORTANT: It is not possible to edit or delete those groups.<br />
If you want to create a new set based on an already existing set, simply duplicate the<br />
existing set and edit the duplicate.<br />
How to duplicate a monitoring set:<br />
1. Right-click the topmost level of a device-specific branch (KVM extenders, for<br />
example) or the KVM combinations branch in the tree view.<br />
2. Click the Monitoring sets entry in the context menu.<br />
3. Select the set to be duplicated and click Edit.<br />
4. Enter the name and an optional comment for the set.<br />
5. Click Duplicate to duplicate the existing set.<br />
6. Edit the new set as described on the previous page or click Close to close the window.<br />
G&D DL-MUX · 33
Monitoring functions<br />
Deleting a monitoring set<br />
The KVM combinations branch as well as many other device-specific branches contain<br />
several preconfigured groups. These groups are displayed in light grey.<br />
IMPORTANT: It is not possible to edit or delete these groups.<br />
How to delete a monitoring set:<br />
1. Right-click the topmost level of a device-specific branch (KVM extenders, for<br />
example) or the KVM combinations branch in the tree view.<br />
2. Click the Monitoring sets entry in the context menu.<br />
3. Select the set to be deleted and click Delete.<br />
4. Confirm the appearing security request be clicking Yes or cancel the task by<br />
clicking No.<br />
5. Click Close to save your settings.<br />
34 · G&D DL-MUX
Device monitoring via SNMP<br />
Device monitoring via SNMP<br />
IMPORTANT: KVM switches of the DL-MUX series only support this function after<br />
the optional DevCon function has been purchased and activated (see page 62)!<br />
The Simple Network Management Protocol (SNMP) is used to monitor and control computers<br />
and network devices.<br />
Practical use of the SNMP protocol<br />
For this purpose, a Network Management System (NMS), which queries and collects<br />
data of the monitored devices from their agents, is carried out.<br />
NOTE: An Agent is a program, which runs on the monitored device and detects its status.<br />
Via SNMP, the detected data are transmitted to the Network Management System.<br />
If an Agent detects a severe failure on the device, it can send a Trap packet to the Network<br />
Management System. This way, the administrator is directly informed about such<br />
occurrences.<br />
<strong>Config</strong>uring the SNMP agent<br />
How to configure the SNMP agent:<br />
1. Use the tree view to click on KVM switches > [All switches].<br />
2. Right-click the device to be configured. Now, click the <strong>Config</strong>uration entry in the<br />
context menu.<br />
3. Click the tabs Network> SNMP Agent.<br />
4. Enter the following data in the Global paragraph:<br />
Status: Select the particular entry to either switch the SNMP agent<br />
off (Off) or on (Enabled).<br />
Protocol: Select the protocol (TCP or UDP) – normally UDP – via which<br />
the SNMP packets are to be transmitted.<br />
Port: Define the port – normally 161 – on which the incoming<br />
SNMP packets are to be accepted.<br />
SysContact: Enter the admin’s contact data (for example direct dial or<br />
email address).<br />
SysName: Enter the device name.<br />
SysLocation: Enter the location of the device.<br />
5. If you want to process the packets of the SNMPv2c protocol version, enter the fol-<br />
G&D DL-MUX · 35
Device monitoring via SNMP<br />
lowing data in the paragraph of the same name:<br />
Access: Activate the View access (View) or deny the access (No) via<br />
SNMPv2c protocol.<br />
Source: Enter the IP address or the address space of the addresses of<br />
incoming SNMP packets.<br />
Read-only<br />
community:<br />
6. If you want to process the packets of the SNMPv3 protocol version, enter the following<br />
data in the paragraph of the same name:<br />
7. Click OK to save your settings and to leave the window.<br />
36 · G&D DL-MUX<br />
Examples:<br />
192.168.150.187: Only IP address 192.168.150.187<br />
192.168.150.0/24: IP addresses of space 192.168.150.x<br />
192.168.0.0/16: IP addresses of space 192.168.x.x<br />
192.0.0.0/8: IP addresses of space 192.x.x.x<br />
Enter the name of the Community which has also been<br />
selected in the Network Management System.<br />
IMPORTANT: The transfer of the packet password (Community) of the SNMPv2c<br />
protocol version is not encrypted. It can therefore be easily tapped!<br />
If required, use the SNMPv3 protocol version (see below) and a high Securitiy<br />
level to ensure a secure data transfer.<br />
Access: Activate the View access (View) or deny the access (No) via<br />
SNMPv3 protocol.<br />
User: Enter the username for the communication with the Network<br />
Management System.<br />
Authentication<br />
protocol<br />
Authentication<br />
passphrase<br />
Select the authentication protocol (MD5 or SHA) which has<br />
been activated in the Network Management System.<br />
Enter the authentication passphrase for the communication<br />
with the Network Management System.<br />
Security level Select between one of the following options:<br />
NoAuthNoPriv: user authentication and Privacy protocol<br />
deactivated<br />
AuthNoPriv: user authentication activated, Privacy protocol<br />
deactivated<br />
AuthPriv: user authentication and Privacy protocol activated<br />
Privacy protocol: Select the Privacy protocol (DES or AES) which has been<br />
activated in the Network Management System.<br />
Privacy passphrase:<br />
Enter the privacy passphrase for secure communication with<br />
the Network Management System.
<strong>Config</strong>uring SNMP traps<br />
Device monitoring via SNMP<br />
How to add a new trap or edit an existing trap:<br />
1. Use the tree view to click on KVM switches > [All switches].<br />
2. Right-click the device to be configured. Now, click the <strong>Config</strong>uration entry in the<br />
context menu.<br />
3. Click the tabs Network > SNMP trap.<br />
4. Click Add or Edit.<br />
5. Enter the following data in the Global paragraph:<br />
Server: Enter the IP address of the Network Management Servers.<br />
Protocol: Select the protocol (TCP or UDP) – normally UDP – via which<br />
the SNMP packets are to be transmitted.<br />
Port: Define the port – normally 162 – on which the outgoing<br />
SNMP packets are to be accepted.<br />
Retries: Enter the number of retries to send an SNMP Inform.<br />
NOTE: Inputs are only possible if the Inform option has been selected in the<br />
Notification type field.<br />
Timeout: Enter the time (in seconds) after which an SNMP Inform is to<br />
be sent again if you have received no confirmation.<br />
NOTE: Inputs are only possible if the Inform option has been selected in the<br />
Notification type field.<br />
Log level: Select from which severity level on an SNMP trap is to be sent.<br />
The selected severity level as well as all lower severity levels<br />
are logged.<br />
NOTE: If you select the severity level 2 - Critical, SNMP traps are sent for<br />
occurences of this level as well as of the severity levels 1 - Alarm and<br />
0 - Emergency.<br />
Version: Select if the traps are to be created and sent according to the<br />
SNMPv2c (v2c) or SNMPv3 (v3) protocol version.<br />
Notification type: Select if the occurrences are sent as Trap or Inform packet.<br />
NOTE: Inform packets require a confirmation of the Network Management System.<br />
If this confirmation is not available, the transmission is repeated.<br />
G&D DL-MUX · 37
Device monitoring via SNMP<br />
6. If you decided to use the SNMPv2c protocol version, use the respective paragraph<br />
to enter the same Community name as selected in the Network Management System.<br />
IMPORTANT: The transfer of the packet password (Community) of the SNMPv2c<br />
protocol version is not encrypted. Therefore, it can be easily tapped!<br />
If required, use the SNMPv3 protocol version (see below) and a high Security level<br />
to ensure a secure data transfer.<br />
7. If you decided to use the SNMPv3 protocol version, use the respective paragraph to<br />
enter the following data:<br />
User: Enter the username for communication with the Network<br />
Management System an.<br />
Authentication protocol<br />
Authentication<br />
passphrase<br />
8. Click OK to save your settings and to leave the window.<br />
38 · G&D DL-MUX<br />
Select the authentication protocol (MD5 or SHA) which has<br />
been activated in the Network Management System.<br />
Enter the authentication passphrase for the communication<br />
with the Network Management System.<br />
Security level Select between one of the following options:<br />
NoAuthNoPriv: deactivated user authentication and Privacy<br />
protocol<br />
AuthNoPriv: activated user authentication, deactivated Privacy<br />
protocol<br />
AuthPriv: activated user authentication and Privacy protocol<br />
Privacy protocol: Select the privacy protocol (DES or AES) which has been<br />
activated in the Network Management System.<br />
Privacy passphrase:<br />
Enter the privacy passphrase for secure communication with<br />
the Network Management System.<br />
Engine ID: Enter an Engine ID which clearly identifies the SNMP agent<br />
within the network.
Device monitoring via SNMP<br />
How to delete an existing trap:<br />
1. Use the tree view to click on KVM switches > [All switches].<br />
2. Right-click the device to be configured. Now, click the <strong>Config</strong>uration entry in the<br />
context menu.<br />
3. Click the tabs Network > SNMP trap.<br />
4. Select the receiver to be deleted and click Delete.<br />
5. Click OK to save your settings and to leave the window.<br />
How to generate a test event:<br />
1. Use the tree view to click on KVM switches > [All switches].<br />
2. Right-click the device to be configured. Now, click the <strong>Config</strong>uration entry in the<br />
context menu.<br />
3. Click the tabs Network > SNMP trap.<br />
4. Click on Generate test event.<br />
5. Click OK to save your settings and to leave the window.<br />
NOTE: If properly configured, the Trap message is displayed within your Network<br />
Management System.<br />
G&D DL-MUX · 39
Logbook<br />
Logbook<br />
The Logbook of a device of the KVM system allows you to collect any information.<br />
ADVICE: Write down any planed changes on the configuration of the device and<br />
assign the entry with a status (»Open«).<br />
After these changes have been carried out, assign the »Closed« status to the logbook<br />
entry. This way you can later refer to the logbook to look up the time these<br />
changes have been made.<br />
If you want to save the logbooks or edit them with other programs, the logbooks of<br />
the different devices can be printed, copied to the clipboard or exported to a file.<br />
The dialog boxes of the logbook<br />
After the logbook has been called up, the »Logook configuration« dialog shows an<br />
overview of all logbook entries that have been saved so far.<br />
All details regarding the entry are shown by double-clicking it.<br />
The »Logbook configuration« dialog<br />
The logbook configuration dialog lists all logbook entries that have been so far collected<br />
for a device in tabular form.<br />
This table shows the Subject and Status (»Open« or »Closed«) as well as the Date each<br />
entry has been last edited.<br />
NOTE: By default, the table is sorted in descending order according to the contents<br />
of the »Status« column. This order is indicated by a small triangle in the column<br />
header.<br />
If you want to sort according to the contents of another column, click the header<br />
of the desired column. Another click reverses the sort sequence.<br />
The following actions can be carried out in the logbook:<br />
New: create a new logbook entry<br />
Edit: update an existing logbook entry<br />
Delete: delete a logbook entry<br />
Print: print a logbook entry<br />
Export: export the data of the logbook entry to csv file<br />
Copy: copy the details of the logbook entry to the clipboard<br />
40 · G&D DL-MUX
Viewing a logbook entry in details<br />
Logbook<br />
Double-click a logbook entry to show its details. The overview provides the following<br />
information:<br />
Subject: short description (max. 128 characters) that allows a quick<br />
overview in the table and on the print-out<br />
Body: detailed description (max. 1.024 characters)<br />
Status: current status (»Open« or »Closed«)<br />
Creator: user name of the person who created the logbook entry<br />
Created: date and time the entry has been originally created<br />
Last editor: user name of the person who last changed the entry<br />
Last edited: date and time the entry has been last changed<br />
The upper part of the dialog shows several special buttons that provide the following<br />
functions:<br />
(left arrow): shows the previous logbook entry (if available)<br />
Print: print logbook entry<br />
Export: export the data of the logbook entry to csv file<br />
Copy: copy the details of the logbook entry to the clipboard<br />
(right arrow): shows the last logbook entry (if available)<br />
NOTE: The functions of the Print, Export and Copy buttons correspond to the entries<br />
of the same name in the context menu of the logbook entries.<br />
These functions are described on the following pages.<br />
Basic logbook functions<br />
The basic logbook functions enable you to created new or edit and delete the existing<br />
logbook entries.<br />
IMPORTANT: The different device within a KVM system all have separate logbooks!<br />
Creating a new logbook entry<br />
How to create a new logbook entry for a device:<br />
1. Click on the folder that contains the device whose logbook you want to open.<br />
2. Right-click on the desired device and click on Logbook in the context menu.<br />
3. Click on New.<br />
G&D DL-MUX · 41
Logbook<br />
4. Enter the Status (max. 128 characters) of the logbook entry.<br />
ADVICE: The subject is shown in the overview of the logbook entries and<br />
allows an quick overview of the entries.<br />
5. If necessary, use the Body field to change the detailed description (max. 1.024<br />
characters) of the logbook entry.<br />
6. Click OK to save the logbook entry.<br />
Changing a logbook entry<br />
How to change the logbook entry of a device:<br />
1. Click on the folder that contains the device whose logbook entry you want to<br />
change.<br />
2. Right-click on the desired device and click on Logbook in the context menu.<br />
3. Click the entry to be edited and click on Edit.<br />
4. If necessary, change the Subject (max. 128 characters) of the logbook entry.<br />
ADVICE: The subject is shown in the overview of the logbook entries and<br />
allows an quick overview of the entries.<br />
5. If necessary, use the Body field to change the detailed description (max. 1.024<br />
characters) of the logbook entry.<br />
6. Use the Status button to select between the »Open« and »Closed« options.<br />
7. The following information are provided in this dialog:<br />
Creator: user name of the person who created the logbook entry<br />
Created: date and time the entry has been originally created<br />
Last editor: user name of the person who last changed the entry<br />
Last edited: date and time the entry has been last changed<br />
8. Click OK to save the logbook entry.<br />
42 · G&D DL-MUX
Deleting a logbook entry<br />
Logbook<br />
How to delete the logbook entry of a device:<br />
1. Click on the folder that contains the device whose logbook entry you want to<br />
delete.<br />
2. Right-click on the desired device and click on Logbook in the context menu.<br />
3. Click the entry to be deleted and click on Delete.<br />
4. Confirm the security request by clicking Yes or cancel the process by clicking No.<br />
Advanced functions<br />
The advanced functions allow you to print or export the logbook entries. The data of a<br />
logbook entry can also be copied to the clipboard.<br />
The advanced functions can either be called up via the buttons in the detail dialog of<br />
the logbook or the context menu of the »Logbook configuration« dialog.<br />
NOTE: The functions of several logbook entries can only be applied if the functions<br />
have been called up via the context menu.<br />
Printing logbook entries<br />
How to print one or several logbook entries:<br />
1. Click on the folder that contains the device whose logbook entry you want to<br />
change.<br />
2. Right-click on the desired device and click on Logbook in the context menu.<br />
3. Mark one or several already existing logbook entries.<br />
NOTE: To select several logbook entries, press the Ctrl key while selecting the<br />
different entries by mouse.<br />
4. Right-click one of the marked entries and click on Print.<br />
5. Select the Printer on which the document is to be printed.<br />
NOTE: If desired, you can also adjust the headline, the number of copies, the<br />
page layout and the frame settings.<br />
6. Click on Print.<br />
G&D DL-MUX · 43
Logbook<br />
Exporting logbook entries<br />
Use the export function to export the data of a logbook entry to a CSV file.<br />
This file format is usually used for exchanging data between different programs. A<br />
CSV file that has been created with the <strong>Config</strong> <strong>Panel</strong> web application can be read with<br />
all common spreadsheet programs, for example.<br />
NOTE: CSV is short for Comma-Separated Values.<br />
How to export one or several logbook entries:<br />
1. Click on the folder that contains the device whose logbook entry you want to<br />
change.<br />
2. Right-click on the desired device and click on Logbook in the context menu.<br />
3. Mark one or several already existing logbook entries.<br />
NOTE: To select several logbook entries, press the Ctrl key while selecting the<br />
different entries by mouse.<br />
4. Right-click one of the marked entries and click on Export.<br />
5. Use the File Name section to select the location and the file name of the file to be<br />
created.<br />
6. The configuration section offers the following settings:<br />
Column headings:<br />
7. Click on Export.<br />
44 · G&D DL-MUX<br />
Select if the column headings (Subject, Body, …) are to be output<br />
in the CSV file.<br />
Options: Yes, No<br />
Delimiter: Select the desired delimiter between the different data fields in<br />
the CSV file.<br />
Options: Tabulator, Semicolon, Comma, Space
Copying the logbook entries<br />
Logbook<br />
As an alternative to the export function which creates a CSV file, the copy function<br />
can be used to copy logbook entries to the clipboard of the operating system.<br />
The copied data can be pasted to any application that has access to the clipboard.<br />
How to copy one or several logbook entries:<br />
1. Click on the folder that contains the device whose logbook entry you want to<br />
change.<br />
2. Right-click on the desired device and click on Logbook in the context menu.<br />
3. Mark one or several already existing logbook entries.<br />
NOTE: To select several logbook entries, press the Ctrl key while selecting the<br />
different entries by mouse.<br />
4. Right-click one of the marked entries and click on Copy.<br />
5. Open a document in the application to which you want to copy the data and<br />
press Ctrl+V.<br />
G&D DL-MUX · 45
Shared editing<br />
Shared editing<br />
The web application enables two users with the respective rights to edit settings at<br />
the same time.<br />
If two users simultaneously change the user account settings, for example, the web<br />
application informs the other user about these changes:<br />
A message in purple appears in the upper row of the footer and points out the<br />
other user’s changes.<br />
The changed setting or the menu item in the submenu which contains this setting<br />
is displayed in green.<br />
The following options are provided to process the collected data:<br />
Discard data: 1. Click on Reload to read the current values of the<br />
dialogue from the database.<br />
Overwrite all data: 1. Click on Accept.<br />
2. Click on Overwrite all data.<br />
Only save own changes: 1. Click on Accept.<br />
46 · G&D DL-MUX<br />
2. Click on Only save own changes.
Users and Groups<br />
Efficient rights administration<br />
Users and Groups<br />
The web application administers a maximum of 256 user accounts as well as the<br />
same amount of user groups. Each user within the system can be a member of up to<br />
20 groups.<br />
It is possible to provide the user accounts as well as the user groups with different<br />
rights to operate the system.<br />
ADVICE: The rights administration can almost be carried out completely through<br />
user groups. Therefore, the user groups as well as the assigned rights have to be<br />
adequately planned and implemented.<br />
This way, the user rights can be quickly and efficiently changed.<br />
The effective right<br />
The effective right determines the right for a particular operation.<br />
IMPORTANT: The effective right is the maximum right, which consists of the user<br />
account’s individual right and the rights of the assigned group(s).<br />
EXAMPLE: The user JDoe is member of the groups Office and Target<strong>Config</strong>.<br />
The following table shows the user account rights, the rights of the assigned groups<br />
and the resulting effective right:<br />
Right User<br />
JDoe<br />
Group<br />
Office<br />
Group<br />
Target<strong>Config</strong><br />
Effective<br />
right<br />
Target config No No Yes Yes<br />
Change own<br />
password<br />
No Yes No Yes<br />
Target access Full View No Full<br />
The settings of the Target config and Change own password rights result from the rights<br />
assigned to the user groups. The Target access right which, in this case, enables full<br />
access, was given directly in the user account.<br />
The dialogue windows of the web application additionally display the effective right<br />
for every setting.<br />
ADVICE: Click the Details button to get a list of the groups that are assigned to the<br />
user account as well as of the assigned rights.<br />
G&D DL-MUX · 47
Users and Groups<br />
Efficient user group administration<br />
User groups enable the creation of a shared right profile for several users with identical<br />
competencies. Furthermore, the user accounts contained in the member list can<br />
be added to the group. The rights of these user accounts therefore no longer have to<br />
be configured individually. This way, the rights administration within the system is<br />
made easier.<br />
If the rights are administered through user groups, the user profile only stores general<br />
data as well as user-related settings (key combinations, language settings, …).<br />
When initiating the system, it is recommended to create different groups for users<br />
with different competencies (e. g. Office and IT) and to assign the respective user<br />
accounts to these groups.<br />
If the user competencies are to be further divided, more groups can be created.<br />
EXAMPLE: If some users of the Office group are to be provided with the multi-access<br />
right, this possibility can be implemented by creating user groups:<br />
Create a user group (e. g. Office_MultiAccess) with identical settings for the Office<br />
group. The multi-access right is set to full. Assign the respective user accounts to this<br />
group.<br />
Create a user group (e. g. MultiAccess) and only set the multi-access right to Yes. In<br />
addition to the Office group, also assign the respective user accounts to this group.<br />
In both cases, the user is provided with the full effective right for multi-access.<br />
ADVICE: The user profile offers the possibility to provide extended rights to a<br />
group member.<br />
Administering user accounts<br />
User accounts enable you to define individual rights for every user.<br />
IMPORTANT: The administrator as well as all users that hold the Superuser right are<br />
permitted to create and delete user accounts and edit rights and user-related settings.<br />
48 · G&D DL-MUX
Creating a new user account<br />
Users and Groups<br />
The web application administers up to 256 user accounts. Each user account is provided<br />
with individual login data, rights and user-related settings for the KVM system.<br />
How to create a new user account:<br />
1. Click on User area > User.<br />
2. Right-click the display range and afterwards the New entry in the context menu.<br />
3. Enter the following information within the interface:<br />
Name: Enter the desired username.<br />
Password: Enter the user account password.<br />
Repeat password: Repeat the password.<br />
Clear text: If necessary, mark this checkbox to view and control<br />
both entered passwords.<br />
Full name: If desired, enter the user’s full name.<br />
Comment: If desired, enter any comment regarding the user<br />
account.<br />
Enabled: Click this checkbox to activate the user account.<br />
If the user account is deactivated, the user is not able to access the KVM<br />
system.<br />
4. Click OK to save the entered data.<br />
IMPORTANT: No rights are assigned to the user account after it has been created.<br />
Add the user account to an existing user group or provide it with individual rights<br />
(see page 51).<br />
G&D DL-MUX · 49
Users and Groups<br />
Renaming the user account<br />
How to rename a user account:<br />
1. Click on User area > User.<br />
2. Right-click the user account to be edited and click the <strong>Config</strong>uration entry in the<br />
context menu.<br />
3. Enter the new username in the Name field.<br />
4. Optional: Enter the user’s full name in the Full name field<br />
5. Click OK to save your settings.<br />
Changing the user account password<br />
How to change the user account password:<br />
1. Click on User area > User.<br />
2. Right-click the user account to be edited and click the <strong>Config</strong>uration entry in the<br />
context menu.<br />
3. Click on Change password.<br />
4. Change the following data within the entry mask:<br />
New password: Enter the new password.<br />
Confirm password: Repeat the new password.<br />
Clear text: Mark this checkbox to view and control both entered<br />
passwords.<br />
5. Click OK to save the new password.<br />
6. Click OK to save your settings.<br />
50 · G&D DL-MUX
Changing the user account rights<br />
Users and Groups<br />
All user accounts can be assigned with different rights.<br />
The following table lists the different user rights. Further information on the rights<br />
can be fo<strong>und</strong> on the indicated pages.<br />
Name Right Page<br />
Change own password Change own password page 56<br />
Superuser right Unrestricted access to the configuration of the page 55<br />
system<br />
WebIf login Login to the <strong>Config</strong> <strong>Panel</strong> web application page 56<br />
Table 1: <strong>Config</strong>urable rights within the system<br />
Changing a user account’s group membership<br />
NOTE: Each user within the system can be a member of up to 20 user groups.<br />
How to change a user account’s group membership:<br />
1. Click the tree view entries User area > User groups.<br />
2. Right-click the user group to be edited and click the <strong>Config</strong>uration entry in the context<br />
menu.<br />
3. Click the Members tab.<br />
Members can now be easily added to or delete from the user groups.<br />
The window consists of two tables. These tables list the user accounts of the<br />
KVM matrix system:<br />
Unassigned: lists all user accounts that are not assigned to this group<br />
Assigned group<br />
members:<br />
lists all user accounts that are assigned to this group<br />
4. Mark the user account you want to add to or delete from the group.<br />
5. Click the button (right arrow) to add the user account to the group or the button<br />
(left arrow) to delete it from the list.<br />
G&D DL-MUX · 51
Users and Groups<br />
(De)activating a user account<br />
IMPORTANT: If the user account is deactivated, the user has no access to the KVM<br />
system.<br />
How to (de)activate a user account:<br />
1. Click the tree view entries User area > User groups.<br />
2. Right-click the user account you want to (de)activate and click the <strong>Config</strong>uration<br />
entry in the context menu.<br />
3. Activate the Enabled box to activate the user account.<br />
If you want to lock the access to the system for this user account, deactivate the box.<br />
4. Click the OK button to save your settings.<br />
Deleting a user account<br />
How to delete a user account:<br />
1. Click the tree view entries User area > User groups.<br />
2. Right-click the user account you want to delete and click the Delete entry in the<br />
context menu.<br />
3. Click OK to confirm the appearing security request.<br />
Administering user groups<br />
User groups enable the user to create a common rights profile for several users with<br />
the same competencies and to add user accounts as members of this group.<br />
This way, the rights of these user accounts do not have to be individually configured<br />
and the rights administration within the KVM system is simplified.<br />
NOTE: The administrator as well as all users who hold the Superuser right are<br />
authorised to create and delete user groups as well as to edit the rights and the<br />
member list.<br />
52 · G&D DL-MUX
Creating a new user group<br />
The user is enabled to create up to 256 user groups within the system.<br />
Users and Groups<br />
How to create a new user group:<br />
1. Click the tree view entries User area > User groups.<br />
2. Right-click the display range and click the New entry in the context menu.<br />
3. Enter the following data in the entry mask:<br />
Name: Enter the name of the user group.<br />
Enabled: Activate this box to activate the user group.<br />
NOTE: If the user group is deactivated, the group rights do not apply to the<br />
assigned members.<br />
Comment: If necessary, enter any comment regarding the user group.<br />
4. Click OK to save your settings.<br />
IMPORTANT: Directly after the new user group has been created, it is provided<br />
with no rights within the system<br />
Renaming a user group<br />
How to rename a user group:<br />
1. Click the tree view entries User area > User groups.<br />
2. Right-click the user account you want to rename and click the <strong>Config</strong>uration entry<br />
in the context menu.<br />
3. Use the Name field to enter the new name of the user group.<br />
4. Click OK to save your settings.<br />
G&D DL-MUX · 53
Users and Groups<br />
Changing the user group rights<br />
The various user groups can be assigned with different rights.<br />
The following table lists the different user rights. Further information about the<br />
rights can be fo<strong>und</strong> on the indicated pages.<br />
Name Right Page<br />
Change own password Change own password page 56<br />
Superuser right Unrestricted access to the configuration of the page 55<br />
system<br />
WebIf login Login to the <strong>Config</strong> <strong>Panel</strong> web application page 56<br />
Table 2: <strong>Config</strong>urable rights within the system<br />
Administering user group members<br />
How to administer user group members:<br />
1. Click the tree view entries User area > User groups.<br />
2. Right-click the user group to be edited and click the <strong>Config</strong>uration entry in the context<br />
menu.<br />
3. Click the Members tab.<br />
Members can now easily be added to or deleted from the user groups.<br />
The window consists of two tables. These tables list the user accounts of the<br />
KVM system:<br />
Unassigned: lists all user accounts that are not assigned to this group<br />
Assigned group<br />
members:<br />
lists all user accounts that are assigned to this group<br />
4. Mark the user account you want to add to or delete from the group.<br />
5. Mark the user account you want to add to or delete from the group. Now, click<br />
the button (right arrow) to add the user account to the group or the button<br />
(left arrow) to delete it from the list.<br />
54 · G&D DL-MUX
(De)activating a user group<br />
Users and Groups<br />
How to (de)activate a user group:<br />
1. Click the tree view entries User area > User groups.<br />
2. Right-click the user group you want to (de)activate and click the <strong>Config</strong>uration<br />
entry in the context menu.<br />
3. Activate the Enabled box to activate the user group.<br />
If you want to lock the access to the KVM system for members of this user group,<br />
deactivate the box.<br />
4. Click the OK button to save your settings.<br />
Deleting a user group<br />
How to delete a user group:<br />
1. Click the tree view entry User area > User groups.<br />
2. Right-click the user group you want to delete and click the Delete entry in the context<br />
menu.<br />
3. Confirm the appearing security request by clicking Yes or cancel the process by<br />
clicking No.<br />
System rights<br />
Rights for full access (Superuser)<br />
The Superuser right enables you to fully access and configure the KVM system.<br />
NOTE: The information about the user rights that have been assigned before are<br />
still stored when the Superuser right is activated. After the Superuser right has been<br />
withdrawn, the saved rights do apply again.<br />
How to change the Superuser right:<br />
1. If you want to change this right of a user account, click the User area > Users entries<br />
in the tree view.<br />
In case of a user group, click the entries User area > User groups.<br />
2. Right-click the user account or the user group you want to configure and click the<br />
<strong>Config</strong>uration entry in the context menu.<br />
3. Click the System rights tab.<br />
G&D DL-MUX · 55
Users and Groups<br />
4. Use the Superuser field to select between the following options:<br />
Yes: allows full access to the KVM system and the connected devices<br />
No: denies full access to the KVM system and the connected devices<br />
5. Click OK to save your settings.<br />
Right to log in to the web application<br />
How to change the right to log in to the web application:<br />
1. If you want to change this right of a user account, click the User area > Users entries<br />
in the tree view.<br />
In case of a user group, click the entries User area > User groups.<br />
2. Right-click the user account or the user group you want to configure and click the<br />
<strong>Config</strong>uration entry in the context menu.<br />
3. Click the System rights tab.<br />
4. Use the Web Interface Login field to select between the following options:<br />
Yes: enables access to web application<br />
No: denies access to web application<br />
5. Click OK to save your settings.<br />
Rights to change own password<br />
How to change the right to change your own password:<br />
1. If you want to change this right of a user account, click the User area > Users entries<br />
in the tree view.<br />
In case of a user group, click the entries User area > User groups.<br />
2. Right-click the user account or the user group you want to configure and click the<br />
<strong>Config</strong>uration entry in the context menu.<br />
3. Click the System rights tab.<br />
4. Use the Change own password field to select between the following options:<br />
Yes: allows the user to change the user account password<br />
No: denies the user to change the user account password<br />
5. Click OK to save your settings.<br />
56 · G&D DL-MUX
The »KVM combinations« folder<br />
The »KVM combinations« folder<br />
The KVM combinations folder enables you to group different devices in any folders.<br />
Especially in larger system, this folder provides better orientation.<br />
You can group the devices according to locations (e. g. server room) or any other<br />
features (e. g. the operating system of the connected computer).<br />
ADVICE: The devices of different classes – for example the target modules of a<br />
matrix system or an extender – can be grouped within one folder.<br />
Folder administration<br />
The KVM combinations folder provides the following system folders:<br />
[Unassigned]: This folder lists all devices that are not assigned to any KVM<br />
combination.<br />
[All devices]: This folder lists all devices of the KVM system.<br />
NOTE: The system folders can neither be deleted nor renamed.<br />
Creating a new folder<br />
How to create an empty folder:<br />
1. Use the tree view to right-click on KVM combination and click on New folder in the<br />
context menu.<br />
ADVICE: If you want to create a subfolder, right-click the main directory and<br />
click on New folder.<br />
2. Use the Name field to enter the desired name.<br />
3. Optional: Use the Comment field to enter a comment.<br />
4. Click OK to create the folder.<br />
G&D DL-MUX · 57
The »KVM combinations« folder<br />
Assigning a device to a folder<br />
NOTE: Each device can be listed in any number of subfolders.<br />
How to group the connected device in a new folder:<br />
1. Use the tree view to click on KVM combinations > [All devices].<br />
2. Right-click a connected device and click on Group connected devices in the context<br />
menu.<br />
3. Use the Name field to enter the desired name.<br />
4. Optional: Use the Comment field to enter a comment.<br />
5. Click OK to group the devices in the new folder.<br />
How to assign a device to an existing folder:<br />
1. Use the tree view to click on KVM combinations > [All devices].<br />
2. Right-click the device to be assigned and click on Copy device in the context menu.<br />
3. Open the folder to which the device is to be assigned to.<br />
4. Right-click the main view and click on Paste device in the context menu.<br />
Deleting a device from a folder<br />
A device can be deleted from the folder by moving it to the [Unassigned] group or by<br />
selecting the Remove from folder entry in the context menu.<br />
How to cancel a target module’s assignment to a folder:<br />
1. Use the tree view to click on KVM combinations > [All devices].<br />
2. Open the folder to which the device is currently assigned to.<br />
Right-click the device whose assignment you want to delete and click on <br />
Remove from folder in the context menu.<br />
58 · G&D DL-MUX
Renaming a folder<br />
The »KVM combinations« folder<br />
How to rename a folder:<br />
1. Use the tree view to click on KVM combinations > [All devices].<br />
2. Right-click the folder to be renamed and click on Rename folder in the context menu.<br />
3. Edit the name and press Enter.<br />
Deleting a folder<br />
All created folders can be deleted at any time.<br />
If a folder contains devices while it is deleted, these devices are automatically moved<br />
to the[Unassigned] group.<br />
NOTE: The system folders [Unassigned] and [All devices] are administered by the web<br />
application and cannot be deleted.<br />
How to delete a folder:<br />
1. Use the tree view to click on KVM combinations > [All devices].<br />
2. Right-click the folder to be deleted and click on Delete folder in the context menu.<br />
3. Confirm the appearing security request by clicking Yes or cancel the task by<br />
clicking No.<br />
G&D DL-MUX · 59
Advanced functions of the KVM system<br />
Advanced functions of the KVM system<br />
Temporarily (de)activating SNMP traps<br />
(Maintenance mode)<br />
By activating the maintenance mode the user is enabled to deactivate SNMP traps<br />
(see page 37), for example, for devices which are currently occupied for reasons of<br />
maintenance.<br />
The status messages are again displayed after the maintenance mode has been deactivated.<br />
(De)activating the maintenance mode<br />
How to (de)activate a device’s maintenance mode:<br />
1. Use the tree view to click on KVM switches > [All switches].<br />
2. Right-click the device and click on <br />
Maintenance > On or Maintenance > Off in the context menu.<br />
Viewing a list of devices in maintenance mode<br />
How to display the list of devices in maintenance mode:<br />
1. Use the tree view to click in the folders System monitoring > Maintenance.<br />
The main view lists the respective devices.<br />
ADVICE: In all views, the devices in the Maintenance mode are displayed in yellow.<br />
60 · G&D DL-MUX
Advanced functions of the KVM system<br />
Identifying a device by activating the Identification LED<br />
Some devices provide an Identification LED on the front panel.<br />
Use the web application to switch the device LEDs on or off in order to identify the<br />
devices in a rack, for example.<br />
How to (de)activate the Identification LED of a device:<br />
1. Use the tree view to click on KVM switches > [All switches].<br />
2. Right-click the device and click on <br />
Identification LED > On or Identification LED > Off in the context menu.<br />
Saving and restoring the data of the KVM system<br />
All system settings – except the network settings of the devices – can be saved with<br />
this backup function.<br />
The saved data can be restored by using the restore function.<br />
NOTE: The paragraph Backup and restore function on page 13 describes how to save<br />
and restore the network settings of a device of the KVM system.<br />
How to save the system settings of the KVM system:<br />
1. Use the tree view to click on System.<br />
2. Right-click on System in the display range and click on Backup/Restore in the context<br />
menu.<br />
3. Click Backup.<br />
4. Optional: Enter a Comment and/or a Password to secure the backup file.<br />
5. Click OK.<br />
6. Use the file window to define the location and the File name of the backup file.<br />
7. Click Save.<br />
8. Click OK to leave the window.<br />
How to restore the system settings of the KVM system:<br />
1. Use the tree view to click on System.<br />
2. Right-click on System in the display range and click on Backup/Restore in the context<br />
menu.<br />
3. Enter the location and the name of the backup file in the Path field.<br />
ADVICE: Use the file button to select the name and the location of the backup<br />
file via the file window.<br />
4. Optional: Click Check file to check the validation of the backup file.<br />
G&D DL-MUX · 61
Advanced functions of the KVM system<br />
5. Use the information in the Date and Comment fields to check if you have selected<br />
the desired backup file.<br />
6. Click Restore.<br />
7. Click OK to leave the window.<br />
Activating the purchased additional functions<br />
After an additional function has been purchased, the user receives a so-called feature<br />
key. This file contains a key to activate the purchased function(s).<br />
By importing this key to the web application, the purchased function(s) is/are activated.<br />
How to import a feature key to activate the purchased function(s):<br />
1. Use the tree view to click on KVM switches > [All switches].<br />
2. Right-click the device whose feature key is to be imported.<br />
3. Click the <strong>Config</strong>uration entry in the context menu.<br />
4. Click the Features tab.<br />
5. Click on Import feature key from file... and import the feature key (file) via the file<br />
interface.<br />
After the file has been loaded, the clear text of the feature key is displayed in the<br />
text field.<br />
NOTE: It is also possible to manually copy the clear text of the feature key into<br />
the text field.<br />
6. Click OK to close the window.<br />
62 · G&D DL-MUX
Overview of the monitoring values<br />
Overview of the monitoring values<br />
The device-specific branches as well as the KVM combinations and the Critical devices<br />
branch of the tree view enable you to view information on the current status of the<br />
different devices in the KVM system.<br />
The following pages list the various monitoring values.<br />
»DL-MUX« KVM switch<br />
NOTE: The table below uses the following placeholders:<br />
[x]: number of CPU channel<br />
[y]: number of video channel<br />
Feature Status Meaning<br />
Active video [x] DL-DVI Dual link video signal is being transmitted<br />
None No video signal fo<strong>und</strong><br />
SL-DVI Single link video signal is being transmitted<br />
VGA VGA video signal is being transmitted<br />
CPU [x] power Off Computer is turned off.<br />
On Computer is turned on<br />
CPU [x] PS/2 Connected Connection between the computer and the emulation<br />
for PS/2 input devices has been established.<br />
Disconnected No connection between computer and emulation for<br />
PS/2 input devices<br />
CPU [x] USB 2.0 Active USB 2.0 data connection has been established<br />
Inactive No USB 2.0 data connection<br />
CPU [x] USB HID Connected Connection between the computer and the <br />
USB HID emulation has been established.<br />
Disconnected Connection between the computer and the <br />
USB HID emulation.<br />
Initialized Connection between the computer and the <br />
USB HID emulation has been initialised.<br />
Display [x] Connected Monitor connected<br />
Disconnected No monitor connected<br />
Display type [x] [String] Textual description of the connected monitor; supplied<br />
by EDID data<br />
G&D DL-MUX · 63
Overview of the monitoring values<br />
Feature Status Meaning<br />
DVI cable CPU<br />
[x].[y]<br />
DVI signal CPU<br />
[x].[y]<br />
64 · G&D DL-MUX<br />
Connected Connection between the computer’s DVI interface<br />
and the KVM switch has been established.<br />
Disconnected No connection between the computer’s DVI interface<br />
and the KVM switch<br />
No signal No DVI video signal<br />
Signal The DVI video signal is being transmitted<br />
Load Numerical value Displays the average load (Load Average)<br />
Main power Off No power supply via »Main power« power pack<br />
On Power is being supplied via »Main power« power pack<br />
Network A Down No connection to network<br />
Up Connection to the network has been established.<br />
Network B Down No connection to network<br />
Up Connection to the network has been established.<br />
PS/2 Con Keyboard PS/2 keyboard of the local console is ready for operation.<br />
Keyboard/Mouse PS/2 keyboard and mouse of the local console are<br />
ready for operation.<br />
Mouse PS/2 mouse of the local console is ready for operation.<br />
None No PS/2 devices at local console<br />
Red<strong>und</strong>ant power On Power is being supplied via »Red. power« power pack.<br />
Off No power supply via »Red. power« power pack<br />
Selected Port Port number Port number of the accessed computer<br />
Target [x] device [String] Connected device type<br />
(e.g. »CPU« or »DL-Vision«)<br />
Temperature Numerical value Current temperature in the device<br />
USB Con Keyboard USB keyboard of the local console is ready for operation.<br />
Keyboard/Mouse USB keyboard and mouse of the local console are<br />
ready for operation.<br />
Mouse USB mouse of the local console is ready for operation.<br />
None No USB devices at local console<br />
VGA cable CPU<br />
[x].[y]<br />
Connected Connection between the computer’s VGA interface<br />
and the KVM switch has been established.<br />
Disconnected No connection between the computer’s VGA interface<br />
and the KVM switch<br />
VGA signal CPU No signal No VGA video signal<br />
[x].[y]<br />
Signal VGA video signal is being transmitted
2 KVM Switches<br />
The KVM switches entry in the tree directory of the web application enables you to<br />
configure different settings of the KVM switch and to view the status information of<br />
the device.<br />
NOTE: The chapter Overview of the monitoring values on page 63 ff. explains the different<br />
information.<br />
Basic configuration of KVM switches<br />
Renaming a KVM switch<br />
How to rename a KVM switch:<br />
1. Click on KVM Switches > [All switches] in the tree view.<br />
2. Right-click the KVM switch to be edited. Now, click on the <strong>Config</strong>uration entry in<br />
the context menu.<br />
3. Use the Name field to enter the new KVM switch name.<br />
4. Click OK to save your settings.<br />
Changing the comment of a KVM switch<br />
The list field of the web application does not only display the KVM switch name but<br />
also the entered comment.<br />
ADVICE: Use the comment to note the location of the KVM switch, for example.<br />
How to change the comment of a KVM switch:<br />
1. Click on KVM Switches > [All switches] in the tree view.<br />
2. Right-click the KVM switch to be edited. Now, click on the <strong>Config</strong>uration entry in<br />
the context menu.<br />
3. Use the Comment field to enter any comment.<br />
4. Click OK to save your settings.<br />
G&D DL-MUX · 65
<strong>Config</strong>uration settings of KVM switches<br />
Deleting a KVM switch from the G&D system<br />
If the system is not able to detect a KVM switch that has been integrated into the<br />
system, the system defines the device as being switched off.<br />
Therefore, delete the list entry of the KVM switch that you want to permanently<br />
remove from the system.<br />
NOTE: Only switched-off KVM switches can be deleted.<br />
How to delete a switched off or disconnected KVM switch:<br />
1. Click on KVM switches > [All switches] in the tree view.<br />
2. Right-click the KVM switch you want to delete and click the Delete entry in the<br />
context menu.<br />
3. Confirm the security request by clicking Yes or cancel the process by clicking No.<br />
<strong>Config</strong>uration settings of KVM switches<br />
Changing the hotkey<br />
The hotkey is used to switch to a computer or to call the setup mode:<br />
If both hotkey and a select key are pressed at the same time, the respective computer<br />
is accessed.<br />
The setup mode is started by pressing the hotkey and the setup key at the same time.<br />
NOTE: The hotkey Ctrl is preset in the default settings.<br />
The number of “free” key combinations is possibly narrowed if many application<br />
programs with hotkeys are operated on one computer or if different G&D devices<br />
are used in one cascade.<br />
In such a case, a set of key combinations that does not interfere with other programs<br />
or cascaded G&D devices can be used by changing the hotkeys.<br />
NOTE: Select your desired key or key combination from the keys Ctrl, Alt, Alt Gr,<br />
Win or Shift.<br />
66 · G&D DL-MUX
<strong>Config</strong>uration settings of KVM switches<br />
How to change the hotkey:<br />
1. Click on KVM switches > [All switches] in the tree view.<br />
2. Right-click the KVM switch and click the <strong>Config</strong>uration entry in the context menu.<br />
3. Click the General tab.<br />
4. Select the row Hotkey modifier to choose at least one of the mentioned modifiers<br />
(Ctrl, Alt, Alt Gr, Win or Shift) by clicking the particular box(es).<br />
NOTE: If you selected several modifiers, press these keys at the same time to activate<br />
the hotkey!<br />
5. Click OK to save your changes.<br />
Changing the select key sets<br />
The select keys 1 to 4 (set »1…4«) are activated in the default settings to switch<br />
between the computers that are connected to the KVM switch.<br />
EXAMPLE: Use the key combination Hotkey+2 (default: Ctrl+2) to switch to computer<br />
2.<br />
If one of the key combinations of the select key set interferes with a key combination<br />
of an installed application program, the hotkey (see page 66) as well as the select key<br />
set can be changed.<br />
How to change the select key set:<br />
1. Click on KVM switches > [All switches] in the tree view.<br />
2. Right-click the KVM switch and click the <strong>Config</strong>uration entry in the context menu.<br />
3. Use the Select key set field of the <strong>Config</strong>uration paragraph to select one of the following<br />
options:<br />
1…4: activate select keys 1, 2, 3, 4<br />
Num1…4: activate select keys Num1, Num2, Num3, Num4<br />
A…D: activate select keys A, B, C, D<br />
F1…F4: activate select keys F1, F2, F3, F4<br />
NOTE: As an alternative to using select keys for switching a channel, you can<br />
also use step keys for switching the channels in ascending or descending order<br />
(see separate »Installation and Operating Guide«).<br />
The active step keys depend on the selected select key set. For your information,<br />
the step keys are shown behind the select key set.<br />
4. Click OK to save your changes.<br />
G&D DL-MUX · 67
<strong>Config</strong>uration settings of KVM switches<br />
Changing the setup key<br />
The hotkey to call the setup mode consists of at least one hotkey modifier (see<br />
Changing the hotkey on page 66) and an additional setup key which can be selected<br />
from a certain range of keys.<br />
How to change the current setup key:<br />
1. Click on KVM switches > [All switches] in the tree view.<br />
2. Right-click the KVM switch and click the <strong>Config</strong>uration entry in the context menu.<br />
3. Click the General tab.<br />
4. Use the Setup Scancode field to select the setup key.<br />
The following keys are provided: Backspace, PrtScr, Scroll, Num, Pause, Insert, Delete,<br />
Home, End, PgUp, PgDn and Space.<br />
5. Click OK to save your changes.<br />
Activating the hotkey delay<br />
In order to start the setup mode, press the key combination Hotkey+Backspace<br />
(Standard: Ctrl+Backspace) for seven seconds.<br />
If you want to start the setup mode directly after having pressed the key combination,<br />
the hotkey delay can be deactivated.<br />
How to (de)activate the hotkey delay:<br />
1. Click on KVM switches > [All switches] in the tree view.<br />
2. Right-click the KVM switch and click the <strong>Config</strong>uration entry in the context menu.<br />
3. Click the General tab.<br />
4. Select the field Hotkey Delay to enter the desired time span of the dely.<br />
NOTE: The maximum time span for the delay is 60 seconds. The value 0 deactivates<br />
the delay.<br />
5. Click OK to save your changes.<br />
68 · G&D DL-MUX
(De)activating the switching<br />
<strong>Config</strong>uration settings of KVM switches<br />
A computer, which is connected to the KVM switch, can be accessed via a serial<br />
interface (protocol: Simple Instruction Set) or by pressing the buttons at the device or the<br />
configured select keys.<br />
If desired, the switching possibilities can be limited.<br />
How to (de)activate a certain type of switching:<br />
1. Click on KVM switches > [All switches] in the tree view.<br />
2. Right-click the KVM switch and click the <strong>Config</strong>uration entry in the context menu.<br />
3. Use the Disable switching to select the options to be disabled (Buttons, Hotkeys,<br />
Serial, IP).<br />
4. Click OK to save your changes.<br />
Selecting the values to be monitored<br />
The KVM system monitors various values (see table on page 63) of the KVM switch<br />
by default.<br />
If desired, you can limit the reporting and monitoring of the features.<br />
How to select the values to be monitored:<br />
1. Click on KVM switches > [All switches] in the tree view.<br />
2. Right-click the KVM switch and click the <strong>Config</strong>uration entry in the context menu.<br />
3. Click the Monitoring tab.<br />
The active tab shows two tables. These tables list the features that are (de)activated<br />
for monitoring:<br />
Enabled: features that are reported and monitored<br />
Disabled: features that are not reported and monitored<br />
4. If you want to remove a feature from being monitored, click on this particular<br />
feature in the Enabled table and click on (right arrow).<br />
In order to add a feature to be monitored, click on this particular feature in the<br />
Disabled table and click on (left arrow).<br />
5. Repeat step 4 if you want to change the monitoring of further features.<br />
6. Click OK to save your changes.<br />
G&D DL-MUX · 69
<strong>Config</strong>uration settings of KVM switches<br />
Settings for special hardware<br />
Support for Multimedia and Sun special keys<br />
Various manufacturers have added special keys to the standard keyboards.<br />
Some keyboards are provided with multimedia keys through which it is possible to<br />
comfortably operate special multimedia functions of the computer. For example,<br />
the keyboard of the Apple Mac mini is provided with a key to open the DVD drive.<br />
Compared to standard keyboards, Sun desktops and servers are provided with separate<br />
keys (Solaris Shortcut Keys) to operate special system functions. After the keyboard<br />
mode for Sun desktops and servers has been activated, the Solaris Shortcut<br />
Keys can be used at the console. If the console only provides a standard keyboard,<br />
several key combinations can be applied to emulate the Solaris Shortcut Keys (see<br />
page 71).<br />
Several USB keymodes are provided to use the special keys of such keyboards.<br />
How to (de)activate the support for Multimedia or Sun special keys:<br />
1. Click on KVM switches > [All switches] in the tree view.<br />
2. Right-click the KVM switch and click the <strong>Config</strong>uration entry in the context menu.<br />
3. Click the Channels tab.<br />
4. Use the field USB Keymode of the desired channel to select between the following<br />
options:<br />
PC Standard: standard keymode<br />
PC Multimedia: support for Multimedia special keys<br />
Apple: keymode for Apple computers<br />
SUN US: Sun keymode (American layout)<br />
SUN DE: Sun keymode (German layout)<br />
5. Click OK to save your changes.<br />
70 · G&D DL-MUX
<strong>Config</strong>uration settings of KVM switches<br />
If a Sun keyboard is connected to the console, it is possible to use the Solaris Shortcut<br />
Keys of this keyboard after their support has been activated. Even when using a<br />
standard keyboard, these functions can be carried out by applying the key combinations<br />
listed below:<br />
Key combination Solaris Shortcut Key of Sun keyboard<br />
Ctrl+Alt+F2 Again<br />
Ctrl+Alt+F3 Props<br />
Ctrl+Alt+F4 Undo<br />
Ctrl+Alt+F5 Front<br />
Ctrl+Alt+F6 Copy<br />
Ctrl+Alt+F7 Open<br />
Ctrl+Alt+F8 Paste<br />
Ctrl+Alt+F9 Find<br />
Ctrl+Alt+F10 Cut<br />
Ctrl+Alt+F11 Help<br />
Ctrl+Alt+F12 Mute<br />
Ctrl+Alt+NUM+ Loud<br />
Ctrl+Alt+NUM- Quiet<br />
Ctrl+Alt+NUM* Compose<br />
Ctrl+Alt+Pause Shutdown<br />
Pause+A Stop<br />
G&D DL-MUX · 71
<strong>Config</strong>uration settings of KVM switches<br />
Support for special keyboards<br />
The KVM switch supports the special functions of special keyboards such as<br />
PixelPower Clarity (blue) and SKIDATA1.<br />
Activate their support to apply such keyboards.<br />
How to (de)activate the support for special keyboards:<br />
1. Use the tree view to click on KVM switches > [All switches].<br />
2. Right-click the KVM switch and click the <strong>Config</strong>uration entry in the context menu.<br />
3. Click the General tab.<br />
4. Use the Enhanced Keyboard Type field to select between the following options:<br />
PixelPower Blue: activate support for PixelPower Blue keyboard<br />
SKIDATA1: activate support for SKIDATA1 keyboard<br />
Standard: deactivate support for special keyboards<br />
5. Click OK to save your changes.<br />
Changing the scancode set of a PS/2 keyboard<br />
If a key is pressed on the PS/2 keyboard, the keyboard processor sends a data packet<br />
called scancode. The two common scancode sets (sets 2 and 3) contain different<br />
scancodes.<br />
In the standard configuration, the KVM switch interprets all PS/2 keyboard inputs<br />
with the scancode set 2.<br />
If the pipe (“|”) cannot be input or if the arrow keys of the keyboard do not function<br />
as expected, it is recommended to switch to scancode set 3.<br />
How to change the settings of the scancode set:<br />
1. Use the tree view to click on KVM switches > [All switches].<br />
2. Right-click the KVM switch and click the <strong>Config</strong>uration entry in the context menu.<br />
3. Click the General tab.<br />
4. Use the Scancode Set field to select between the following options:<br />
Set 2: activate scancode set 2 for PS/2 keyboard inputs<br />
Set 3: activate scancode set 2 for PS/2 keyboard inputs<br />
5. Click OK to save your changes.<br />
6. Restart the KVM switch.<br />
NOTE: After the restart, the keyboard is being initialised and the selected scancode<br />
set is applied.<br />
72 · G&D DL-MUX
Advanced functions for KVM switches<br />
Advanced functions for KVM switches<br />
Switching the channel<br />
NOTE: Only if you have purchased and activated the DevCon function, you can<br />
switch the channels via the <strong>Config</strong> <strong>Panel</strong> web application.<br />
There are three alternatives to switch to one of the computers that are conencted to<br />
the KVM switch. It is possible to use the buttons at the device, the configured select<br />
keys or the <strong>Config</strong> <strong>Panel</strong> web application.<br />
After the switching, all mouse and keyboard inputs as well as the data stream of the<br />
USB devices that are connected to the KVM switch and the incoming audio signal<br />
are directly forwarded to the active computer.<br />
How to switch the signal transmission to a computer:<br />
1. Use the tree view to click on KVM Switches > [All Switches].<br />
2. Right-click on the KVM switch and on Switch in the context menu.<br />
3. Use the opened submenu to click on the channel to be activated (e. g. Channel 1).<br />
4. A separate window shows the switching status.<br />
(De)activating channels<br />
Up to four computers can be connected to the DL-MUX. The console at the device is<br />
enabled to access all channels.<br />
If less than four computers are connected to the KVM switch, the other channels<br />
can be deactivated. These channels can no longer be accessed and the monitoring<br />
data is not analysed.<br />
How to (de)activate a channel of the KVM switch:<br />
1. Use the tree view to click on KVM switches > [All switches].<br />
2. Right-click the KVM switch and click the <strong>Config</strong>uration entry in the context menu.<br />
3. Click the Channels tab.<br />
4. Use the Enabled field of the desired channel to select between the following<br />
options:<br />
Enabled: activated channel (default)<br />
Disabled: no access to channel or analysis of monitoring data<br />
5. Click OK to save your changes.<br />
G&D DL-MUX · 73
Advanced functions for KVM switches<br />
Administering and using EDID profiles<br />
EDID information (Extended Display Identification Data) of a monitor inform the graphics<br />
card of a connected computer about various technical featueres of the device.<br />
Enhanced-DDC (Enhanced Display Data Channel) is usually used to transmit the information<br />
without any changes from KVM extender to computer.<br />
IMPORTANT: It might be possible that graphics cards of the Barco PVS series do not<br />
display any images when the Auto mode is active!<br />
When applying such a graphics card, select the EDID profile which is intended<br />
for such a use (see page 75).<br />
The EDID profile of a monitor can also be imported. The KVM switch transmits<br />
the profile to one (or several) connected computers.<br />
Importing the EDID profile of a monitor<br />
NOTE: An EDID profile can either be imported from a bin file or directly from a<br />
monitor that is connected to the KVM switch.<br />
How to import the EDID profile of a connected monitor:<br />
1. Use the tree view to click on KVM switches > [All switches].<br />
2. Right-click the KVM switch and click the <strong>Config</strong>uration entry in the context menu.<br />
3. Click the Channels tab.<br />
4. Click New EDID profile.<br />
5. Click Erlernen.<br />
6. Mark the monitor whose EDID information are to be imported and click Ok.<br />
NOTE: Click [+] to show all monitors that are connected to the KVM switch.<br />
NOTE: The Name and Comment fields of the profile are already filled in, and the<br />
EDID information are shown.<br />
7. If necessary change the Name and/or Comment.<br />
8. Click OK to save your settings.<br />
74 · G&D DL-MUX
Advanced functions for KVM switches<br />
How to import the EDID profile of a monitor from a file:<br />
1. Use the tree view to click on KVM switches > [All switches].<br />
2. Right-click the KVM switch and click the <strong>Config</strong>uration entry in the context menu.<br />
3. Click the Channels tab.<br />
4. Click New EDID profile.<br />
5. Click Search.<br />
6. Use the file dialog to choose the bin file to be imported and click Ok.<br />
NOTE: The Name and Comment fields of the profile are already filled in, and the<br />
EDID information are shown.<br />
7. If necessary change the Name and/or Comment.<br />
8. Click OK to save your settings.<br />
Defining the EDID profile for a channel<br />
How to choose the EDID profile:<br />
ADVICE: If you want to enable an EDID profile for all channels, first choose the<br />
desired profile for channel 1 as described below and click All.<br />
1. Use the tree view to click on KVM switches > [All switches].<br />
2. Right-click the KVM switch and click the <strong>Config</strong>uration entry in the context menu.<br />
3. Click the Channels tab.<br />
4. Use the EDID x field of the desired channel to choose between the following<br />
options:<br />
[Auto]: treats EDID data automatically (default)<br />
[Barco PVS]: special mode for graphics cards of the Barco PVS series<br />
Profile<br />
name:<br />
chooses an EDID profile which has been imported by the user<br />
NOTE: A separate EDID profile (EDID 1 and EDID 2, for example) can be chosen<br />
for each video channel of a multi-channel device.<br />
5. Click OK to save your settings.<br />
G&D DL-MUX · 75
Advanced functions for KVM switches<br />
Overview of the stored EDID profiles<br />
The System > EDID-Profile branch of the tree view shows an overview of the EDID<br />
profiles that are stored in the KVM system.<br />
Use the context menu to Add, Delete and Change the profiles.<br />
NOTE: Refer to the previous pages to carry out these actions.<br />
Viewing the status information of a KVM switch<br />
The context menu of a KVM switch enables you to call a window with various status<br />
information of the KVM switch.<br />
How to view the status information of a KVM switch:<br />
1. Use the tree view to click on KVM switches > [All switches].<br />
2. Right-click the KVM switch and click on Information in the context menu.<br />
3. The window, which now opens, provides the following information:<br />
KVM Switch<br />
Name: KVM switch name<br />
Device ID: physical ID of the KVM switch<br />
Status: current status (on or off) of the KVM switch<br />
Comment: user comment regarding the KVM switch<br />
Feature Information<br />
Lists all activated additional functions<br />
NOTE: The chapter Overview of the monitoring values on page 63 ff. explains the<br />
various status information in detail.<br />
4. Click on Close to close the window.<br />
76 · G&D DL-MUX
Viewing information on the connection<br />
Advanced functions for KVM switches<br />
If the KVM switch is connected to another G&D device (for example to a KVM<br />
extender), the connection between the G&D devices can be viewed in the web application.<br />
The information window displays the physical connections of the KVM switches to<br />
other compatible G&D device as well as the physical device IDs, the occupied interfaces<br />
and the device status.<br />
IMPORTANT: If the computers as well as the devices of the local console are the only<br />
devices connected to the KVM switch, the information screen displays nothing!<br />
How to view information on the connection:<br />
1. Use the tree view to click on KVM switches > [All switches].<br />
2. Right-click the KVM switch and click on Connections in the context menu to view<br />
any information on the connection.<br />
NOTE: The KVM switch via whose context menu the connection information<br />
has been called is highlighted in red.<br />
3. You are provided with the following information on the connection:<br />
Names and physical device IDs of the connected devices<br />
Interface names of interconnected devices<br />
Switching status (On or Off) of the devices<br />
4. Click on Close to close the window.<br />
G&D DL-MUX · 77
NOTES
NOTES
NOTES
NOTES
<strong>Guntermann</strong> & <strong>Drunck</strong> <strong>GmbH</strong><br />
Dortm<strong>und</strong>er Str. 4a<br />
57234 Wilnsdorf<br />
Germany<br />
http://www.GDsys.de<br />
sales@GDsys.de<br />
The manual is constantly updated and available on our website.<br />
http://gdsys.de/A9200086