think-cell 5.3 – User Guide
think-cell 5.3 – User Guide
think-cell 5.3 – User Guide

You also want an ePaper? Increase the reach of your titles
YUMPU automatically turns print PDFs into web optimized ePapers that Google loves.
4. Basic concepts<br />
This chapter presents the basic concepts of working with<br />
<strong>think</strong>-<strong>cell</strong>. They apply to all chart types. For a quick tour<br />
refer to chapter Introduction to <strong>think</strong>-<strong>cell</strong> on page 14.<br />
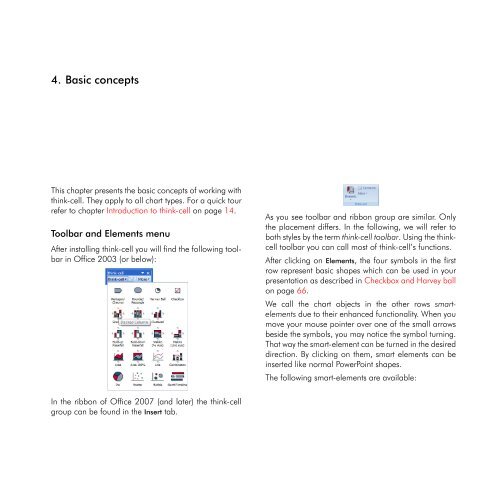
Toolbar and Elements menu<br />
After installing <strong>think</strong>-<strong>cell</strong> you will find the following toolbar<br />
in Office 2003 (or below):<br />
In the ribbon of Office 2007 (and later) the <strong>think</strong>-<strong>cell</strong><br />
group can be found in the Insert tab.<br />
As you see toolbar and ribbon group are similar. Only<br />
the placement differs. In the following, we will refer to<br />
both styles by the term <strong>think</strong>-<strong>cell</strong> toolbar. Using the <strong>think</strong><strong>cell</strong><br />
toolbar you can call most of <strong>think</strong>-<strong>cell</strong>’s functions.<br />
After clicking on Elements, the four symbols in the first<br />
row represent basic shapes which can be used in your<br />
presentation as described in Checkbox and Harvey ball<br />
on page 66.<br />
We call the chart objects in the other rows smartelements<br />
due to their enhanced functionality. When you<br />
move your mouse pointer over one of the small arrows<br />
beside the symbols, you may notice the symbol turning.<br />
That way the smart-element can be turned in the desired<br />
direction. By clicking on them, smart elements can be<br />
inserted like normal PowerPoint shapes.<br />
The following smart-elements are available: