DVR-640H-S DVR-543H-S DVR-540H-S - Pioneer
DVR-640H-S DVR-543H-S DVR-540H-S - Pioneer
DVR-640H-S DVR-543H-S DVR-540H-S - Pioneer
You also want an ePaper? Increase the reach of your titles
YUMPU automatically turns print PDFs into web optimized ePapers that Google loves.
05<br />
Recording<br />
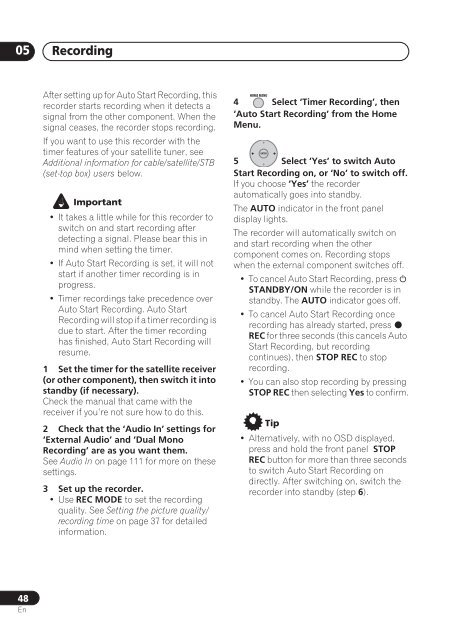
After setting up for Auto Start Recording, this<br />
recorder starts recording when it detects a<br />
signal from the other component. When the<br />
signal ceases, the recorder stops recording.<br />
If you want to use this recorder with the<br />
timer features of your satellite tuner, see<br />
Additional information for cable/satellite/STB<br />
(set-top box) users below.<br />
Important<br />
• It takes a little while for this recorder to<br />
switch on and start recording after<br />
detecting a signal. Please bear this in<br />
mind when setting the timer.<br />
• If Auto Start Recording is set, it will not<br />
start if another timer recording is in<br />
progress.<br />
• Timer recordings take precedence over<br />
Auto Start Recording. Auto Start<br />
Recording will stop if a timer recording is<br />
due to start. After the timer recording<br />
has finished, Auto Start Recording will<br />
resume.<br />
1 Set the timer for the satellite receiver<br />
(or other component), then switch it into<br />
standby (if necessary).<br />
Check the manual that came with the<br />
receiver if you’re not sure how to do this.<br />
2 Check that the ‘Audio In’ settings for<br />
‘External Audio’ and ‘Dual Mono<br />
Recording’ are as you want them.<br />
See Audio In on page 111 for more on these<br />
settings.<br />
3 Set up the recorder.<br />
• Use REC MODE to set the recording<br />
quality. See Setting the picture quality/<br />
recording time on page 37 for detailed<br />
information.<br />
HOME MENU<br />
4 Select ‘Timer Recording’, then<br />
‘Auto Start Recording’ from the Home<br />
Menu.<br />
ENTER<br />
5 Select ‘Yes’ to switch Auto<br />
Start Recording on, or ‘No’ to switch off.<br />
If you choose ‘Yes’ the recorder<br />
automatically goes into standby.<br />
The AUTO indicator in the front panel<br />
display lights.<br />
The recorder will automatically switch on<br />
and start recording when the other<br />
component comes on. Recording stops<br />
when the external component switches off.<br />
• To cancel Auto Start Recording, press <br />
STANDBY/ON while the recorder is in<br />
standby. The AUTO indicator goes off.<br />
• To cancel Auto Start Recording once<br />
recording has already started, press <br />
REC for three seconds (this cancels Auto<br />
Start Recording, but recording<br />
continues), then STOP REC to stop<br />
recording.<br />
• You can also stop recording by pressing<br />
STOP REC then selecting Yes to confirm.<br />
Tip<br />
• Alternatively, with no OSD displayed,<br />
press and hold the front panel STOP<br />
REC button for more than three seconds<br />
to switch Auto Start Recording on<br />
directly. After switching on, switch the<br />
recorder into standby (step 6).<br />
48<br />
En


