
You also want an ePaper? Increase the reach of your titles
YUMPU automatically turns print PDFs into web optimized ePapers that Google loves.
5. Exchanging data with your<br />
computer<br />
Use USB Slave Mode to transfer data between your computer<br />
and <str<strong>on</strong>g>the</str<strong>on</strong>g> PC drive.<br />
For <str<strong>on</strong>g>the</str<strong>on</strong>g> procedure refer to “USB” (→p.92).<br />
6. Erasing a CD-RW disc<br />
This operati<strong>on</strong> erases <str<strong>on</strong>g>the</str<strong>on</strong>g> data that was written <strong>on</strong> a CD-RW<br />
disc.<br />
Erasing a disc lets you use <str<strong>on</strong>g>the</str<strong>on</strong>g> entire capacity of <str<strong>on</strong>g>the</str<strong>on</strong>g> disc, just<br />
as when it was unused (blank).<br />
When you execute this operati<strong>on</strong> all data will be erased from <str<strong>on</strong>g>the</str<strong>on</strong>g><br />
CD-RW disc.<br />
This operati<strong>on</strong> cannot be performed <strong>on</strong> any disc o<str<strong>on</strong>g>the</str<strong>on</strong>g>r than a CD-<br />
RW disc.<br />
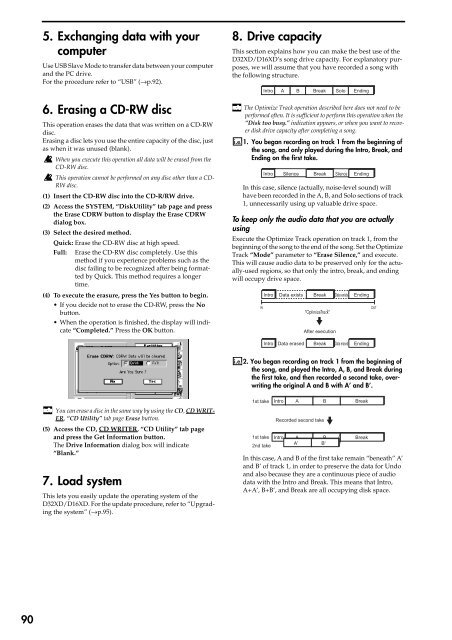
(1) Insert <str<strong>on</strong>g>the</str<strong>on</strong>g> CD-RW disc into <str<strong>on</strong>g>the</str<strong>on</strong>g> CD-R/RW drive.<br />
(2) Access <str<strong>on</strong>g>the</str<strong>on</strong>g> SYSTEM, “DiskUtility” tab page and press<br />
<str<strong>on</strong>g>the</str<strong>on</strong>g> Erase CDRW butt<strong>on</strong> to display <str<strong>on</strong>g>the</str<strong>on</strong>g> Erase CDRW<br />
dialog box.<br />
(3) Select <str<strong>on</strong>g>the</str<strong>on</strong>g> desired method.<br />
Quick: Erase <str<strong>on</strong>g>the</str<strong>on</strong>g> CD-RW disc at high speed.<br />
Full: Erase <str<strong>on</strong>g>the</str<strong>on</strong>g> CD-RW disc completely. Use this<br />
method if you experience problems such as <str<strong>on</strong>g>the</str<strong>on</strong>g><br />
disc failing to be recognized after being formatted<br />
by Quick. This method requires a l<strong>on</strong>ger<br />
time.<br />
(4) To execute <str<strong>on</strong>g>the</str<strong>on</strong>g> erasure, press <str<strong>on</strong>g>the</str<strong>on</strong>g> Yes butt<strong>on</strong> to begin.<br />
• If you decide not to erase <str<strong>on</strong>g>the</str<strong>on</strong>g> CD-RW, press <str<strong>on</strong>g>the</str<strong>on</strong>g> No<br />
butt<strong>on</strong>.<br />
• When <str<strong>on</strong>g>the</str<strong>on</strong>g> operati<strong>on</strong> is finished, <str<strong>on</strong>g>the</str<strong>on</strong>g> display will indicate<br />
“Completed.” Press <str<strong>on</strong>g>the</str<strong>on</strong>g> OK butt<strong>on</strong>.<br />
8. Drive capacity<br />
This secti<strong>on</strong> explains how you can make <str<strong>on</strong>g>the</str<strong>on</strong>g> best use of <str<strong>on</strong>g>the</str<strong>on</strong>g><br />
<str<strong>on</strong>g>D32XD</str<strong>on</strong>g>/<str<strong>on</strong>g>D16XD</str<strong>on</strong>g>’s s<strong>on</strong>g drive capacity. For explanatory purposes,<br />
we will assume that you have recorded a s<strong>on</strong>g with<br />
<str<strong>on</strong>g>the</str<strong>on</strong>g> following structure.<br />
The Optimize Track operati<strong>on</strong> described here does not need to be<br />
performed often. It is sufficient to perform this operati<strong>on</strong> when <str<strong>on</strong>g>the</str<strong>on</strong>g><br />
“Disk too busy.” indicati<strong>on</strong> appears, or when you want to recover<br />
disk drive capacity after completing a s<strong>on</strong>g.<br />
1. You began recording <strong>on</strong> track 1 from <str<strong>on</strong>g>the</str<strong>on</strong>g> beginning of<br />
<str<strong>on</strong>g>the</str<strong>on</strong>g> s<strong>on</strong>g, and <strong>on</strong>ly played during <str<strong>on</strong>g>the</str<strong>on</strong>g> Intro, Break, and<br />
Ending <strong>on</strong> <str<strong>on</strong>g>the</str<strong>on</strong>g> first take.<br />
In this case, silence (actually, noise-level sound) will<br />
have been recorded in <str<strong>on</strong>g>the</str<strong>on</strong>g> A, B, and Solo secti<strong>on</strong>s of track<br />
1, unnecessarily using up valuable drive space.<br />
To keep <strong>on</strong>ly <str<strong>on</strong>g>the</str<strong>on</strong>g> audio data that you are actually<br />
using<br />
Execute <str<strong>on</strong>g>the</str<strong>on</strong>g> Optimize Track operati<strong>on</strong> <strong>on</strong> track 1, from <str<strong>on</strong>g>the</str<strong>on</strong>g><br />
beginning of <str<strong>on</strong>g>the</str<strong>on</strong>g> s<strong>on</strong>g to <str<strong>on</strong>g>the</str<strong>on</strong>g> end of <str<strong>on</strong>g>the</str<strong>on</strong>g> s<strong>on</strong>g. Set <str<strong>on</strong>g>the</str<strong>on</strong>g> Optimize<br />
Track “Mode” parameter to “Erase Silence,” and execute.<br />
This will cause audio data to be preserved <strong>on</strong>ly for <str<strong>on</strong>g>the</str<strong>on</strong>g> actually-used<br />
regi<strong>on</strong>s, so that <strong>on</strong>ly <str<strong>on</strong>g>the</str<strong>on</strong>g> intro, break, and ending<br />
will occupy drive space.<br />
IN<br />
Intro A B Break Solo<br />
Ending<br />
Intro Silence Break Silence Ending<br />
Intro<br />
Data exists<br />
Break<br />
“OptimizeTrack”<br />
After executi<strong>on</strong><br />
Data exists<br />
Ending<br />
OUT<br />
Intro<br />
Data erased<br />
Break<br />
Data erased<br />
Ending<br />
<str<strong>on</strong>g>2.</str<strong>on</strong>g> You began recording <strong>on</strong> track 1 from <str<strong>on</strong>g>the</str<strong>on</strong>g> beginning of<br />
<str<strong>on</strong>g>the</str<strong>on</strong>g> s<strong>on</strong>g, and played <str<strong>on</strong>g>the</str<strong>on</strong>g> Intro, A, B, and Break during<br />
<str<strong>on</strong>g>the</str<strong>on</strong>g> first take, and <str<strong>on</strong>g>the</str<strong>on</strong>g>n recorded a sec<strong>on</strong>d take, overwriting<br />
<str<strong>on</strong>g>the</str<strong>on</strong>g> original A and B with A’ and B’.<br />
You can erase a disc in <str<strong>on</strong>g>the</str<strong>on</strong>g> same way by using <str<strong>on</strong>g>the</str<strong>on</strong>g> CD, CD WRIT-<br />
ER, “CD Utility” tab page Erase butt<strong>on</strong>.<br />
(5) Access <str<strong>on</strong>g>the</str<strong>on</strong>g> CD, CD WRITER, “CD Utility” tab page<br />
and press <str<strong>on</strong>g>the</str<strong>on</strong>g> Get Informati<strong>on</strong> butt<strong>on</strong>.<br />
The Drive Informati<strong>on</strong> dialog box will indicate<br />
“Blank.”<br />
7. Load system<br />
This lets you easily update <str<strong>on</strong>g>the</str<strong>on</strong>g> operating system of <str<strong>on</strong>g>the</str<strong>on</strong>g><br />
<str<strong>on</strong>g>D32XD</str<strong>on</strong>g>/<str<strong>on</strong>g>D16XD</str<strong>on</strong>g>. For <str<strong>on</strong>g>the</str<strong>on</strong>g> update procedure, refer to “Upgrading<br />
<str<strong>on</strong>g>the</str<strong>on</strong>g> system” (→p.95).<br />
1st take<br />
Intro<br />
1st take Intro<br />
2nd take<br />
A<br />
Recorded sec<strong>on</strong>d take<br />
A<br />
A'<br />
In this case, A and B of <str<strong>on</strong>g>the</str<strong>on</strong>g> first take remain “beneath” A’<br />
and B’ of track 1, in order to preserve <str<strong>on</strong>g>the</str<strong>on</strong>g> data for Undo<br />
and also because <str<strong>on</strong>g>the</str<strong>on</strong>g>y are a c<strong>on</strong>tinuous piece of audio<br />
data with <str<strong>on</strong>g>the</str<strong>on</strong>g> Intro and Break. This means that Intro,<br />
A+A’, B+B’, and Break are all occupying disk space.<br />
B<br />
B<br />
B'<br />
Break<br />
Break<br />
90