
You also want an ePaper? Increase the reach of your titles
YUMPU automatically turns print PDFs into web optimized ePapers that Google loves.
White balance<br />
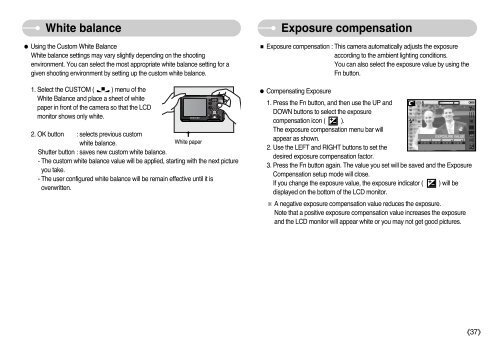
● Using the Custom White Balance<br />
White balance settings may vary slightly depending on the shooting<br />
environment. You can select the most appropriate white balance setting for a<br />
given shooting environment by setting up the custom white balance.<br />
1. Select the CUSTOM ( ) menu of the<br />
White Balance and place a sheet of white<br />
paper in front of the camera so that the LCD<br />
monitor shows only white.<br />
2. OK button : selects previous custom<br />
white balance.<br />
Shutter button : saves new custom white balance.<br />
<br />
White paper<br />
- The custom white balance value will be applied, starting with the next picture<br />
you take.<br />
- The user configured white balance will be remain effective until it is<br />
overwritten.<br />
Exposure compensation<br />
■ Exposure compensation : This camera automatically adjusts the exposure<br />
according to the ambient lighting conditions.<br />
You can also select the exposure value by using the<br />
Fn button.<br />
● Compensating Exposure<br />
1. Press the Fn button, and then use the UP and<br />
6<br />
DOWN buttons to select the exposure<br />
compensation icon ( ).<br />
The exposure compensation menu bar will<br />
EXPOSURE VALUE<br />
appear as shown.<br />
-2 -1 0 +1 +2<br />
2. Use the LEFT and RIGHT buttons to set the<br />
desired exposure compensation factor.<br />
3. Press the Fn button again. The value you set will be saved and the Exposure<br />
Compensation setup mode will close.<br />
If you change the exposure value, the exposure indicator ( ) will be<br />
displayed on the bottom of the LCD monitor.<br />
※ A negative exposure compensation value reduces the exposure.<br />
Note that a positive exposure compensation value increases the exposure<br />
and the LCD monitor will appear white or you may not get good pictures.<br />
《37》