

Wire Harness Installation Instructions For Installing - Painless Wiring
Wire Harness Installation Instructions For Installing - Painless Wiring
Wire Harness Installation Instructions For Installing - Painless Wiring

Create successful ePaper yourself
Turn your PDF publications into a flip-book with our unique Google optimized e-Paper software.
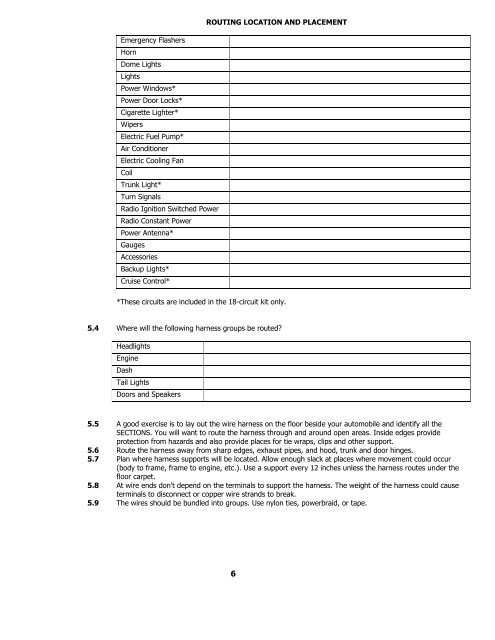
ROUTING LOCATION AND PLACEMENT<br />
Emergency Flashers<br />
Horn<br />
Dome Lights<br />
Lights<br />
Power Windows*<br />
Power Door Locks*<br />
Cigarette Lighter*<br />
Wipers<br />
Electric Fuel Pump*<br />
Air Conditioner<br />
Electric Cooling Fan<br />
Coil<br />
Trunk Light*<br />
Turn Signals<br />
Radio Ignition Switched Power<br />
Radio Constant Power<br />
Power Antenna*<br />
Gauges<br />
Accessories<br />
Backup Lights*<br />
Cruise Control*<br />
*These circuits are included in the 18-circuit kit only.<br />
5.4 Where will the following harness groups be routed<br />
Headlights<br />
Engine<br />
Dash<br />
Tail Lights<br />
Doors and Speakers<br />
5.5 A good exercise is to lay out the wire harness on the floor beside your automobile and identify all the<br />
SECTIONS. You will want to route the harness through and around open areas. Inside edges provide<br />
protection from hazards and also provide places for tie wraps, clips and other support.<br />
5.6 Route the harness away from sharp edges, exhaust pipes, and hood, trunk and door hinges.<br />
5.7 Plan where harness supports will be located. Allow enough slack at places where movement could occur<br />
(body to frame, frame to engine, etc.). Use a support every 12 inches unless the harness routes under the<br />
floor carpet.<br />
5.8 At wire ends don't depend on the terminals to support the harness. The weight of the harness could cause<br />
terminals to disconnect or copper wire strands to break.<br />
5.9 The wires should be bundled into groups. Use nylon ties, powerbraid, or tape.<br />
6


