Wire Harness Installation Instructions For Installing - Painless Wiring
Wire Harness Installation Instructions For Installing - Painless Wiring
Wire Harness Installation Instructions For Installing - Painless Wiring
You also want an ePaper? Increase the reach of your titles
YUMPU automatically turns print PDFs into web optimized ePapers that Google loves.
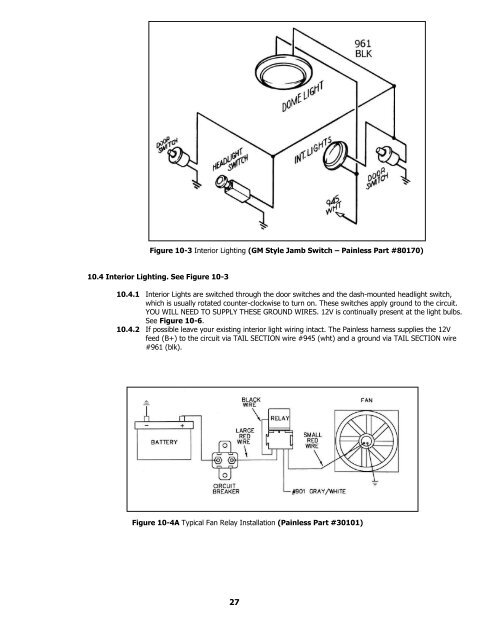
Figure 10-3 Interior Lighting (GM Style Jamb Switch – <strong>Painless</strong> Part #80170)<br />
10.4 Interior Lighting. See Figure 10-3<br />
10.4.1 Interior Lights are switched through the door switches and the dash-mounted headlight switch,<br />
which is usually rotated counter-clockwise to turn on. These switches apply ground to the circuit.<br />
YOU WILL NEED TO SUPPLY THESE GROUND WIRES. 12V is continually present at the light bulbs.<br />
See Figure 10-6.<br />
10.4.2 If possible leave your existing interior light wiring intact. The <strong>Painless</strong> harness supplies the 12V<br />
feed (B+) to the circuit via TAIL SECTION wire #945 (wht) and a ground via TAIL SECTION wire<br />
#961 (blk).<br />
Figure 10-4A Typical Fan Relay <strong>Installation</strong> (<strong>Painless</strong> Part #30101)<br />
27


