FULLY-AUTOMATIC ESPRESSO COFFEE MACHINE - Wega
FULLY-AUTOMATIC ESPRESSO COFFEE MACHINE - Wega
FULLY-AUTOMATIC ESPRESSO COFFEE MACHINE - Wega

Create successful ePaper yourself
Turn your PDF publications into a flip-book with our unique Google optimized e-Paper software.
TROUBLESHOOTING - chap.10<br />
Technical manual<br />
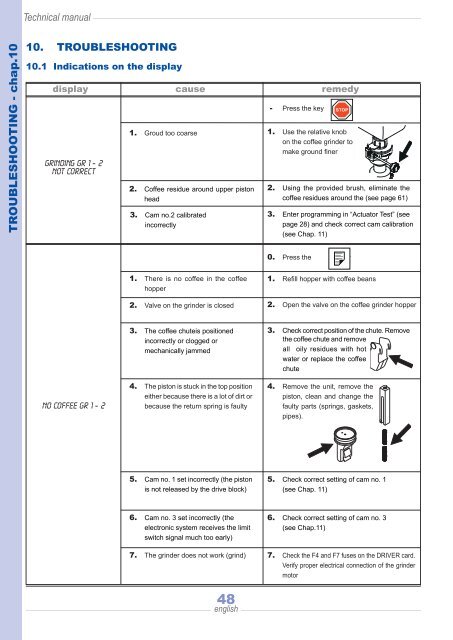
10. TROUBLESHOOTING<br />
10.1 Indications on the display<br />
display<br />
GRINDing GR 1 - 2<br />
NOT correct<br />
NO <strong>COFFEE</strong> GR 1 - 2<br />
1. Groud too coarse<br />
cause remedy<br />
2. Coffee residue around upper piston<br />
head<br />
3. Cam no.2 calibrated<br />
incorrectly<br />
1. There is no coffee in the coffee<br />
hopper<br />
2. Valve on the grinder is closed<br />
3. The coffee chuteis positioned<br />
incorrectly or clogged or<br />
mechanically jammed<br />
4. The piston is stuck in the top position<br />
either because there is a lot of dirt or<br />
because the return spring is faulty<br />
5. Cam no. 1 set incorrectly (the piston<br />
is not released by the drive block)<br />
6. Cam no. 3 set incorrectly (the<br />
electronic system receives the limit<br />
switch signal much too early)<br />
48<br />
english<br />
- Press the key<br />
1. Use the relative knob<br />
on the coffee grinder to<br />
make ground finer<br />
2. Using the provided brush, eliminate the<br />
coffee residues around the (see page 61)<br />
3. Enter programming in “Actuator Test” (see<br />
page 28) and check correct cam calibration<br />
(see Chap. 11)<br />
0. Press the key<br />
1. Refill hopper with coffee beans<br />
2. Open the valve on the coffee grinder hopper<br />
3. Check correct position of the chute. Remove<br />
the coffee chute and remove<br />
all oily residues with hot<br />
water or replace the coffee<br />
chute<br />
4. Remove the unit, remove the<br />
piston, clean and change the<br />
faulty parts (springs, gaskets,<br />
pipes).<br />
5. Check correct setting of cam no. 1<br />
(see Chap. 11)<br />
6. Check correct setting of cam no. 3<br />
(see Chap.11)<br />
7. The grinder does not work (grind) 7. Check the F4 and F7 fuses on the DRIVER card.<br />
Verify proper electrical connection of the grinder<br />
motor