
You also want an ePaper? Increase the reach of your titles
YUMPU automatically turns print PDFs into web optimized ePapers that Google loves.
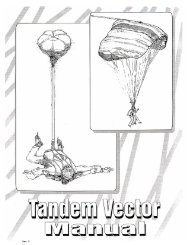
V E C T O R O W N E R ’ S M A N U A L<br />
❈ Abrasion<br />
Nylon quickly frays if dragged over concrete or other rough surfaces. Do not drag your rig on the<br />
concrete while packing.<br />
PERIODIC MAINTENANCE FOR THE BOOTH 3-RING RELEASE SYSTEM<br />
The Booth 3-Ring release system has been in use for many years with excellent results. Although<br />
the system is as durable as the rest of the rig, it requires periodic maintenance and inspection to<br />
ensure proper operation.<br />
The procedures below should be done at least every 3 months. This is especially important if the<br />
rig has not been used for an extended period, such as during the winter. Immediate inspection is<br />
required if it has been subjected to some abuse such as a drag across the runway, a water landing<br />
or exposure to a lot of dust or sand.<br />
It’s important to maintain the system even more frequently in humid, muddy or freezing conditions.<br />
If the Vector becomes immersed in mud or muddy water, clean the 3-Ring release system with a<br />
mild solution of soap and water. Any rusted components must be replaced.<br />
PROCEDURE FOR PERIODIC MAINTENANCE OF THE BOOTH 3-RING<br />
RELEASE SYSTEM<br />
1. Every 3 months operate the 3-Ring release system on the ground. Extract the cable completely<br />
from the housings and disconnect the risers.<br />
2. While the system is disassembled, closely inspect it for wear. Check the white locking loops (the<br />
ones that pass over the smallest ring and through the grommet) to be sure they are not frayed.<br />
3. Check the hook and loop fastener on the cutaway handle and main lift web to be sure it is clean<br />
and adequately holds the handle.<br />
4. Check the cable ends for a smooth finish. The ends are finished at the factory to have a smooth,<br />
tapered surface. This prevents the cable from hanging up in the loop. Check the cable ends and<br />
consult a rigger or the manufacturer if a burr or “hook” is present.<br />
5. Check the stitching, including that which holds the large rings to the harness.<br />
6. Check the 3-Ring release housings for solid hand tacking and proper stretch. The housing ends<br />
lay at the chest strap area, pull downward on these housing ends and check that they don’t move<br />
downwards more than ½ inch. Pull the housings from the free end and expect 1-2 inches of<br />
movement.<br />
7. Take each riser and vigorously twist and flex the webbing near where it passes through each<br />
ring. The idea is to remove any set or deformation in the webbing. Do the same thing to the white<br />
loop.<br />
8. Check the housings for dents or other obstructions. Use the cable to do this.<br />
9. Clean and lubricate the release cable with a light oil such as “3 in 1” brand or silicon. Put a few<br />
drops on a paper towel and firmly wipe the cable a few times. A thin, invisible film should remain—<br />
Page • 74:88 section 6 : periodic maintenance<br />
09354 - 11/26/2003<br />
Rev 0