
Create successful ePaper yourself
Turn your PDF publications into a flip-book with our unique Google optimized e-Paper software.
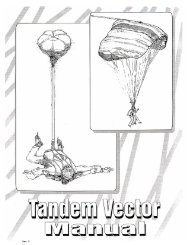
V E C T O R O W N E R ’ S M A N U A L<br />
note<br />
Use a friction lock<br />
and pull up cord to<br />
keep the freebag<br />
grommets together -<br />
this will keep bulk on<br />
the outside of the<br />
bag.<br />
note<br />
Do not rely on the<br />
container to shape<br />
the pack job or hide<br />
any poor fabric<br />
distribution.<br />
SPREAD THE SLIDER GROMMETS APART AND STAGGER THEM.<br />
✪ Be sure the grommets are lying flat relative to the reserve pack tray.<br />
✪ This distributes the bulk over a wider area, minimizing lumps in the pack job.<br />
✪ Spread them apart 4 inches if the rig is Cypres-equipped.<br />
• This allows the pack job to mold around the Cypres unit and reduce it’s protrusion into<br />
the main container<br />
• It also prevents the unit from contacting the hard grommets if the rig is dropped<br />
LEAVE 2-3 INCHES OF FOLDED CANOPY PROTRUDING OUT OF THE MOUTH OF<br />
THE BAG.<br />
✪ This helps fill the corners of the reserve container.<br />
✪ This also helps prevent excessive bulk distribution in the center of the pack tray.<br />
THE BAGGED CANOPY SHOULD REFLECT THE DESIRED SHAPE OF THE RIG FOR<br />
BEST RESULTS.<br />
✪ Putting the canopy in the bag is best described as:<br />
“Pulling the bag onto the pack job, not putting the pack job into the bag”<br />
✪ It should be square at the bottom, wedge shaped in profile, and thin at the top.<br />
✪ When pressing down on the pack job, it should be firm at the mouth of the bag and get<br />
progressively softer as you get closer to the bridle attachment point.<br />
✪ Leave very little, if any canopy in the ears/top corners of the freebag.<br />
MAKE NEAT AND ORDERLY LINE STOWS.<br />
✪ Use protective strips on the bag hook and loop fastener to protect the lines from snags.<br />
✪ Make the line stows the same width as the line stow pocket.<br />
✪ Distribute the lines evenly from the bottom of the pocket to the top to minimize bulk.<br />
✪ Leave 12 inches of line unstowed between the bag and riser ends.<br />
USE A ¾ INCH OPENING IN THE RESERVE CLOSING LOOP.<br />
✪ This allows a temporary pin to remain in place while the loop is pulled through the reserve<br />
flap grommets.<br />
✪ It gives you a chance to determine if you can close the flap prior to unpinning the container,<br />
at which time you are committed to closing the flap or losing the pack job.<br />
✪ The ¾ inch opening will be contained within the stacked grommets, minimizing any risk<br />
of canopy material from becoming lodged in the loop<br />
WHEN USING A CYPRES CLOSING LOOP, USE TWO CYPRES PULL-UP CORDS.<br />
✪ Two cords will hold the eye of the loop open wider to ease pin insertion.<br />
✪ The second cord is inserted after the closing loop is through the loop cutter, as two will<br />
not fit.<br />
✪ Another option is to finger trap one cord into another to produce a fatter pull-up cord.<br />
note<br />
Make a Cypres<br />
“indent” in the pack<br />
job prior to placing<br />
the bag into the<br />
container.<br />
PRE-STRETCH CYPRES CLOSING LOOPS.<br />
✪ Pre-stretched loops will behave more consistently than unstretched loops.<br />
✪ Consistent loop behavior combined with consistent packing techniques will allow you to<br />
establish known loop lengths for different canopy/container combinations.<br />
09354 - 11/26/2003<br />
appendix : packing tips and tricks<br />
Page • 85:88<br />
Rev 0