Type to Learn, Jr. Teacher's Guide.pdf
Type to Learn, Jr. Teacher's Guide.pdf
Type to Learn, Jr. Teacher's Guide.pdf

Create successful ePaper yourself
Turn your PDF publications into a flip-book with our unique Google optimized e-Paper software.
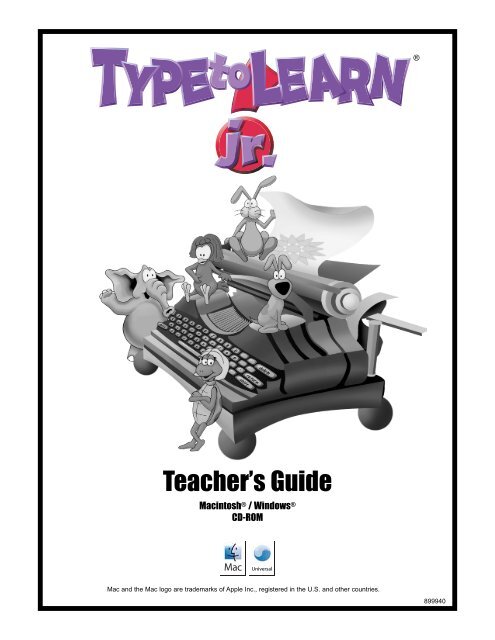
®Teacher’s <strong>Guide</strong>Macin<strong>to</strong>sh ® / Windows ®CD-ROMMac and the Mac logo are trademarks of Apple Inc., registered in the U.S. and other countries.899940
All Sunburst Technology Corporation material is copyrighted. However, Sunburst TechnologyCorporation does give the purchaser the following permissions:• You have permission <strong>to</strong> reproduce any student worksheets in this guide for your classroomuse. You should not, however, copy the whole guide.• If you purchased this program for one computer, you may use it on a single computer only.• If you wish <strong>to</strong> use this software on multiple computers, you must purchase the right <strong>to</strong> do sofrom Sunburst. Call and ask for lab pack/school licensing prices.• You have permission <strong>to</strong> use lab packs/school licenses within one site. You do not, however,have permission <strong>to</strong> divide the package and use the software in more than one site.For more information or a free software catalog, write, call, or email cus<strong>to</strong>mer service at:Sunburst Technology1550 Executive DriveElgin, IL 60123(888) 492-8817 / service@sunburst.comor visit our Web site:www.sunburst.comFor technical support call or email:(800) 338-3457 / http://techsupport.sunburst.com/PermissionsCopyright © 2008 Sunburst Technology Corporation. All Rights Reserved.Mac and the Mac logo are trademarks of Apple Computer, Inc.,registered in the U.S. and other countries.Windows is a registered trademark of Microsoft Corporation.Sunbuddies is a trademark of Sunburst Technology Corporation.<strong>Type</strong> <strong>to</strong> <strong>Learn</strong> is a registered trademark of Sunburst Technology Corporation.Revised 3/08
CreditsProject ManagerDesign TeamCreative Design andArtistic DirectionArt and AnimationProject EngineeringOriginal Music,Sound and Audio ProductionSunburst Programming ToolsResources and InstallerProgrammingQuality ControlDebra WeinbergerDebra Weinberger, Dan Wetzel, Jennifer SimonDan WetzelDan Wetzel, Michael Muldoon, Loren Mack, Joe SummerhaysSteven Grosmark, Elliot Kwestel, Jennifer Simon, Rick Sut<strong>to</strong>nFrank Migliorelli, Bobby SabellaSteven Grosmark, John Mullaney, Jennifer Simon, Nicole DiazMichael AyottesoftGear technology, Inc.Sunburst: Dominic Bertalan, Peter Koziol, Nick Roby,Peter Nebauer, Eric MangusiVoice CharacterizationsTeacher’s <strong>Guide</strong>Teacher’s <strong>Guide</strong> DesignDesk<strong>to</strong>p PublishingEdi<strong>to</strong>rMax - Chris BrownTiny - John MurrayShelby - Monica PassinCassie - Alicia GenetskiCreative Media ApplicationsMichelle NahigianMichelle Nahigian, Keith PlechatyEmilie RappoportSpecial Thanks <strong>to</strong>...Ellen Baru, Cathedral SchoolKaren Bryant, York Central SchoolCarol Churgin, Salt Brook School
Welcome <strong>to</strong> <strong>Type</strong> <strong>to</strong> <strong>Learn</strong> <strong>Jr</strong> ……………………………… 1Network Installation Instructions ………………………… 2Macin<strong>to</strong>sh Universal Binary/Intel …………………… 2System Requirements ……………………………… 2Network Installation ………………………………… 2Client Installation …………………………………… 5Macin<strong>to</strong>sh PowerPC …………………………………… 8System Requirements ……………………………… 8Network Installation ………………………………… 8Client Installation …………………………………… 11Windows ………………………………………………… 13System Requirements ……………………………… 13Network Installation ………………………………… 13Client Installation …………………………………… 16Upgrading from Standalone <strong>to</strong> Network……………… 19Standalone Installation Instructions……………………… 22Windows® ………………………………………………… 22System Requirements ……………………………… 22Standalone Installation ……………………………… 22Macin<strong>to</strong>sh® Universal Binary/Intel …………………… 26System Requirements ……………………………… 26Standalone Installation ……………………………… 26Macin<strong>to</strong>sh® Power PC …………………………………… 28System Requirements ……………………………… 29Standalone Installation ……………………………… 29About This Manual ………………………………………… 31Using <strong>Type</strong> <strong>to</strong> <strong>Learn</strong> <strong>Jr</strong>. …………………………………… 32Getting Started ………………………………………… 32Getting Started - Network ……………………………… 33The Home Screen ………………………………………… 34The <strong>Learn</strong>ing Center …………………………………… 35The Activities ………………………………………… 40Cassie’s Empty Nest ………………………………… 40Hopkins’s Treasure Trove …………………………… 42Tiny’s Flying Feat …………………………………… 44Exiting <strong>Type</strong> <strong>to</strong> <strong>Learn</strong> <strong>Jr</strong>. ………………………………… 49Teacher Options ………………………………………… 50Student Lists ………………………………………… 51Class Lists - Network Version ……………………… 52Student Lists - Network Version …………………… 52Options ……………………………………………… 54
Progress Reports……………………………………… 57Progress Reports - Network Version ……………… 58Change Data File Path - Network Version Only … 58<strong>Type</strong> <strong>to</strong> <strong>Learn</strong> <strong>Jr</strong>. in the Classroom …………………… 60Classroom Management Tips ……………………… 60Limited Computer Time………………………… 60Computer in the Classroom …………………… 60Large Class Size ………………………………… 60Small Groups …………………………………… 60<strong>Learn</strong>ing with <strong>Type</strong> <strong>to</strong> <strong>Learn</strong> <strong>Jr</strong>.……………………… 61Before Playing …………………………………… 61At the Computer ………………………………… 61After Playing …………………………………… 61Extension Activities …………………………………… 63Red Letter, Purple Letter …………………………… 63The Giant Keyboard ………………………………… 65The Home Row …………………………………… 67Right Left Banner …………………………………… 69Which Way Do I Go? ……………………………… 71Chair Toe Touches …………………………………… 73Four-Handed Typing ……………………………… 75Different Sorts …………………………………… 77Ideas from the Alphabet …………………………… 79Where’s the Pair? …………………………………… 81Keyboard Poetry …………………………………… 83Scrambled Sentences………………………………… 85Without Words …………………………………… 87The Art of the Sentence …………………………… 89No-Peek Typing …………………………………… 91Blackline MastersBlackline Master 1: The Keyboard ………………… 93Blackline Master 2: The Big key …………………… 95Blackline Master 3: Alphabet Cards A <strong>to</strong> F ……… 97Blackline Master 4: Alphabet Cards G <strong>to</strong> L ……… 99Blackline Master 5: Alphabet Cards M <strong>to</strong> R ………101Blackline Master 6: Alphabet Cards S <strong>to</strong> X ………103Blackline Master 7: Alphabet Cards Y <strong>to</strong> Z ………105Blackline Master 8: Rhyming Cards 1 ……………107Blackline Master 9: Rhyming Cards 2 ……………109Blackline Master 10: Rhyming Cards 3 …………… 111
<strong>Type</strong> <strong>to</strong> <strong>Learn</strong> ® <strong>Jr</strong>. provides an engaging and informative introduction<strong>to</strong> computer keyboarding skills for young children. The programfeatures a guided learning tu<strong>to</strong>rial and exciting interactivegames <strong>to</strong> motivate early learners.<strong>Type</strong> <strong>to</strong> <strong>Learn</strong> <strong>Jr</strong>. includes:• The <strong>Learn</strong>ing Center, a step-by-step guided introduction <strong>to</strong>the keyboard.• Three playful typing activities designed <strong>to</strong> provide a varietyof challenges and rewards.• Game levels designed <strong>to</strong> enhance students’ progress andprovide new and enjoyable challenges.• Strong support for the development of correct posture andhand placement on the keyboard.• Printable progress reports <strong>to</strong> assess children’s progress andshare their achievement with parents.• Teacher options that allow for the cus<strong>to</strong>mization of classlists and modification of activities <strong>to</strong> match individualneeds.Welcome<strong>to</strong> <strong>Type</strong> <strong>to</strong><strong>Learn</strong> <strong>Jr</strong>.The <strong>Learn</strong>ing Center and activities were developed with children’ssmall hands in mind. The activities build skills in anencouraging environment that helps <strong>to</strong> eliminate frustration.Children are not timed and do not receive strong negative feedbackfor typing incorrect letters. Instead, children are encouragedand rewarded along the way.In addition <strong>to</strong> the valuable program options, the extension activitiesin this manual will help teachers:• Prepare students <strong>to</strong> learn or review <strong>Type</strong> <strong>to</strong> <strong>Learn</strong> <strong>Jr</strong>. skills.• Connect skills learned in <strong>Type</strong> <strong>to</strong> <strong>Learn</strong> <strong>Jr</strong>. with other classroomactivities.• Apply <strong>Type</strong> <strong>to</strong> <strong>Learn</strong> <strong>Jr</strong>. skills <strong>to</strong> other computer programs intheir schools or classrooms.We would love <strong>to</strong> hear from you. Let us know how you and yourstudents use <strong>Type</strong> <strong>to</strong> <strong>Learn</strong> <strong>Jr</strong>. in your classroom. Drop us a line at:Sunburst Technology1550 Executive DriveElgin, IL 60123Visit us on the Web: http://www.sunburst.com<strong>Type</strong> <strong>to</strong> <strong>Learn</strong> <strong>Jr</strong>.1
<strong>Type</strong> <strong>to</strong> <strong>Learn</strong> <strong>Jr</strong>. NetworkMac Intel v1.3n CD Installation TipsYou have just received two <strong>Type</strong> <strong>to</strong> <strong>Learn</strong> <strong>Jr</strong>. Network CDs. Please read carefully <strong>to</strong> determine which version youneed <strong>to</strong> install. Then refer <strong>to</strong> the Network Installation Instructions in the Teacher’s <strong>Guide</strong>.Version 1.3n (Network Universal Binary) is a special version of <strong>Type</strong> <strong>to</strong> <strong>Learn</strong> <strong>Jr</strong>. Network designed <strong>to</strong> support theMac Intel based computers. You only need <strong>to</strong> install this CD if you have Intel Macs that need <strong>to</strong> run <strong>Type</strong> <strong>to</strong><strong>Learn</strong> <strong>Jr</strong>. Network. If you do not have Intel Macs there is no need for you <strong>to</strong> install this CD. Use v1.2n instead.This v1.3n CD should be installed on<strong>to</strong> your server. If you already have an earlier version of <strong>Type</strong> <strong>to</strong> <strong>Learn</strong> <strong>Jr</strong>.Network (v1.2n) installed on your server, the most important item <strong>to</strong> remember when running another serverinstallation is <strong>to</strong> install it in<strong>to</strong> a different location on your server than the earlier install. Installing <strong>Type</strong> <strong>to</strong><strong>Learn</strong> <strong>Jr</strong>. v1.3n over an existing network install will result in the loss of current data and classes.Described below are just two examples of possible scenarios and installation recommendations:1. If you are already running <strong>Type</strong> To <strong>Learn</strong> <strong>Jr</strong>. Network v1.2n on a network of computers andhave added a few Intel Macs <strong>to</strong> your environment, we recommend the following:a. Install <strong>Type</strong> <strong>to</strong> <strong>Learn</strong> <strong>Jr</strong>. CD v1.3n <strong>to</strong> a different location on your server than the currentinstallation. Run the client installation from the new server install on your Intel Macs only.Then on each Intel Mac, enter Teacher’s Options and manually point your data file path <strong>to</strong> the“classes.tjr” folder in the old server location. This will allow your newer Intel Macs <strong>to</strong> accessyour original data.2. If you are running an environment with OS X 10.4.6+ and/or 10.5 Macs and have added many IntelMacs <strong>to</strong> your environment, we recommend the following:a. Install <strong>Type</strong> <strong>to</strong> <strong>Learn</strong> <strong>Jr</strong>. CD v1.3n <strong>to</strong> a different location on your server than the currentinstallation. Make a copy of the shared “classes.tjr” folder from your old server locationand place it inside the new <strong>Type</strong> <strong>to</strong> <strong>Learn</strong> Network folder in the new server location.Delete <strong>Type</strong> <strong>to</strong> <strong>Learn</strong> <strong>Jr</strong>. and all associated files off the client workstations. Run the newclient installation <strong>to</strong> all workstations and choose the “classes.tjr” folder you have justcopied <strong>to</strong> your new server location.TTL <strong>Jr</strong>. versionsMac IntelOSX10.5OXS10.4OXS10.3OXS10.2OXS9.2WinVistaWinXPWin2000Win98v1.3n ✔ ✔ ✔ x x x ✔ ✔ ✔ ✔v1.2n x ✔ ✔ ✔ ✔ ✔ ✔ ✔ ✔ ✔For help with installation or using your <strong>Type</strong> <strong>to</strong> <strong>Learn</strong> product, contact our free Technical Support staff at800-338-3457, Monday-Friday, 7:00am-4:30pm CST. Or email us at: support@sunburst.com.Mac and the Mac logo are trademarksof Apple Inc., registered in the U.S. andother countries.1a<strong>Type</strong> <strong>to</strong> <strong>Learn</strong> <strong>Jr</strong>.
<strong>Type</strong> <strong>to</strong> <strong>Learn</strong> <strong>Jr</strong>. StandaloneMac Intel v1.3s CD Installation TipsYou have just received two <strong>Type</strong> <strong>to</strong> <strong>Learn</strong> <strong>Jr</strong>. CDs. Please read carefully <strong>to</strong> determine which version youneed <strong>to</strong> install. Then refer <strong>to</strong> the Standalone Installation Instructions in the Teacher’s <strong>Guide</strong>.Version 1.3s (Standalone Universal Binary) is a special version of <strong>Type</strong> <strong>to</strong> <strong>Learn</strong> <strong>Jr</strong>. designed <strong>to</strong> supportthe Mac Intel based computers. You only need <strong>to</strong> install this CD if you have Intel Macs that need<strong>to</strong> run <strong>Type</strong> <strong>to</strong> <strong>Learn</strong> <strong>Jr</strong>. If you do not have Intel Macs there is no need for you <strong>to</strong> install this CD. Usev1.1x instead.If you already have <strong>Type</strong> <strong>to</strong> <strong>Learn</strong> <strong>Jr</strong>. installed and running on your PowerPC Macs, there is no need <strong>to</strong>install this CD.This v1.3s CD should be installed on<strong>to</strong> every Intel Mac client machine within your purchased license. Ifyou have purchased a single copy of <strong>Type</strong> <strong>to</strong> <strong>Learn</strong> <strong>Jr</strong>., then you may only install this CD on<strong>to</strong> onemachine. If you have purchased a lab pack or a site license, then you may install it on<strong>to</strong> multiplemachines, as allowed by your license agreement.The Universal Binary version of <strong>Type</strong> <strong>to</strong> <strong>Learn</strong> <strong>Jr</strong>. (version 1.3s) will install and run on Intel Macin<strong>to</strong>shcomputers, Macin<strong>to</strong>sh PowerPCs running at least 10.4.6, as well as Windows machines:TTL <strong>Jr</strong>. versionsMac IntelOSX10.5OXS10.4OXS10.3OXS10.2OXS9.2WinVistaWinXPWin2000Win98v1.3s ✔ ✔ ✔ x x x ✔ ✔ ✔ ✔v1.1x x ✔ ✔ ✔ ✔ ✔ ✔ ✔ ✔ ✔For help with installation or using your <strong>Type</strong> <strong>to</strong> <strong>Learn</strong> product, contact our free Technical Support staff at800-338-3457, Monday-Friday, 7:00am-4:30pm CST. Or email us at: support@sunburst.com.Mac and the Mac logo are trademarksof Apple Inc., registered in the U.S. andother countries.<strong>Type</strong> <strong>to</strong> <strong>Learn</strong> <strong>Jr</strong>.1b
NetworkInstallationInstructionsMacin<strong>to</strong>sh Universal Binary/Intel(use CD-ROM v1.3n)Version 1.3n will install and run on Intel Based Macin<strong>to</strong>sh computersand Macin<strong>to</strong>sh PowerPCs running OSX 10.4.6+ and 10.5.System RequirementsTo use <strong>Type</strong> <strong>to</strong> <strong>Learn</strong> <strong>Jr</strong>. Network, you will need a network of computersrunning:• Macin<strong>to</strong>sh G3 PowerPC or Intel platform• Macin<strong>to</strong>sh OSX 10.4.6 or higher, including 10.5 Leopard• 8MB of RAM or more (minimum)• 1024 x 768 screen resolution recommended,800 x 600 minimum• Ethernet or faster network pro<strong>to</strong>colMacin<strong>to</strong>sh Intel Network InstallationInstallation Instructions <strong>to</strong> a Network File ServerNote: if you are upgrading from the standalone version andwould like <strong>to</strong> keep your data files, please see those upgradeinstructions later in this document.1. Before you install, quit any applications you may haveopen. If you have virus protection, turn it off beforeinstalling <strong>Type</strong> <strong>to</strong> <strong>Learn</strong> <strong>Jr</strong>. Network and turn it back onafter the installation.2. Insert the <strong>Type</strong> <strong>to</strong> <strong>Learn</strong> <strong>Jr</strong>. Network CD v1.3n in<strong>to</strong> a workstation.3. As a user with administra<strong>to</strong>r permissions, connect <strong>to</strong> andmount the network file server volume where you plan <strong>to</strong>install <strong>Type</strong> <strong>to</strong> <strong>Learn</strong> <strong>Jr</strong>.• In the Finder, select ‘Connect <strong>to</strong> Server’ under the “Go”menu. Locate and log in<strong>to</strong> the sharepoint that will act asthe network s<strong>to</strong>rage for <strong>Type</strong> <strong>to</strong> <strong>Learn</strong> <strong>Jr</strong>. Network.Make sure the sharepoint is mounted on your desk<strong>to</strong>pwith read/write permissions.2<strong>Type</strong> <strong>to</strong> <strong>Learn</strong> <strong>Jr</strong>.
4. Double-click the CD icon that appears on the screen andthen double click the Server Installer icon. Click Continue onthe Introduction screen.5. Click Select Folder <strong>to</strong> select the location where you wouldlike <strong>to</strong> install <strong>Type</strong> <strong>to</strong> <strong>Learn</strong> <strong>Jr</strong>. Network.<strong>Type</strong> <strong>to</strong> <strong>Learn</strong> <strong>Jr</strong>.3
9. Make sure the required access privileges are set so that studentsand teachers have both read and write permissions<strong>to</strong> all files and folders in the <strong>Type</strong> <strong>to</strong> <strong>Learn</strong> <strong>Jr</strong>. Network folderon your network server.Macin<strong>to</strong>sh Intel Client Installation(Must be done from each client computer)1. As an administra<strong>to</strong>r of a client workstation, mount theserver volume and folder where <strong>Type</strong> <strong>to</strong> <strong>Learn</strong> <strong>Jr</strong>. Networkwas installed.• In the Finder, select ‘Connect <strong>to</strong> Server’ under the “Go”menu. Locate and log in<strong>to</strong> the sharepoint where <strong>Type</strong> <strong>to</strong><strong>Learn</strong> <strong>Jr</strong>. Network was installed. Make sure the sharepointis mounted on your desk<strong>to</strong>p with read/write permissions.2. Locate and open the <strong>Type</strong> <strong>to</strong> <strong>Learn</strong> <strong>Jr</strong>. Network folder anddouble-click the Client Installer icon. Then click Continue onthe Introduction screen.<strong>Type</strong> <strong>to</strong> <strong>Learn</strong> <strong>Jr</strong>.5
3. Now choose the location on your client workstation whereyou want the client files <strong>to</strong> be installed. The default locationis inside the Applications folder on your Hard Drive.Click Continue <strong>to</strong> choose the default location, or click SelectFolder <strong>to</strong> choose a different location on the workstation.Find that location, double-click on it, and then clickContinue.4. Choose the type of installation you would like <strong>to</strong> perform.You can view your install options by clicking on the EasyInstall drop down menu and selecting Easy or Full Install.After you have selected the installation type, click Install.6<strong>Type</strong> <strong>to</strong> <strong>Learn</strong> <strong>Jr</strong>.
5. The installer will ask you <strong>to</strong> select a folder in<strong>to</strong> which thestudent data (classes.tjr folder) will be s<strong>to</strong>red. The defaultlocation for the data folder is the same folder on the networkfrom which you are running the client installationprogram. If you choose a location other than this default,be sure <strong>to</strong> set the read and write permissions <strong>to</strong> this folder(classes.tjr) for all student and teacher users.Note: The student data path can be changed at any time by usingthe Teacher Options within the program.6. Click the Quit but<strong>to</strong>n once the installation is complete.7. To start the program, open the <strong>Type</strong> <strong>to</strong> <strong>Learn</strong> <strong>Jr</strong>. folder onyour hard drive (not the server) and double-click the programicon.<strong>Type</strong> <strong>to</strong> <strong>Learn</strong> <strong>Jr</strong>.7
Macin<strong>to</strong>sh PowerPC(use CD-ROM version 1.2n)Version 1.2n will install and run on Macin<strong>to</strong>sh Power PCs running9.2, 10.2, 10.3, 10.4, and 10.5. This version is not compatible withIntel Based Macin<strong>to</strong>sh computers.System RequirementsTo use <strong>Type</strong> <strong>to</strong> <strong>Learn</strong> <strong>Jr</strong>. Network you will need a network of computersrunning:• Macin<strong>to</strong>sh System 9.2, 10.2, 10.3, 10.4, or 10.5• G3 PowerPC or higher, (not Intel Mac)• 8 MB of RAM or more (minimum)• 800 x 600 color moni<strong>to</strong>r with thousands ofcolors (minimum)• Ethernet or faster Network pro<strong>to</strong>colMacin<strong>to</strong>sh PowerPC Network InstallationInstallation Instructions <strong>to</strong> a Network File Server1. Before you install, quit any applications you may haveopen. If you have virus protection, turn it off beforeinstalling <strong>Type</strong> <strong>to</strong> <strong>Learn</strong> <strong>Jr</strong>. Network and turn it back onafter the installation.2. Insert the <strong>Type</strong> <strong>to</strong> <strong>Learn</strong> <strong>Jr</strong>. Network CD v1.2n in<strong>to</strong> yourCD-ROM drive.3. Connect <strong>to</strong> and mount the network file server volumewhere you plan <strong>to</strong> install the program.• In the Finder, select ‘Connect <strong>to</strong> Server’ under the “Go”menu. Locate and log in<strong>to</strong> the sharepoint that will act asthe network s<strong>to</strong>rage for <strong>Type</strong> <strong>to</strong> <strong>Learn</strong> <strong>Jr</strong>. Network.Make sure the sharepoint is mounted on your desk<strong>to</strong>pwith read/write permissions.8<strong>Type</strong> <strong>to</strong> <strong>Learn</strong> <strong>Jr</strong>.
4. Double-click the CD icon that appears on the screen andthen the Server Installer icon. Then click Continue on theIntroduction screen.5. Click on the Install Location drop down <strong>to</strong> select the locationon your server where you would like <strong>to</strong> install <strong>Type</strong> <strong>to</strong><strong>Learn</strong> <strong>Jr</strong>. Network.<strong>Type</strong> <strong>to</strong> <strong>Learn</strong> <strong>Jr</strong>.9
6. Navigate <strong>to</strong> the network server volume that you mountedon your desk<strong>to</strong>p and choose a location on that volumewhere the contents of the program are <strong>to</strong> be s<strong>to</strong>red, thenclick Choose.7. Click Install <strong>to</strong> install <strong>Type</strong> <strong>to</strong> <strong>Learn</strong> <strong>Jr</strong>. Network <strong>to</strong> yourselected server location. A folder entitled “<strong>Type</strong> <strong>to</strong> <strong>Learn</strong> <strong>Jr</strong>.Network” will au<strong>to</strong>matically be created in your serverlocation.8. Click Quit once the installation is complete and eject theCD-ROM.9. Make sure the required access privileges are set so that studentsand teachers have read and write permissions <strong>to</strong> allfiles and folders in the <strong>Type</strong> <strong>to</strong> <strong>Learn</strong> <strong>Jr</strong>. Network folder onyour network server.10<strong>Type</strong> <strong>to</strong> <strong>Learn</strong> <strong>Jr</strong>.
Macin<strong>to</strong>sh PowerPC Client Installation(Must be done from each client computer)1. From a client workstation, mount the server volume andfolder where <strong>Type</strong> <strong>to</strong> <strong>Learn</strong> <strong>Jr</strong>. Network was installed.• In the Finder, select ‘Connect <strong>to</strong> Server’ under the “Go”menu. Locate and log in<strong>to</strong> the sharepoint where <strong>Type</strong> <strong>to</strong><strong>Learn</strong> <strong>Jr</strong>. Network was installed. Make sure the sharepointis mounted on your desk<strong>to</strong>p with read/write permissions.2. Locate the <strong>Type</strong> <strong>to</strong> <strong>Learn</strong> <strong>Jr</strong>. Network folder and doubleclickthe Client Installer icon. Then click Continue.3. Click the Select Folder option in the Install Location dropdown<strong>to</strong> choose a location other than the default on yourclient workstation where you want the client files <strong>to</strong> beinstalled. The default location is in the root of your HardDrive.<strong>Type</strong> <strong>to</strong> <strong>Learn</strong> <strong>Jr</strong>.11
4. Choose the type of installation you would like <strong>to</strong> perform.You can view your install options by clicking on the EasyInstall drop down menu and selecting Easy or Cus<strong>to</strong>m(choosing Cus<strong>to</strong>m will allow you <strong>to</strong> do a full installation ofthe program).5. Click Install.6. The installer will ask you <strong>to</strong> select a folder in<strong>to</strong> which thestudent data (classes.tjr folder) will be s<strong>to</strong>red. The defaultlocation for the data folder is the same folder on the networkfrom which you are running the client installationprogram. If you choose a different location, you must setthe read and write permissions <strong>to</strong> this folder for all studentand teacher users.12<strong>Type</strong> <strong>to</strong> <strong>Learn</strong> <strong>Jr</strong>.
7. Click Choose.Note: The student data path can be changed at any time by usingthe Teacher Options within the program.8. To start the program, open the <strong>Type</strong> <strong>to</strong> <strong>Learn</strong> <strong>Jr</strong>. folder onyour hard drive (not the server) and double-click the programicon.Windows(use either CD-ROM version 1.2n or 1.3n)System RequirementsTo use <strong>Type</strong> <strong>to</strong> <strong>Learn</strong> <strong>Jr</strong>. Network, you will need a network ofcomputers running:• Windows 98, 2000, XP, or Vista• 80486 DX2 66Mhz processor or faster• 8MB of RAM or more (minimum)• 800 x 600 color moni<strong>to</strong>r with 256 colors (minimum)• Ethernet or faster network pro<strong>to</strong>colWindows Network InstallationInstallation Instructions <strong>to</strong> a Network File Server1. Before you install, quit any applications you may haveopen. If you have virus protection, turn it off beforeinstalling <strong>Type</strong> <strong>to</strong> <strong>Learn</strong> <strong>Jr</strong>. Network and turn it back onafter the installation.2. Insert the <strong>Type</strong> <strong>to</strong> <strong>Learn</strong> <strong>Jr</strong>. Network CD in<strong>to</strong> your CD-ROM drive.3. Open Network Neighborhood or My Network Places andselect and map the network file server volume where youplan <strong>to</strong> install <strong>Type</strong> <strong>to</strong> <strong>Learn</strong> <strong>Jr</strong>. Network. To map a networkvolume, right-click the volume and choose Map NetworkDrive.<strong>Type</strong> <strong>to</strong> <strong>Learn</strong> <strong>Jr</strong>.13
4. Click My Computer, then double-click the <strong>Type</strong> <strong>to</strong> <strong>Learn</strong> <strong>Jr</strong>.Network CD icon, and then double-click Setup.exe.5. Leave the <strong>to</strong>p option selected and click Next.6. Click Next again.7. Select the location where you would like <strong>to</strong> install <strong>Type</strong> <strong>to</strong><strong>Learn</strong> <strong>Jr</strong>. Network. Click Browse and navigate <strong>to</strong> the networkserver volume that you have mapped. Then choose alocation on that volume where you want the contents of the14<strong>Type</strong> <strong>to</strong> <strong>Learn</strong> <strong>Jr</strong>.
program <strong>to</strong> be s<strong>to</strong>red and click OK. Then click Next. A folderentitled TTL_JR will be created in this location.8. Click Finish when installation is complete.9. Make sure the required access privileges are set so that studentsand teachers have read, file scan, write, delete, createand modify rights <strong>to</strong> all files and folders in the TTL_JRfolder.Note: If you are using a Novell Netware file server, it is necessary<strong>to</strong> flag all the files in the folder <strong>to</strong> which you have installed<strong>Type</strong> <strong>to</strong> <strong>Learn</strong> <strong>Jr</strong>. Network (and its sub-folder) as “shared.” If thisis not done, no more than one user will be able <strong>to</strong> run the programconcurrently. Additionally, the rights should be set forguest access. Since it is very often the intention of a network program<strong>to</strong> provide a location common <strong>to</strong> all users <strong>to</strong> s<strong>to</strong>re studentdata files, be sure <strong>to</strong> set up access <strong>to</strong> a common direc<strong>to</strong>ry.<strong>Type</strong> <strong>to</strong> <strong>Learn</strong> <strong>Jr</strong>.15
Windows Client Installation(Must be performed from each client computer)1. From a client workstation, open Network Neighborhoodor My Network Places and navigate <strong>to</strong> the volume where<strong>Type</strong> <strong>to</strong> <strong>Learn</strong> <strong>Jr</strong>. Network was installed.2. Map the volume containing the TTL_JR folder.3. Open the folder TTL_JR, and double-click setup.exe.4. Click Next in the Welcome screen.16<strong>Type</strong> <strong>to</strong> <strong>Learn</strong> <strong>Jr</strong>.
5. The installer will ask you <strong>to</strong> select a location <strong>to</strong> s<strong>to</strong>re your<strong>Type</strong> <strong>to</strong> <strong>Learn</strong> <strong>Jr</strong>. data files (classes.tjr folder). The defaultlocation for the data folder is the same folder from whichyou are running the client installation program. You mayuse the Browse but<strong>to</strong>n <strong>to</strong> locate a different data files path.If you choose a different location, you must set the read,file scan, write, delete, create and modify rights <strong>to</strong> this folderfor all student and teacher users.6. Now choose the location on your client workstation whereyou want the client files <strong>to</strong> be placed. The default locationis c:\<strong>Type</strong> To <strong>Learn</strong> <strong>Jr</strong> (where c: is your hard drive). It is recommendedthat you use the default location, or you canclick Browse <strong>to</strong> choose a different location. Then click Next.<strong>Type</strong> <strong>to</strong> <strong>Learn</strong> <strong>Jr</strong>.17
7. Choose the type of installation you would like <strong>to</strong> perform(Minimal, Standard, or Full). We recommend a Full installationfor best performance. Then click Next.8. Select a folder in which <strong>to</strong> place the program icon, or clickNext <strong>to</strong> use the default location. The default is c:/ProgramFolders/Sunburst, where c is your Hard Drive.9. Click Finish on the Setup Complete window.10. To start the program click on:Start/Programs/Sunburst/<strong>Type</strong> <strong>to</strong> <strong>Learn</strong> <strong>Jr</strong>. Network.Alternatively, you can open the folder where you haveinstalled <strong>Type</strong> <strong>to</strong> <strong>Learn</strong> <strong>Jr</strong>. Network and double-click theprogram icon.Note: The network drive that is hosting <strong>Type</strong> <strong>to</strong> <strong>Learn</strong> <strong>Jr</strong>.Network MUST be mapped <strong>to</strong> the same drive letter each time theprogram is launched or the program will not run correctly.18<strong>Type</strong> <strong>to</strong> <strong>Learn</strong> <strong>Jr</strong>.
Special Note <strong>to</strong> Windows NT or Windows 2000 Users:When running this program’s client installer under Windows NTor Windows 2000, you must be logged in with administra<strong>to</strong>r privileges.If you are not, you may be unable <strong>to</strong> complete the installation.In this case, you will see a message dialog that says, “Setupfailed <strong>to</strong> launch installation engine. Class not registered.”Upgrading from <strong>Type</strong> <strong>to</strong> <strong>Learn</strong> <strong>Jr</strong>. Standalone <strong>to</strong> NetworkIf you are upgrading from <strong>Type</strong> <strong>to</strong> <strong>Learn</strong> <strong>Jr</strong>. Standalone <strong>to</strong> theNetwork version, you may want <strong>to</strong> keep your student data. To dothis:1. Uninstall <strong>Type</strong> <strong>to</strong> <strong>Learn</strong> <strong>Jr</strong>. from a student computer. Notethat the student data files are s<strong>to</strong>red in the folder in whichthe standalone program resided. Therefore, you do NOTwant <strong>to</strong> delete the “Classes.tjr” folder within this folder. Ifyou delete this folder, you will lose all the student data onthat computer. The Windows Uninstall program is safe <strong>to</strong>run, since it does NOT remove the student data files.Example:Win:<strong>Type</strong> <strong>to</strong> <strong>Learn</strong> <strong>Jr</strong>. is sitting in C:\TTL_<strong>Jr</strong> , and the data filesare in C:\TTL_<strong>Jr</strong>\Classes.tjr.Mac:<strong>Type</strong> <strong>to</strong> <strong>Learn</strong> <strong>Jr</strong>. is sitting in Harddrive:<strong>Type</strong> <strong>to</strong> <strong>Learn</strong> <strong>Jr</strong>.,and the data files are inHarddrive: <strong>Type</strong> <strong>to</strong> <strong>Learn</strong> <strong>Jr</strong>:Classes.tjr.To uninstall the standalone version, you want <strong>to</strong> throwaway the contents of Harddrive:<strong>Type</strong> <strong>to</strong> <strong>Learn</strong> <strong>Jr</strong>. EXCEPTfor the Classes.tjr folder. You also want <strong>to</strong> remove the <strong>Type</strong><strong>to</strong> <strong>Learn</strong> <strong>Jr</strong>. Prefs file residing in Harddrive:SystemFolder:Preferences.<strong>Type</strong> <strong>to</strong> <strong>Learn</strong> <strong>Jr</strong>.19
2. Install <strong>Type</strong> <strong>to</strong> <strong>Learn</strong> <strong>Jr</strong>. Network <strong>to</strong> a student computer andnote the data files path that you selected.Example: The data files for the network version are s<strong>to</strong>redat:Win: F:\TTLJRNET\Classes.tjrMac: Network:<strong>Type</strong> <strong>to</strong> <strong>Learn</strong> <strong>Jr</strong> Network:Classes.tjr3. Navigate <strong>to</strong> the folder containing the data files that youselected in the previous step. Inside that folder will be afolder called “Classes.tjr.” Open “Classes.tjr.”Example:Win: Navigate <strong>to</strong> F:\TTLJRNET\Classes.tjr usingExplorer.Mac: Navigate <strong>to</strong> Network:<strong>Type</strong> <strong>to</strong> <strong>Learn</strong> <strong>Jr</strong> Network:Classes.tjr using the Finder.4. Now go back <strong>to</strong> the computer’s hard drive and open thefolder that the standalone version had resided in (wherethe old data files are located — mentioned in step 1). Therewill be a folder inside this called “Classes.tjr.” Inside“Classes.tjr” is a folder called “Default.” COPY the“Default” folder on the student’s hard drive in<strong>to</strong> the network“Classes.tjr” folder from step 3. You want <strong>to</strong> copy thefolder rather than move it. That way, if an error occurs, thedata is not destroyed.Example:Win: Copy C:\TTL_<strong>Jr</strong>\Classes.tjr\Default <strong>to</strong> F:\TTLJR-NET\Classes.tjrMac: Copy Harddrive:<strong>Type</strong> <strong>to</strong> <strong>Learn</strong> <strong>Jr</strong>:Classes.tjr:Default<strong>to</strong> Network:<strong>Type</strong> <strong>to</strong> <strong>Learn</strong> <strong>Jr</strong> Network:Classes.tjr20<strong>Type</strong> <strong>to</strong> <strong>Learn</strong> <strong>Jr</strong>.
5. For every additional computer with student data that youwould like <strong>to</strong> move <strong>to</strong> the network version, do steps 1 and2. Then as in step 4, you want <strong>to</strong> open the “Classes.tjr” folderwithin the standalone version’s installation folder.Rename the “Default” folder on the student’s hard drive <strong>to</strong>any other name that is 8 characters or less. You will have achance <strong>to</strong> give the classes longer names once you can accessthem from the teacher options in <strong>Type</strong> <strong>to</strong> <strong>Learn</strong> <strong>Jr</strong>. ThenCOPY the entire folder in<strong>to</strong> the network “Classes.tjr”folder.Example:Win: Rename C:\TTL_<strong>Jr</strong>\Classes.tjr\Default <strong>to</strong>C:\TTL_<strong>Jr</strong>\Classes.tjr\Class1Copy C:\TTL_<strong>Jr</strong>\Classes.tjr\Class1 <strong>to</strong>F:\TTLJRNET\Classes.tjrMac: Rename Harddrive:<strong>Type</strong> <strong>to</strong> <strong>Learn</strong><strong>Jr</strong>:Classes.tjr:Default <strong>to</strong> Harddrive:<strong>Type</strong> <strong>to</strong> <strong>Learn</strong><strong>Jr</strong>:Classes.tjr:Class1Copy Harddrive:<strong>Type</strong> <strong>to</strong> <strong>Learn</strong> <strong>Jr</strong>:Classes.tjr:Class1 <strong>to</strong>Network:<strong>Type</strong> <strong>to</strong> <strong>Learn</strong> <strong>Jr</strong> Network:Classes.tjr6. After you have copied all the standalone student data in<strong>to</strong>the network data folder, run <strong>Type</strong> <strong>to</strong> <strong>Learn</strong> <strong>Jr</strong>. Networkfrom any computer. There should be one class for each se<strong>to</strong>f student data files you moved. Note that you can haveonly 15 classes with 40 students in each. If there are morethan 15 classes or 40 students they will NOT appear in thelogin screen. However, they will appear in teacher options.From the teacher options, you will want <strong>to</strong> move all the studentsin<strong>to</strong> 15 or fewer classes and then delete the emptyclasses.To avoid future confusion, it is important that you have at most 15classes with 40 students in each of them. You may also renameany classes or students at this time.<strong>Type</strong> <strong>to</strong> <strong>Learn</strong> <strong>Jr</strong>.21
StandaloneInstallationInstructionsWindows ®(use either CD-ROM version 1.1x or 1.3s)System Requirements• 80486 DX/2 66 processor or better• Windows 98, 2000, XP, or Vista• 8 MB minimum of available RAM• 60 MB minimum of free hard drive space, dependingon installation (see below)• Windows compatible Sound card• 4X CD-ROM drive or faster• 1024 x 768 screen resolution recommended, 800 x 600supportedWindows Standalone Installation1. Before you install, quit any applications you may haveopen. If you have virus protection, turn it off beforeinstalling <strong>Type</strong> <strong>to</strong> <strong>Learn</strong> <strong>Jr</strong>. and turn it back on after theinstallation.2. Place the CD in the CD-ROM drive and double-click the<strong>Type</strong> <strong>to</strong> <strong>Learn</strong> <strong>Jr</strong>. CD icon in My Computer.3. Double-click Setup.exe.4. Click Next in the Welcome screen.22<strong>Type</strong> <strong>to</strong> <strong>Learn</strong> <strong>Jr</strong>.
5. Select the location on your computer where you would like<strong>to</strong> install <strong>Type</strong> <strong>to</strong> <strong>Learn</strong> <strong>Jr</strong>. Click Browse <strong>to</strong> navigate <strong>to</strong> a newlocation or accept the default location which is the root ofyour hard drive. A folder entitled <strong>Type</strong> <strong>to</strong> <strong>Learn</strong> <strong>Jr</strong>. will becreated in this location. Then click Next.<strong>Type</strong> <strong>to</strong> <strong>Learn</strong> <strong>Jr</strong>.23
6. Choose the type of setup: Minimal, Standard, or Full. Werecommend Full installation for greatest performance. Thenclick Next.• Choose Minimal if you have very limited hard drive space.With the Minimal installation, you must have the CD in theCD-ROM drive <strong>to</strong> use <strong>Type</strong> <strong>to</strong> <strong>Learn</strong> <strong>Jr</strong>., and program performanceis slower; however, you will need only 1 MB ofhard drive space.• Standard installation gives better performance, but youmust still have the CD in the CD-ROM drive <strong>to</strong> use <strong>Type</strong> <strong>to</strong><strong>Learn</strong> <strong>Jr</strong>. You will need 3 MB of hard drive space.• Choose Full <strong>to</strong> install the full program on your hard drive,for best performance. The Full installation requires 60 MBof hard drive space, and you will not need the CD in theCD-ROM drive <strong>to</strong> use the program.24<strong>Type</strong> <strong>to</strong> <strong>Learn</strong> <strong>Jr</strong>.
7. Select a folder in which <strong>to</strong> place the program icon, orclick Next <strong>to</strong> use the default location. The default isc:/Program Folders/Sunburst, where c is your Hard Drive.8. When setup is complete, click Finish.9. Launch the program by going <strong>to</strong> Start / Programs / Sunburst/ <strong>Type</strong> <strong>to</strong> <strong>Learn</strong> <strong>Jr</strong>. Alternatively, you can open the folderwhere you have installed <strong>Type</strong> <strong>to</strong> <strong>Learn</strong> <strong>Jr</strong>. and double-clickthe program icon.<strong>Type</strong> <strong>to</strong> <strong>Learn</strong> <strong>Jr</strong>.25
Macin<strong>to</strong>sh Universal Binary/Intel(use CD-ROM version 1.3s)The Universal Binary version of <strong>Type</strong> <strong>to</strong> <strong>Learn</strong> <strong>Jr</strong>. Standalone (version1.3s) will install and run on Intel Based Macin<strong>to</strong>sh computersas well as Macin<strong>to</strong>sh PowerPCs running OSX 10.4.6+ and 10.5.System Requirements• Macin<strong>to</strong>sh G3 PowerPC or Intel platform• Macin<strong>to</strong>sh OSX 10.4.6 or higher, including 10.5 Leopard• 8MB of RAM or more (minimum)• 1024 x 768 screen resolution recommended, 800 x 600supportedMacin<strong>to</strong>sh Intel Standalone Installation:1. Before you install, quit any applications you have open. If youhave virus protection, turn it off before installing <strong>Type</strong> <strong>to</strong><strong>Learn</strong> <strong>Jr</strong>. and turn it back on after installation.2. Insert the <strong>Type</strong> <strong>to</strong> <strong>Learn</strong> <strong>Jr</strong>. CD in<strong>to</strong> your CD-ROM drive anddouble-click the program icon.3. Double-click the Installer icon.4. Installing this program on OS X requires an Admin user nameand password. Enter yours and click OK <strong>to</strong> continue.26<strong>Type</strong> <strong>to</strong> <strong>Learn</strong> <strong>Jr</strong>.
5. Click Continue in the Introduction screen.6. By default, <strong>Type</strong> <strong>to</strong> <strong>Learn</strong> <strong>Jr</strong>. will be installed in<strong>to</strong> yourApplications folder. If you wish, you may select a differentlocation on your hard drive <strong>to</strong> install the files in<strong>to</strong>, by clickingSelect Folder. Once you have selected a folder, click Continue.<strong>Type</strong> <strong>to</strong> <strong>Learn</strong> <strong>Jr</strong>.27
7. Click Install <strong>to</strong> perform a standard installation. This is the onlytype of installation available.8. When you see the message that the software was successfullyinstalled, click Quit <strong>to</strong> exit the installer.9. To start the program, open the <strong>Type</strong> <strong>to</strong> <strong>Learn</strong> <strong>Jr</strong>. folder on yourhard drive and double-click the program icon.Macin<strong>to</strong>sh PowerPC(use CD-ROM version 1.1x)<strong>Type</strong> <strong>to</strong> <strong>Learn</strong> <strong>Jr</strong>. version 1.1x will install and run on Macin<strong>to</strong>shPowerPCs running 9.2, 10.2, 10.3, 10.4, and 10.5. This version isnot compatible with Intel Based Macin<strong>to</strong>sh computers.28<strong>Type</strong> <strong>to</strong> <strong>Learn</strong> <strong>Jr</strong>.
System Requirements:• G3 PowerPC or higher (not Intel Mac)• Macin<strong>to</strong>sh System 9.2, 10.2, 10.3, 10.4, and 10.5• 8 MB of RAM or more (minimum)• 1024 x 768 recommended screen resolution, 800 x 600supportedMacin<strong>to</strong>sh PowerPC Standalone Installation:1. Before you install, quit any applications you have open. If youhave virus protection, turn it off before installing <strong>Type</strong> <strong>to</strong><strong>Learn</strong> <strong>Jr</strong>. and turn it back on after installation.2. Insert the <strong>Type</strong> <strong>to</strong> <strong>Learn</strong> <strong>Jr</strong>. CD in<strong>to</strong> your CD-ROM drive anddouble-click the program icon.3. Double-click the <strong>Type</strong> <strong>to</strong> <strong>Learn</strong> <strong>Jr</strong>. Installer icon.4. If a password is requested, enter your username and passwordfor your computer. The <strong>Type</strong> <strong>to</strong> <strong>Learn</strong> <strong>Jr</strong>. installer launches.<strong>Type</strong> <strong>to</strong> <strong>Learn</strong> <strong>Jr</strong>.29
5. Click Continue.6. Choose Easy Install or Cus<strong>to</strong>m Install from the drop-downmenu at the <strong>to</strong>p.• If you choose Cus<strong>to</strong>m Install, then select either Easy or FullInstall. We recommend performing the Full Install.7. Choose an install location from the drop-down menu at thebot<strong>to</strong>m. Then click Install.8. When the program is successfully installed you will see thismessage. Click Quit <strong>to</strong> exit the installer.9. To start the program, open the <strong>Type</strong> <strong>to</strong> <strong>Learn</strong> <strong>Jr</strong>. folder on yourhard drive and double-click the program icon.30<strong>Type</strong> <strong>to</strong> <strong>Learn</strong> <strong>Jr</strong>.
This manual is designed <strong>to</strong> help you use <strong>Type</strong> <strong>to</strong> <strong>Learn</strong> <strong>Jr</strong>. with yourclass. It is divided in<strong>to</strong> two sections.Using <strong>Type</strong> <strong>to</strong> <strong>Learn</strong> <strong>Jr</strong>.How <strong>to</strong> use the <strong>Type</strong> <strong>to</strong> <strong>Learn</strong> <strong>Jr</strong>. program features. This sectiondescribes the but<strong>to</strong>ns, options, and activities that are available inthe program.About ThisManual<strong>Type</strong> <strong>to</strong> <strong>Learn</strong> <strong>Jr</strong>. in the ClassroomHow <strong>to</strong> integrate <strong>Type</strong> <strong>to</strong> <strong>Learn</strong> <strong>Jr</strong>. in<strong>to</strong> you classroom routine. Thissection provides classroom management tips and a variety ofactivities and blackline masters designed <strong>to</strong> introduce and explorethe concepts featured in the program.<strong>Type</strong> <strong>to</strong> <strong>Learn</strong> <strong>Jr</strong>.31
Using <strong>Type</strong><strong>to</strong> <strong>Learn</strong> <strong>Jr</strong>.Getting StartedThe Sunbuddies guide children through the log-in process.Children double-click the <strong>Type</strong> <strong>to</strong> <strong>Learn</strong> <strong>Jr</strong>. icon <strong>to</strong> launch the program.The animated title screen appears followed by the Log-inscreen. Children can press the spacebar at any time <strong>to</strong> interruptthe animation and go on.TIP: Pressing the space barwill end the animationTIP: Press Ctrl + Tanywhere in theprogram <strong>to</strong> accessteacher controlsA child who has previously used the program can locate his or hername on the list, highlight it, and click DONE. Children can alsodouble-click their names <strong>to</strong> begin.New users type their names and click DONE.Press Control+T <strong>to</strong> access Teacher Controls (see page 50 for moreinformation).32<strong>Type</strong> <strong>to</strong> <strong>Learn</strong> <strong>Jr</strong>.
Getting Started - NetworkThe very first time <strong>Type</strong> <strong>to</strong> <strong>Learn</strong> <strong>Jr</strong>. Network is run there will beno classes or students entered in the program. When the programgets <strong>to</strong> the Log-in screen it will look like the standalone version. Ifstudents add their names at this point they will be entered in aDefault class. If you do not ever want <strong>to</strong> have more than one class,you may just want <strong>to</strong> continue <strong>to</strong> have them enter their names inthe Default class. This way they do not have <strong>to</strong> ever select a class.However, if you want <strong>to</strong> have more than one class or you specificallywant students <strong>to</strong> select a class, see the Adding Classes sectionof Teacher Options. Although students can add their ownnames at the Log-in screen, they cannot add new classes.If both the class list and the student list are showing at the Log-inscreen, the child must first select his/her class from the class lis<strong>to</strong>n the left.A child who has previously used the program can locate his/hername in the student list once the class list has been selected.He/She can then highlight it and click Done. Children can alsodouble-click their names <strong>to</strong> begin.New users type their names in the New Student box and clickDone. Names entered this way will be available the next time theprogram is run.Note: Children must select a Class name before they can type intheir new student name.Press Control-T <strong>to</strong> access Teacher Options.<strong>Type</strong> <strong>to</strong> <strong>Learn</strong> <strong>Jr</strong>.33
The Home ScreenThe Home screen appears after a child logs in.The Home screen is the starting place for every <strong>Type</strong> <strong>to</strong> <strong>Learn</strong> <strong>Jr</strong>.exploration. Children click the screen <strong>to</strong> choose from these fouroptions.Current UserThe <strong>Learn</strong>ing CenterTiny’s Flying FeatHopkins’s Treasure TroveCassie’s Empty NestQuitHelpReturn <strong>to</strong> Log-in Screen• The <strong>Learn</strong>ing Center provides a guided tu<strong>to</strong>rial about theentire keyboard. Children learn about key positions as wellas correct posture and hand placement.• Cassie’s Empty Nest provides beginning practice with typingsets of letters and numbers with the right or left hand.• Hopkins’s Treasure Trove provides intermediate practicewith typing both lowercase and uppercase letters.• Tiny’s Flying Feat provides advanced practice with recognizingand typing rhyming words.34<strong>Type</strong> <strong>to</strong> <strong>Learn</strong> <strong>Jr</strong>.
The <strong>Learn</strong>ing CenterThe <strong>Learn</strong>ing Center presents a guided introduction <strong>to</strong> the keyboard.In addition <strong>to</strong> learning key locations, the Sunbuddies provideimportant hints and guidelines for correct posture and handpositions.When children arrive at The <strong>Learn</strong>ing Center screen, Tiny gives aposture hint. Press the space bar <strong>to</strong> interrupt the message and continue.When children return <strong>to</strong> The <strong>Learn</strong>ing Center, they beginwhere they left off in their previous sessions.Letter BannerLeft-HandKeysRight-Hand KeysHelpPrint Progress CertificateThe <strong>Learn</strong>ing Center introduces keys and <strong>to</strong>pics in this order:• lowercase letters (in alphabetical order)• numbers (for 0-9)• shift key <strong>to</strong> type uppercase• punctuation marks (period, exclamation point, andquestion mark)• space bar and Enter/Return <strong>to</strong> type sentencesThe <strong>Learn</strong>ing Center displays a color-coded keyboard that helpschildren remember proper hand placement. Prompts remindthem <strong>to</strong> use their left hands <strong>to</strong> press any red key and their righthands <strong>to</strong> press any purple key.<strong>Type</strong> <strong>to</strong> <strong>Learn</strong> <strong>Jr</strong>.35
Sunbuddies introduce letters one at a time. To teach a letter, aSunbuddy names the letter and highlights it on the (on-screen)keyboard. As children type the letter, it appears on the screenviewer. When children fill each letter position, a picture appearsshowing an object that begins with the letter.The Letter Banner at the <strong>to</strong>p of the screen shows letters alreadylearned by the child. Children can click any highlighted letter inthe Letter Banner <strong>to</strong> review a previously learned letter.These alphabet pictures appear in The <strong>Learn</strong>ing Center viewer:ant butterfly cake dog eggsfish grapes hippo inchworm juicekitten lollipop moon nuts oc<strong>to</strong>puspear queen robot snail telephoneunicorn volcano whale x-ray yakzap(A full set of pic<strong>to</strong>rial alphabet cards appears on Blackline Masters 3-7on page s 97-105 of this guide.)As additional practice, between some lessons, children will typewords using the letters they have learned.After children learn the 26 lowercase letters, they practice numbers.The Sunbuddies introduce a number and children type it <strong>to</strong>make the numeral in the viewer.Return <strong>to</strong> AlphabetNumber Banner36<strong>Type</strong> <strong>to</strong> <strong>Learn</strong> <strong>Jr</strong>.
Children can use the Number Banner <strong>to</strong> see the numbers alreadylearned. Click any highlighted number <strong>to</strong> review a previouslylearned number. Click the Arrow at the <strong>to</strong>p left of the screen <strong>to</strong>return <strong>to</strong> studying the alphabet. Children can then click any letterin the Letter Banner <strong>to</strong> review that letter.After children learn the 10 numbers, they learn how <strong>to</strong> createuppercase letters using the shift key. Children practice typingcombinations of upper- and lowercase letters, such as: PPPPppppor NNnnNNnn.Next, children learn punctuation marks: period, exclamationpoint, and question mark. They type combinations of marks (suchas !!??!!??) and simple words (such as Cool! or Who?)The last lessons in The <strong>Learn</strong>ing Center introduce the space barand Enter/Return keys. Children practice typing simple sentences,such as This is great! or The lamp is on.When children complete all of the lessons, they can print a certificate.Click Yes <strong>to</strong> print the certificate now. Click No <strong>to</strong> return <strong>to</strong>the Home screen without printing the certificate.Progress CertificatesChildren click Print on The <strong>Learn</strong>ing Center screen <strong>to</strong> print a certificatethat shows completed lessons. Children can return <strong>to</strong> The<strong>Learn</strong>ing Center at any time <strong>to</strong> print their certificates.Teachers can also reviewand print children’sprogress certificates fromTeacher Options. See page50 for more information.Note: For the capital letters,punctuation and sentences,the certificate will reflectwhether or not a student hascompleted the entire section.<strong>Type</strong> <strong>to</strong> <strong>Learn</strong> <strong>Jr</strong>.37
The <strong>Learn</strong>ing Center Words and SentencesStudents type words after sets of lessons in The <strong>Learn</strong>ing Center.after A through Eacebadbeadbedbeecabdabdaddeedafter K through Obonekidlicklidmanminemoonnicenodafter F through Jfacefadfadefeedfighadhidhidejigafter P through TdeskflipnestpastratsadstarstemtripStudents type words and sentences during these lessons in The<strong>Learn</strong>ing Center.during Punctuation lessonsCome!Cool!Good!Great!Hello!Hurry!Nice!Oops!Wow!Zap!How?Now?Really?What?When?Where?Who?Why?38<strong>Type</strong> <strong>to</strong> <strong>Learn</strong> <strong>Jr</strong>.
during Sentence lessonsThe camp is full.The dog is sad.The jet is far.The lamp is on.The mop is wet.The pet is fat.The sink is pink.The sock is red.The star is far.The sun is hot.The wig is big.Be careful!Hello there!Hold on!I am ready!Look over there!Nice work!This is fun!This is great!Watch out!Watch your step!You can do it!You win!Are we there?Are you hungry?Are you there?Can you play?How are you?Is it easy?Is it hard?What is it?What time is it?When is it?Where is it?Who is it?<strong>Type</strong> <strong>to</strong> <strong>Learn</strong> <strong>Jr</strong>.39
The ActivitiesCassie’s Empty NestA strong breeze blows Cassie’s colorful items out of her nest.Children type target letters and numbers <strong>to</strong> help Cassie fill hernest again. Cassie’s game offers basic challenges for beginningkeyboarders, emphasizing right-hand and left-hand placement.The typing targets are letter combinations, not words. These targetsallow children <strong>to</strong> focus on letter placement without concentratingon word and reading skills.LevelHomeStartHelpClick Level <strong>to</strong> change the game level.Click Start <strong>to</strong> begin play.Click Home <strong>to</strong> return <strong>to</strong> the Home screen.Click Help <strong>to</strong> get help.When children click Start, a brief animation shows Cassie’s itemsblowing out of her nest. Then her game screen appears.Children type the target cluster. Each time they complete anotherthree-letter or number group, Cassie brings one of her items back<strong>to</strong> her nest.40<strong>Type</strong> <strong>to</strong> <strong>Learn</strong> <strong>Jr</strong>.
Click Level <strong>to</strong> change the game level. Each game level presents aunique typing focus:• Level 1: Target clusters are the same (e.g., mmm, eee or555).• Level 2: Target clusters are typed with one hand on onerow (e.g., left hand: asd or 344; right hand: jkl or ppo).• Level 3: Target clusters are typed with one hand on morethan one row (e.g. , left hand: edc or d36; right hand: mkoor hy8).LevelTarget ClusterHelpHomeThroughout the game, Cassie provides hints <strong>to</strong> help children whohave difficulty finding and typing the correct letters and numbers.<strong>Type</strong> <strong>to</strong> <strong>Learn</strong> <strong>Jr</strong>.41
Hopkins’s Treasure TroveChildren type letters <strong>to</strong> help Hopkins dig tunnels and recover hislost treasures. Hopkins’s game offers intermediate challenges forbeginning keyboarders that emphasize the position of letters inthe upper, middle, and lower keyboard rows. Hopkins digs up ordown when children type a key on the <strong>to</strong>p or bot<strong>to</strong>m letter row onthe keyboard, reinforcing key position memory. Level one reinforcesproper hand positioning by using only letters located onthe “home row,” the letters in the middle row on which fingersshould rest.LevelHomeStartHelpClick Level <strong>to</strong> change the game level.Click Start <strong>to</strong> begin play.Click Home <strong>to</strong> return <strong>to</strong> the Home screen.Click Help <strong>to</strong> get help.When children click Start, Hopkins leaps in<strong>to</strong> his hole in theground. Then his game screen appears.42<strong>Type</strong> <strong>to</strong> <strong>Learn</strong> <strong>Jr</strong>.
Children type the target letters <strong>to</strong> help Hopkins dig the tunnel.When the tunnel crosses a treasure, it appears in the TreasureCollection at the <strong>to</strong>p of the screen. The game ends when childrencollect all of the treasures and reach the end of the path.Treasure CollectedLevelTarget LettersHelpHomeClick Level <strong>to</strong> change the game level. Each game level presents aunique typing focus:• Level 1: Target letters are on the home row (e.g., a, s, d, f, j,k, l). Hopkins digs forward as children type letters on thehome row.• Level 2: Target letters are on more than one keyboard row(e.g., right hand: l, p, p, k, m, k). Hopkins digs up whenchildren type a letter from the <strong>to</strong>p keyboard row. He digsdown when children type a letter from the bot<strong>to</strong>m row. Hedigs forward as children type letters on the home row.• Level 3: Target letters use all keyboard rows as well as capitalletters. (e.g., G, t, T, J, K, j).The Sunbuddies provide hints throughout the game <strong>to</strong> help childrenwho have difficulty finding and typing the correct letters.<strong>Type</strong> <strong>to</strong> <strong>Learn</strong> <strong>Jr</strong>.43
Tiny’s Flying FeatChildren type rhyming words <strong>to</strong> help Tiny find his way throughthe clouds. Tiny’s game offers advanced challenges for beginningkeyboarders. Children practice reading and recognizing rhymesin addition <strong>to</strong> typing simple words.LevelHomeStartHelpClick Level <strong>to</strong> change the game level.Click Start <strong>to</strong> begin play.Click Home <strong>to</strong> return <strong>to</strong> the Home screen.Click Help <strong>to</strong> get help.When children click Start, Tiny launches in<strong>to</strong> the air with his jetpack.Then his game screen appears.Children read each word pair <strong>to</strong> find one that rhymes. When childrentype a pair of rhyming words, Tiny reads the pair aloud andflies further in<strong>to</strong> the clouds. Tiny reaches his goal after childrentype six (Levels 1 and 2) or nine (Level 3) rhyming pairs.Note: Children can click on the word pairs <strong>to</strong> hear them spoken.44<strong>Type</strong> <strong>to</strong> <strong>Learn</strong> <strong>Jr</strong>.
Word pairsLevelHomeHelpClick Level <strong>to</strong> change the game level. Each game level presents aunique typing focus.• Level 1: Rhyming pairs are three-letter words typed withone hand. (e.g., far and car or hip and lip).• Level 2: Rhyming pairs include three- and four-letterwords typed with both hands. (e.g., try and dry or nest andrest).• Level 3: Rhyming pairs include three- and four-letterwords that have different spellings. (e.g., low and <strong>to</strong>e orblue and chew). Children sometimes choose from amongthree pairs of words instead of two pairs. They also typecomplete sentences <strong>to</strong> continue after each set of three correctlytyped pairs.Throughout the game, the Sunbuddies provide hints <strong>to</strong> help childrenwho have difficulty finding and typing the correct letters.<strong>Type</strong> <strong>to</strong> <strong>Learn</strong> <strong>Jr</strong>.45
Tiny’s Rhyming WordsLevel 1Left hand three-letter wordsbadsadbagragtagwagbarcarfartarbatcatfatratRight hand three-letter wordssatvatrawsawwaxtaxseateabedfedredwedbeefeeseebetgetsetvetwethiplipniphopmoppophummumyumLevel 2Three- and four-letter rhymes with same end spelling patterns(using both hands)Level 1 Words (above) plus:dadhadmadpadnaghamjamcanfanmanpanrantanvancaplapmapnapraptapzaphatmatpatbaydayhaylaymaypayraysaywayleddenhenmenpentenletnetpetyetbiddidhidkidlidridliepiebigdigjigpigwigdipripsiptipzipfixmixsixhoe<strong>to</strong>edogfoghoglog46<strong>Type</strong> <strong>to</strong> <strong>Learn</strong> <strong>Jr</strong>.
moozoocotdothotlotnotpotrot<strong>to</strong>tcowhownowwowboxfoxbugdugrughugjugbunfunnunrunsuncuppupbutcuthutnutdrytrymaidpaidnailsailtailfairhairpairbakecakefakelakemakeraketakewakefallhalltallwallcamplamprampbandhandlandsandmarkparkcartdartparttartdatefatelatemateratedazefazemazebeadreadbeamseamteamfearhearnearyearweartearbeatfeatseatfreetreefeedseedweedbellfellselltellwellyellbestnestresttestvestzestlinkminkpinksinkwinklicenicericehighsighbillhillwillpillfirehiretirewiredishfishwishrocksockboilfoilsoilmoonsoonjumppump<strong>Type</strong> <strong>to</strong> <strong>Learn</strong> <strong>Jr</strong>.47
Level 3Three- and four-letter rhymes with different endspelling patterns (using both hands)addpadsadairfairhairpearraretearwearearfearhearpeeryearbeadfeedneedreadseedweedbedheadredsaidshedbeefreepeaseesheskiteatreedeernearyearblowhoelowshowsnow<strong>to</strong>ebuybyedryhighflypieshysightrybluechewfluglueshoestew<strong>to</strong>otwoviewwhoyouzoomadepaidSentencesAsk for a task.Bake a cake.Did the deer hear?I ate a date.I see you ski.Sand is on land.See the moon soon.The cow can plow.The deer is near.The fly will try.The nest is best.The pump canjump.The star is far.The <strong>to</strong>e is in snow.The tree is free.The wall will fall.View the stew.We ate late.Wish for a fish.She is a bee.48<strong>Type</strong> <strong>to</strong> <strong>Learn</strong> <strong>Jr</strong>.
Exiting <strong>Type</strong> To <strong>Learn</strong>, <strong>Jr</strong>.Children can always leave <strong>Type</strong> <strong>to</strong> <strong>Learn</strong> <strong>Jr</strong>. by going <strong>to</strong> the Homescreen and clicking the Quit but<strong>to</strong>n. A confirmation windowappears.Click Yes <strong>to</strong> exit the program. Click No <strong>to</strong> continue playing.<strong>Type</strong> <strong>to</strong> <strong>Learn</strong> <strong>Jr</strong>.49
Teacher OptionsPress Control-T anywhere in the program <strong>to</strong> access the TeacherOptions menu.• Student Lists allows you <strong>to</strong> add, edit, or delete studentnames on the list. You may want <strong>to</strong> add all of your students’names <strong>to</strong> a class list before they use <strong>Type</strong> <strong>to</strong> <strong>Learn</strong> <strong>Jr</strong>.• Options allows you <strong>to</strong> change program settings for any orall students.• Progress Reports allows you <strong>to</strong> moni<strong>to</strong>r children’s progressin The <strong>Learn</strong>ing Center. You can assess progress and printProgress Certificates for any or all students.50<strong>Type</strong> <strong>to</strong> <strong>Learn</strong> <strong>Jr</strong>.
Student ListsStudent List screen allows you <strong>to</strong> set up or edit your student list.This screen appears when you click Student Lists.Click Add <strong>to</strong> add a child’s name <strong>to</strong> the class list. In the windowthat follows, enter a student’s name and click Add. Enter as manynames as desired, clicking Add <strong>to</strong> include each name on the classlist. Click Done <strong>to</strong> return <strong>to</strong> the Student List screen. Names areau<strong>to</strong>matically alphabetized by first letter.To change a name on the list, highlight the name and click Edit.After editing the name, click OK.To remove a name from the list, highlight the name and clickDelete.• Click Back <strong>to</strong> return <strong>to</strong> the Teacher Options main menu.• Click Back <strong>to</strong> Program <strong>to</strong> return <strong>to</strong> where you were in the<strong>Type</strong> <strong>to</strong> <strong>Learn</strong> <strong>Jr</strong>. program.<strong>Type</strong> <strong>to</strong> <strong>Learn</strong> <strong>Jr</strong>.51
Class Lists – Network Version OnlyThe Class List screen allows you <strong>to</strong> set up or edit your class list.This screen appears when you click Class Lists. You may haveonly 15 classes.Click Add <strong>to</strong> add a class <strong>to</strong> the list of classes. In the window thatfollows, enter a class name and click Add. Enter as many namesas desired, clicking Add <strong>to</strong> include each name on the list of classes.Click Done <strong>to</strong> return <strong>to</strong> the Class List screen. Names are au<strong>to</strong>maticallyalphabetized by first letter.To change a name on the list, highlight the name and click Edit.After editing the name, click OK.To remove a name from the list, highlight the name and clickDelete. You may highlight multiple names <strong>to</strong> delete.To modify the students for a particular class, select that classname and then click Students.Click Back <strong>to</strong> return <strong>to</strong> the Teacher Options main menu.Click Back <strong>to</strong> Program <strong>to</strong> return <strong>to</strong> where you were in the <strong>Type</strong> <strong>to</strong><strong>Learn</strong> <strong>Jr</strong>. program.Student Lists – Network VersionThe Student List screen allows you <strong>to</strong> set up or edit your studentlist for a particular class. This screen appears when you click onthe Students but<strong>to</strong>n on the Class List screen. You may have only40 students per class.Click Add <strong>to</strong> add a student <strong>to</strong> the class. In the window that follows,enter a student’s name and click Add. Enter as many namesas desired, clicking Add <strong>to</strong> include each name on the list of students.Click Done <strong>to</strong> return <strong>to</strong> the Student List screen. Names areau<strong>to</strong>matically alphabetized by first letter.To change a name on the list, highlight the name and click Edit.After editing the name, click OK.52<strong>Type</strong> <strong>to</strong> <strong>Learn</strong> <strong>Jr</strong>.
To remove a name or names from the list, highlight all the namesyou want <strong>to</strong> remove and click Delete.To move a student or students <strong>to</strong> a different class, highlight all thenames you want <strong>to</strong> move, and click Move. In the window that follows,select which class you would like <strong>to</strong> move your student(s)in<strong>to</strong> and then click Move.To add a list of students from a text file <strong>to</strong> the class, click Import.In the next window you will want <strong>to</strong> select the text file which containsthe list of students and click Open. You can export a list ofstudents from one computer and import the list <strong>to</strong> another (if theyare not connected by a network and you want <strong>to</strong> use the samelist). Or, you can type a list of students in<strong>to</strong> a text file and thenimport that list. Each student name will go on a separate line inthe text file (type Return or Enter between names).To Export a list of students from a class <strong>to</strong> a text file, click Export.In the next window you will want <strong>to</strong> select the text file <strong>to</strong> whichthe student list will be exported and click Save. It will export thestudents that are selected. If no student is selected, the entire listwill be exported. This export file can later be imported <strong>to</strong> anotherclass or another instance of the program.Click Back <strong>to</strong> return <strong>to</strong> the Teacher Options Class List.Click Back <strong>to</strong> Program <strong>to</strong> return <strong>to</strong> where you were in the <strong>Type</strong> <strong>to</strong><strong>Learn</strong> <strong>Jr</strong>. program.<strong>Type</strong> <strong>to</strong> <strong>Learn</strong> <strong>Jr</strong>.53
OptionsOptions allows you <strong>to</strong> adjust program settings for any or allstudents on your student list. Click Options <strong>to</strong> see a student list.Click the student or students for whom you want <strong>to</strong> adjust settings.A check-mark appears next <strong>to</strong> each selected student name.Click Continue <strong>to</strong> adjust settings for the check-marked students.• Click Back <strong>to</strong> return <strong>to</strong> the Teacher Options main menu.• Click Back <strong>to</strong> Program <strong>to</strong> return <strong>to</strong> where you were in the<strong>Type</strong> <strong>to</strong> <strong>Learn</strong> <strong>Jr</strong>. program.After you select students, the Making Changes screen appears.54<strong>Type</strong> <strong>to</strong> <strong>Learn</strong> <strong>Jr</strong>.
General Options• Click Play Background Music <strong>to</strong> turn this option on or off.A check appears when background music is turned on.• Click Students Can Print Certificates <strong>to</strong> allow students <strong>to</strong>print their own certificates. A check appears when studentsare permitted <strong>to</strong> print. Click again <strong>to</strong> prevent students fromprinting certificates.• Click Lowercase Letters <strong>to</strong> Uppercase Letters <strong>to</strong> change thekeyboard display. Use uppercase letters selection if youwant the on–screen keyboard <strong>to</strong> match the students actualkeyboard.Note: Once clicked, Options will turn blue <strong>to</strong> indicate that you havemade a change.Activities Students Can PlayClick an activity <strong>to</strong> select it. A check-mark appears next <strong>to</strong> eachactivity a student is allowed <strong>to</strong> play. Click again <strong>to</strong> de-select anactivity.• Click Save <strong>to</strong> save your changes.• Click Reset <strong>to</strong> return <strong>to</strong> the default settings.• Click Back <strong>to</strong> return <strong>to</strong> the Teacher Options main menu.• Click Back <strong>to</strong> Program <strong>to</strong> return <strong>to</strong> where you were in the<strong>Type</strong> <strong>to</strong> <strong>Learn</strong> <strong>Jr</strong>. program.Options – Network VersionOptions allow you <strong>to</strong> adjust program settings for any or all studentson your student list. Once you click on the Options but<strong>to</strong>nat the Teacher Options main menu, you will see the Optionsscreen <strong>to</strong> the right.You can make changes for an entire class or you can make changesfor individual students. Whichever changes you last made will bethe ones that are used. Therefore, if you make a change <strong>to</strong> class1and then <strong>to</strong> student1, it will use the option that was saved for student1.However, if you make a change <strong>to</strong> class1 and then student1and then class1, it will use the last change that was saved forclass1.Click on the Choose Classes but<strong>to</strong>n:<strong>Type</strong> <strong>to</strong> <strong>Learn</strong> <strong>Jr</strong>.55
Click the class or classes for whom you want <strong>to</strong> adjust settings. Acheck-mark appears next <strong>to</strong> each selected class name. ClickContinue <strong>to</strong> adjust settings for the check-marked classes.Click on the Choose Students but<strong>to</strong>n:First you need <strong>to</strong> select a class from the list on the left. Once youclick on a class, the students in that class will appear in the list onthe right. Click the student or students for whom you want <strong>to</strong>adjust settings. A check-mark appears next <strong>to</strong> each selected studentname. Click Continue <strong>to</strong> adjust settings for the check-markedstudents.Click Back <strong>to</strong> return <strong>to</strong> the Options screen in Teacher Options.Click Back <strong>to</strong> Program <strong>to</strong> return <strong>to</strong> where you were in the <strong>Type</strong> <strong>to</strong><strong>Learn</strong> <strong>Jr</strong>. program.56<strong>Type</strong> <strong>to</strong> <strong>Learn</strong> <strong>Jr</strong>.
Progress ReportsProgress Reports allows you <strong>to</strong> moni<strong>to</strong>r each student’s progress inThe <strong>Learn</strong>ing Center. You can review progress and/or printProgress Certificates. This screen appears when you click ProgressReports on the Teacher Options Menu.Click All Students <strong>to</strong> view Progress Reports for all students.Click Choose Students <strong>to</strong> view Progress Reports for some students.On the Student List screen, highlight the desired studentnames and click Continue.The next Progress Reports screen summarizes student progress inThe <strong>Learn</strong>ing Center.<strong>Type</strong> <strong>to</strong> <strong>Learn</strong> <strong>Jr</strong>.57
The summary screen displays each student’s stage andprogress level.• Click Print Summary Report <strong>to</strong> print the summary reportshown on the screen.• Click Print Student Certificates <strong>to</strong> print ProgressCertificates for each student shown in the SummaryReport.• Click Back <strong>to</strong> return <strong>to</strong> the Teacher Options main menu.• Click Back <strong>to</strong> Program <strong>to</strong> return <strong>to</strong> where you were in the<strong>Type</strong> <strong>to</strong> <strong>Learn</strong> <strong>Jr</strong>. program.Progress Reports – Network VersionProgress Reports allow you <strong>to</strong> moni<strong>to</strong>r each student’s progress inThe <strong>Learn</strong>ing Center. You can review progress and/or printProgress Certificates. This screen appears when you click ProgressReports on the Teacher Options Menu.Click All Classes <strong>to</strong> view Progress Reports for all the students in allthe classes. Click Choose Classes <strong>to</strong> view Progress Reports for allthe students in the chosen classes. Click Choose Students <strong>to</strong> viewProgress Reports for some students.Click Back <strong>to</strong> return <strong>to</strong> the Teacher Options main menu.Click Back <strong>to</strong> Program <strong>to</strong> return <strong>to</strong> where you were in the <strong>Type</strong> <strong>to</strong><strong>Learn</strong> <strong>Jr</strong>. program.Change Data Files Path – Network Version OnlyThe Change Data Files Path screen allows you <strong>to</strong> change the locationof the student data for the computer you are on. For everycomputer that you want <strong>to</strong> change the data files path, you willhave <strong>to</strong> go <strong>to</strong> that computer, run <strong>Type</strong> <strong>to</strong> <strong>Learn</strong> <strong>Jr</strong>., go <strong>to</strong> TeacherOptions, and change the data files path. This screen appears whenyou click Change Data Files Path on the main menu of TeacherOptions.You may use the Browse but<strong>to</strong>n <strong>to</strong> locate a new path for the studentdata.Click Save <strong>to</strong> save your new student data location.58<strong>Type</strong> <strong>to</strong> <strong>Learn</strong> <strong>Jr</strong>.
If you choose a location that does not exist, the program will askyou if it should create it. If it cannot create it, it will not let youselect the location. Students will need <strong>to</strong> have read, file scan,write, create, delete, and modify rights <strong>to</strong> the data files direc<strong>to</strong>ry.You need <strong>to</strong> choose a location that either has these rights or willbe given <strong>to</strong> them before the students run the program.Click Back <strong>to</strong> return <strong>to</strong> the Teacher Options main menu.Click Back <strong>to</strong> Program <strong>to</strong> return <strong>to</strong> where you were in the <strong>Type</strong> <strong>to</strong><strong>Learn</strong> <strong>Jr</strong>. program.<strong>Type</strong> <strong>to</strong> <strong>Learn</strong> <strong>Jr</strong>.59
<strong>Type</strong> <strong>to</strong><strong>Learn</strong> <strong>Jr</strong>.in theClassroomClassroom Management TipsLimited Computer TimeWhen computer time is limited, encourage students <strong>to</strong> studythree or four letters in The <strong>Learn</strong>ing Center during each computersession. Each time students return <strong>to</strong> The <strong>Learn</strong>ing Center foranother round, they can begin where they left off at their last session.Students can keep track of their work by printing theProgress certificate in The <strong>Learn</strong>ing Center or by coloring the keysthey have studied on The Keyboard blackline master (p. 63). Afterstudying new letters, allow students <strong>to</strong> choose and play at leas<strong>to</strong>ne game.Computer in the ClassroomIf students are using a computer in your classroom, you may wish<strong>to</strong> have them use headphones <strong>to</strong> help them ignore outside distractionsand avoid distracting others.You can focus student interest on typing and <strong>Type</strong> <strong>to</strong> <strong>Learn</strong> <strong>Jr</strong>. bydecorating the computer station with printed Progress certificatesand colored keyboards (Blackline Master 1, p. 63) or keys(Blackline Master 2, p. 65).Large Class SizeYou may wish <strong>to</strong> introduce <strong>Type</strong> <strong>to</strong> <strong>Learn</strong> <strong>Jr</strong>. <strong>to</strong> a large group of studentsat one time. Have students gather around the keyboard andmoni<strong>to</strong>r. Describe the parts of the keyboard and demonstrate logging-inand selecting an activity. You may wish <strong>to</strong> give each studenta copy of Blackline Master 1 (The Keyboard) before youbegin your demonstration. Have volunteers take turns enteringkeys on the computer keyboard. Other students can follow alongby locating and “pressing” keys on their paper keyboards.Small GroupsSmall groups or partners can work <strong>to</strong>gether at one computer bytaking turns selecting activities and using the keyboard.Encourage students <strong>to</strong> talk about the activities as they work<strong>to</strong>gether. Viewers can help keyboarders by checking their postureand hand positions.60<strong>Type</strong> <strong>to</strong> <strong>Learn</strong> <strong>Jr</strong>.
<strong>Learn</strong>ing With <strong>Type</strong> <strong>to</strong> <strong>Learn</strong>, <strong>Jr</strong>.Before PlayingIntroduce the parts of a computer before students begin playing<strong>Type</strong> <strong>to</strong> <strong>Learn</strong> <strong>Jr</strong>. Students should be familiar with terms includingcomputer, moni<strong>to</strong>r, keyboard, and CD-ROM. Talk about why it isimportant <strong>to</strong> learn about the keyboard. Explain that many differentkinds of programs require you <strong>to</strong> enter letters and numbersusing the keyboard. Discuss several writing situations, such as:• writing a s<strong>to</strong>ry using a word processor• sending an email note <strong>to</strong> a friend• adding a title <strong>to</strong> a computer pictureReview rhyming before students play Tiny’s Flying Feat. Remindstudents that rhyming words end with the same sounds. Havestudents suggest word pairs that rhyme and write them on thechalkboard. First discuss rhyming words that end with the samespelling patterns (such as cat and bat). Then discuss pairs that endwith different spelling patterns (such as do and blue). You maywish <strong>to</strong> review the rhyming pairs used in the game. The completelist is found on page 46.At the ComputerWatch students as they use the program. Remind them <strong>to</strong> followthese posture and hand position tips:• Sit up straight.• Use both hands.• Keep your left hand on the left side of the keyboard.• Keep your right hand on the right side of the keyboard.After PlayingAfter all students have had an opportunity <strong>to</strong> explore <strong>Type</strong> <strong>to</strong><strong>Learn</strong> <strong>Jr</strong>., hold a class discussion about the program. Discuss students’favorite activities as well as their hints and strategies forfinding and typing the correct keys.After playing <strong>Type</strong> <strong>to</strong> <strong>Learn</strong> <strong>Jr</strong>., open a children’s word processingprogram and show students how they can use their new keyboardingskills <strong>to</strong> enter words and sentences.Use one of the Extension Activities on pages 63-91 <strong>to</strong> support andextend concepts developed by <strong>Type</strong> <strong>to</strong> <strong>Learn</strong> <strong>Jr</strong>.<strong>Type</strong> <strong>to</strong> <strong>Learn</strong> <strong>Jr</strong>.61
62<strong>Type</strong> <strong>to</strong> <strong>Learn</strong> <strong>Jr</strong>.
Red Letter, Purple LetterMaterials:Skills:The Keyboard (p. 93), red and purple crayonsor markersrecognizing key positions, identifying rightand left★ Give each child a copy of the keyboard. Discuss thearrangement of letters. You may wish <strong>to</strong> explain that theletters are organized <strong>to</strong> make it easier for people <strong>to</strong> typequickly.★ Have children color the “left-hand keys” red and the“right-hand keys” purple like the on-screen <strong>Type</strong> <strong>to</strong> <strong>Learn</strong> <strong>Jr</strong>.keyboard.★ After coloring the keyboards, have children practice severalpatterns that emphasize the left/right split, such as thefollowing:all left hand: a a s s d d f fall right hand: h h j j k k l lalternating hands: d j d j d j d jalternating by twos: s s k k s s k kalternating by threes: a a a l l l a a a l l l★ Allow children <strong>to</strong> invent and share their own typingpatterns.<strong>Type</strong> <strong>to</strong> <strong>Learn</strong> <strong>Jr</strong>.63
64<strong>Type</strong> <strong>to</strong> <strong>Learn</strong> <strong>Jr</strong>.
The Giant KeyboardMaterials:Skills:The Big Key (p. 95), cardboard or butcher paper,chalkrecognizing key positions, spelling simplewords, identifying right and left★ Use Blackline Master 2 <strong>to</strong> create a giant hop-on keyboard inthe classroom or on the playground. Follow one of thesesuggestions <strong>to</strong> create your keyboard:★ Make 26 copies of The Big Key. (Make 36 <strong>to</strong> include numbersas well as letters.) Write one letter or number on eachkey. Then have children help arrange the letters in the correctkeyboard pattern. Children can find the pattern on anactual keyboard or use Blackline Master 1.★ Cut out The Big Key and trace it on butcher paper <strong>to</strong> createthe giant keyboard. Have children help you label each key.★ Create the keyboard on a playground by cutting out TheBig Key and tracing it with chalk.★ Have children hop on one foot <strong>to</strong> spell out words or theirnames on the keyboard. Children can hop on their left foot<strong>to</strong> step on left-hand keys and their right foot <strong>to</strong> spell-outright hand keys.★ Groups of three or more children can stand on keys <strong>to</strong> spella word. You can suggest words <strong>to</strong> spell or allow children <strong>to</strong>suggest their own words. Have other children look at thekeys and try <strong>to</strong> guess the words.<strong>Type</strong> <strong>to</strong> <strong>Learn</strong> <strong>Jr</strong>.65
66<strong>Type</strong> <strong>to</strong> <strong>Learn</strong> <strong>Jr</strong>.
The Home RowMaterials:Skills:The Big Key (p.65), red and purple crayons ormarkersrecognizing key positions★ Have nine children model the key positions of the homerow.★ Make nine copies of The Big Key.★ Help students write one letter on each key. Color the a, s, d,f, and g keys “red.” Color h, j, k, and l keys “purple.”★ Ask the children <strong>to</strong> stand in front of the class in any order,holding their key letter in front of them.★ Have volunteers in the class give directions <strong>to</strong> help thechildren arrange themselves in keyboard order.★ After the row is ordered correctly (a, s, d, f, g, h, j, k, l) discusswhy some of the letters are red and some are purple(you type the red letters with your left hand and the purpleletters with your right hand.)★ Challenge students <strong>to</strong> think of words that can be typedusing only these letters. As suggestions are offered, havethe children model typing the letters by bending theirknees and calling out their letters.★ Some words that can be typed using only the home roware: sad, dad, fad, had, lad, has, ask, ash.<strong>Type</strong> <strong>to</strong> <strong>Learn</strong> <strong>Jr</strong>.67
68<strong>Type</strong> <strong>to</strong> <strong>Learn</strong> <strong>Jr</strong>.
Right Left BannerMaterials:Skills:red and purple fingerpaint, butcher paper orcardboardidentifying right and left, estimating andcounting★ Have children create a handprint banner using their rightand left hands.★ First have children use purple paint and their right hands<strong>to</strong> add handprints <strong>to</strong> the right side of the banner. Thenhave children wash their hands and use red paint and theirleft hands <strong>to</strong> add handprints <strong>to</strong> the left side of the banner.★ After the banner is finished, turn it upside down and havechildren decide which way is up. Help children use clueslike the location of thumbprints <strong>to</strong> decide which way <strong>to</strong>hang the poster so that the right hands are on the rightside.★ Help children practice estimating and counting by askingthem <strong>to</strong> guess how many right handprints are on theposter. Then have a volunteer count the hands. Repeat forleft hands. To help children improve their estimation skills,ask focusing questions: Do you think there are more redhands or purple hands? How many purple handprints didwe count? How many red handprints do you think thereare?<strong>Type</strong> <strong>to</strong> <strong>Learn</strong> <strong>Jr</strong>.69
70<strong>Type</strong> <strong>to</strong> <strong>Learn</strong> <strong>Jr</strong>.
Which Way Do I Go?Materials:Skills:chairs, bandannas or blindfolds (optional)identifying right and left, giving directions★ Have partners work <strong>to</strong>gether <strong>to</strong> walk through a chairobstacle course. Players set up one <strong>to</strong> three chairs in anopen area. One partner shuts his or her eyes. The othergives simple walking directions, such as “Take one step <strong>to</strong>your right.” or “Take three steps <strong>to</strong> your left.” or “Take twosteps forward.”★ Allow children <strong>to</strong> exchange roles.★ Children can also practice giving left/right directions <strong>to</strong>help one another solve mazes or locate cities on a map.<strong>Type</strong> <strong>to</strong> <strong>Learn</strong> <strong>Jr</strong>.71
72<strong>Type</strong> <strong>to</strong> <strong>Learn</strong> <strong>Jr</strong>.
Chair Toe TouchesMaterials:Skills:chairsrecognizing posture and balance★ Have children sit in their chairs and practice this exercise<strong>to</strong> find correct posture.★ Children begin by bending over and <strong>to</strong>uching their <strong>to</strong>es.Then they sit up very slowly. Tell them <strong>to</strong> imagine they areunrolling like a <strong>to</strong>wel or a blanket.★ As they sit up, encourage children <strong>to</strong> press their backslightly against their chair backs. Help each child find thecorrect upright sitting position. Children should be sittingupright, but not stiff. They should also avoid over-extendingor exaggerating the upright position. Repeating the <strong>to</strong>e<strong>to</strong>uches and slow sit up can help children relax and findtheir natural upright posture.★ Emphasize that this exercise should be done slowly andwith natural breathing.<strong>Type</strong> <strong>to</strong> <strong>Learn</strong> <strong>Jr</strong>.73
74<strong>Type</strong> <strong>to</strong> <strong>Learn</strong> <strong>Jr</strong>.
Four-Handed TypingMaterials:Skills:word processor or typewriteridentifying keyboard position, writing words★ Have partners work <strong>to</strong>gether with a word processor ortypewriter.★ One partner types an uppercase letter. The other partnerthinks of a word that begins with the letter and types otherletters <strong>to</strong> complete the word.★ Players take turns beginning words. Remind children <strong>to</strong>add one space between words so that they do not run<strong>to</strong>gether.★ Older children can extend the activity by beginning with aword instead of a letter. The other partner then completesa sentence beginning with the word. Remind children <strong>to</strong>use appropriate end punctuation (period, exclamationpoint, or question mark).<strong>Type</strong> <strong>to</strong> <strong>Learn</strong> <strong>Jr</strong>.75
76<strong>Type</strong> <strong>to</strong> <strong>Learn</strong> <strong>Jr</strong>.
Different SortsMaterials: Alphabet Cards (pp. 67-75)optional: cardboard, glue, The Keyboard (p. 63)Skills: classifying, identifying letters, identifyingalphabetical order, recognizing patterns★ Glue blackline master reproductions <strong>to</strong> cardboard <strong>to</strong> createsturdier cards. Cut out and fold Alphabet Cards.★ Shuffle the cards and have partners work <strong>to</strong>gether <strong>to</strong> placethe cards in alphabetical order.★ Then have children organize the cards in<strong>to</strong> two sets: letterstyped by the right hand and letters typed by the left hand.Children may wish <strong>to</strong> use copies of The Keyboard (p. 63) <strong>to</strong>help them classify the letters.★ Have children sort the alphabet cards in<strong>to</strong> other categories:• first half of the alphabet and second half of thealphabet• vowels and consonants• letters with curves and letters without curves• letters with holes (a, b, d, e, o, p, q) and letters without holes<strong>Type</strong> <strong>to</strong> <strong>Learn</strong> <strong>Jr</strong>.77
78<strong>Type</strong> <strong>to</strong> <strong>Learn</strong> <strong>Jr</strong>.
Ideas from the AlphabetMaterials:Skills:Alphabet Cards (pp. 67-75), a word processoroptional: cardboard, glue,typing words★ Cut out and fold Alphabet Cards. Glue blackline masters <strong>to</strong>cardboard before cutting <strong>to</strong> create sturdier cards.★ Have children practice typing with a word processor byselecting Alphabet Cards and typing the words with a wordprocessor.★ Partners can work <strong>to</strong>gether. One partner selects a card andreads it aloud. The other partner types the word. The firstpartner can provide a letter–by–letter spelling.★ Challenge students <strong>to</strong> write a sentence using the wordshown on a card. Children can write their sentences with apencil or type them with a word processor.<strong>Type</strong> <strong>to</strong> <strong>Learn</strong> <strong>Jr</strong>.79
80<strong>Type</strong> <strong>to</strong> <strong>Learn</strong> <strong>Jr</strong>.
Where’s the Pair?Materials: Rhyming Cards 1, 2, and 3 (pp. 107-111)optional: cardboard, glueSkills: identifying rhyming pairs★ Cut out Rhyming Cards 1, 2, and 3. Glue blackline masters<strong>to</strong> cardboard before cutting <strong>to</strong> create sturdier cards.★ Give one card <strong>to</strong> each child. Have students try <strong>to</strong> find aclassmate who has a word card that rhymes with his or herword card. After children find their matches, have themstand in a circle and read the rhyming pairs aloud. Askolder students <strong>to</strong> use each word in a sentence.★ Shuffle the cards and repeat. To begin at an easy level, useonly the words on Rhyming Cards 1 (three-letter rhymeswith matching end-spelling patterns). Increase difficultyby adding Rhyming Cards 2 (four-letter rhymes withmatching end-spelling patterns) and Rhyming Cards 3(rhymes with different end-spelling patterns).<strong>Type</strong> <strong>to</strong> <strong>Learn</strong> <strong>Jr</strong>.81
82<strong>Type</strong> <strong>to</strong> <strong>Learn</strong> <strong>Jr</strong>.
Keyboard PoetryMaterials: Rhyming Cards 1, 2, and 3 (pp. 77-81)Skills: identifying rhymes, typing words, writing★ Cut out and shuffle the rhyming cards. Have childrenselect one card and think of a word that rhymes with it.Children can look through the cards <strong>to</strong> find a rhyme if theycannot think of one.★ Have children invent poems or rhyming sentences usingtheir rhyming words.★ Allow students <strong>to</strong> use a word processor or typewriter <strong>to</strong>write their poems.★ Encourage students <strong>to</strong> read their poetry aloud.★ Create a Poet’s Corner and post children’s poems.<strong>Type</strong> <strong>to</strong> <strong>Learn</strong> <strong>Jr</strong>.83
84<strong>Type</strong> <strong>to</strong> <strong>Learn</strong> <strong>Jr</strong>.
Scrambled SentencesMaterials:Skills:sentence strips, envelopesreading words and sentences★ Write several sentences from The <strong>Learn</strong>ing Center or Tiny’sFlying Feat on sentence strips. (See pages 38 and 46 for acomplete list of sentences used in The <strong>Learn</strong>ing Center andTiny’s Flying Feat.)★ Give each child a sentence and an envelope. Have them cutthe sentences in<strong>to</strong> separate words and place the words inthe envelope.★ Have students exchange envelopes and try <strong>to</strong> rearrange thewords in their envelopes <strong>to</strong> form a sentence.★ Ask volunteers <strong>to</strong> read their sentences aloud.<strong>Type</strong> <strong>to</strong> <strong>Learn</strong> <strong>Jr</strong>.85
86<strong>Type</strong> <strong>to</strong> <strong>Learn</strong> <strong>Jr</strong>.
Without WordsMaterials:Skills:paper or sentence strips, pencilsreading words and sentences, watching andlistening★ Have students play charades using the sentences used in<strong>Type</strong> <strong>to</strong> <strong>Learn</strong> <strong>Jr</strong>. (See pages 38 and 46 for a complete list ofsentences used in The <strong>Learn</strong>ing Center and Tiny’s FlyingFeat.)★ Write the sentences on paper or sentence strips. Have studentstake turns selecting a piece of paper, reading the sentencesilently, and then acting it out for the class. You maywish <strong>to</strong> review signals for showing how many words are ina sentence.★ Discuss the differences between typing words and sentences.Emphasize that typists need <strong>to</strong> enter a space bypressing the space bar between words.<strong>Type</strong> <strong>to</strong> <strong>Learn</strong> <strong>Jr</strong>.87
88<strong>Type</strong> <strong>to</strong> <strong>Learn</strong> <strong>Jr</strong>.
The Art of the SentenceMaterials:Skills:poster board, markers, crayonsreading sentences★ Have children create illustrations <strong>to</strong> accompany sentencesused in <strong>Type</strong> <strong>to</strong> <strong>Learn</strong> <strong>Jr</strong>. (See pages 38 and 46 for a completelist of sentences used in The <strong>Learn</strong>ing Center and Tiny’sFlying Feat.)★ Have each student select a sentence, or assign sentencesrandomly.★ Help students write the sentence at the <strong>to</strong>p or bot<strong>to</strong>m oftheir poster board.★ Then have students create illustrations <strong>to</strong> accompany thesentence. Children can display their artwork. Cover thesentences and have viewers try <strong>to</strong> guess what sentenceeach artwork illustrates.<strong>Type</strong> <strong>to</strong> <strong>Learn</strong> <strong>Jr</strong>.89
90<strong>Type</strong> <strong>to</strong> <strong>Learn</strong> <strong>Jr</strong>.
No-Peek TypingMaterials:Skills:SpeedSkinRemembering key positions★ Provide an extra challenge for advanced students using theSpeedSkin keyboard cover, available from Sunburst. TheSpeedSkin is a one-piece opaque keyboard overlay thatrests easily on all keyboards and prevents children fromseeing the letter labels. Home row indica<strong>to</strong>rs give a tactilestarting place.★ Place the SpeedSkin over the keyboard. Have studentsbegin by revisiting The <strong>Learn</strong>ing Center.★ Students can also try playing any of the three <strong>Type</strong> <strong>to</strong> <strong>Learn</strong><strong>Jr</strong>. activities with the SpeedSkin in place.<strong>Type</strong> <strong>to</strong> <strong>Learn</strong> <strong>Jr</strong>.91
92<strong>Type</strong> <strong>to</strong> <strong>Learn</strong> <strong>Jr</strong>.
The KeyboardCopyright © 2008 Sunburst Technology Corporation93
The Big KeyCopyright © 2008 Sunburst Technology Corporation95
Alphabet Cardsa through faantbbutterflyccakeddogeeggsffishCopyright © 2008 Sunburst Technology Corporation97
Alphabet Cardsg through lggrapeshhippoiinchwormjjuicekkittenllollipopCopyright © 2008 Sunburst Technology Corporation99
Alphabet Cardsm through rmmoonnnutsooc<strong>to</strong>pusppearqqueenrrobotCopyright © 2008 Sunburst Technology Corporation101
Alphabet Cardss through xssnailttelephoneuunicornvvolcanowwhalexx-rayCopyright © 2008 Sunburst Technology Corporation103
Alphabet Cardsy through zyyakzzapCopyright © 2008 Sunburst Technology Corporation105
Rhyming Cards 1bat red hopcat bed mopbag bee hipwag see lipCopyright © 2008 Sunburst Technology Corporation107
Rhyming Cards 2bake bell wishcake sell fishhand nest rocksand test sockCopyright © 2008 Sunburst Technology Corporation109
Rhyming Cards 3read deer highneed year flybed snow bluehead <strong>to</strong>e shoeCopyright © 2008 Sunburst Technology Corporation111