
You also want an ePaper? Increase the reach of your titles
YUMPU automatically turns print PDFs into web optimized ePapers that Google loves.
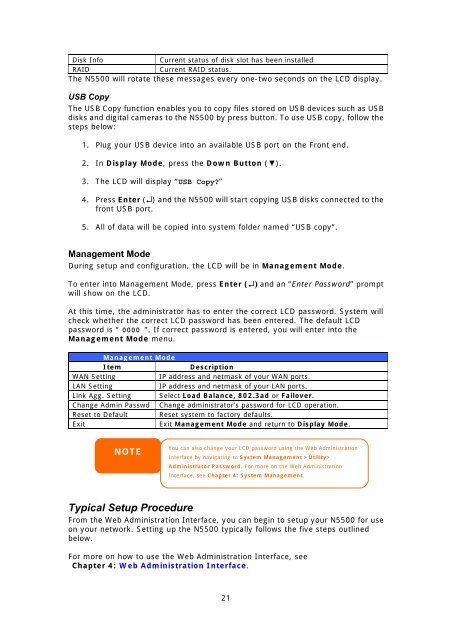
Disk InfoCurrent status of disk slot has been installedRAIDCurrent RAID status.The <strong>N5500</strong> will rotate these messages every one-two seconds on the LCD display.USB CopyThe USB Copy function enables you to copy files stored on USB devices such as USBdisks and digital cameras to the <strong>N5500</strong> by press button. To use USB copy, follow thesteps below:1. Plug your USB device into an available USB port on the Front end.2. In Display Mode, press the Down Button (▼).3. The LCD will display “USB Copy?”4. Press Enter (↵) and the <strong>N5500</strong> will start copying USB disks connected to thefront USB port.5. All of data will be copied into system folder named “USB copy”.Management ModeDuring setup and configuration, the LCD will be in Management Mode.To enter into Management Mode, press Enter (↵) and an “Enter Password” promptwill show on the LCD.At this time, the administrator has to enter the correct LCD password. System willcheck whether the correct LCD password has been entered. The default LCDpassword is “ 0000 ”. If correct password is entered, you will enter into theManagement Mode menu.Management ModeItemDescriptionWAN SettingIP address and netmask of your WAN ports.LAN SettingIP address and netmask of your LAN ports.Link Agg. Setting Select Load Balance, 802.3ad or Failover.Change Admin Passwd Change administrator’s password for LCD operation.Reset to Default Reset system to factory defaults.ExitExit Management Mode and return to Display Mode.NOTEYou can also change your LCD password using the Web AdministrationInterface by navigating to System Management >Utility>Administrator Password. For more on the Web AdministrationInterface, see Chapter 4: System Management.Typical Setup ProcedureFrom the Web Administration Interface, you can begin to setup your <strong>N5500</strong> for useon your network. Setting up the <strong>N5500</strong> typically follows the five steps outlinedbelow.For more on how to use the Web Administration Interface, seeChapter 4: Web Administration Interface.21