You also want an ePaper? Increase the reach of your titles
YUMPU automatically turns print PDFs into web optimized ePapers that Google loves.
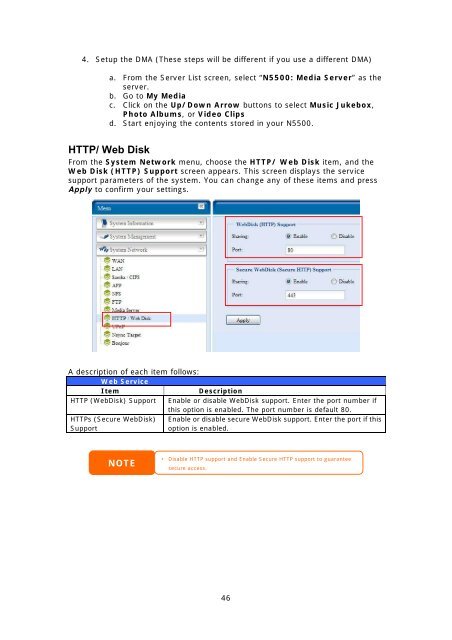
4. Setup the DMA (These steps will be different if you use a different DMA)a. From the Server List screen, select “<strong>N5500</strong>: Media Server” as theserver.b. Go to My Mediac. Click on the Up/Down Arrow buttons to select Music Jukebox,Photo Albums, or Video Clipsd. Start enjoying the contents stored in your <strong>N5500</strong>.HTTP/ Web DiskFrom the System Network menu, choose the HTTP/ Web Disk item, and theWeb Disk (HTTP) Support screen appears. This screen displays the servicesupport parameters of the system. You can change any of these items and pressApply to confirm your settings.A description of each item follows:Web ServiceItemDescriptionHTTP (WebDisk) Support Enable or disable WebDisk support. Enter the port number ifthis option is enabled. The port number is default 80.HTTPs (Secure WebDisk) Enable or disable secure WebDisk support. Enter the port if thisSupportoption is enabled.NOTE• Disable HTTP support and Enable Secure HTTP support to guaranteesecure access.46


