
Create successful ePaper yourself
Turn your PDF publications into a flip-book with our unique Google optimized e-Paper software.
<strong>RVE</strong>-<strong>1060</strong> Video Enhancer<br />
20<br />
System Status<br />
Main Menu<br />
Input Setup<br />
<br />
<br />
<br />
<br />
<br />
<br />
<br />
<br />
<br />
<br />
<br />
<br />
<br />
<br />
<br />
<br />
<br />
<br />
<br />
<br />
<br />
<br />
<br />
<br />
<br />
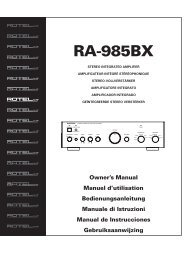
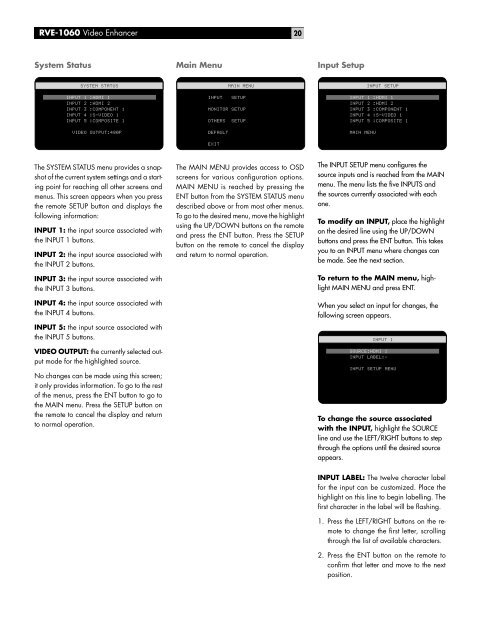
The SYSTEM STATUS menu provides a snapshot<br />
of the current system settings and a starting<br />
point for reaching all other screens and<br />
menus. This screen appears when you press<br />
the remote SETUP button and displays the<br />
following information:<br />
INPUT 1: the input source associated with<br />
the INPUT 1 buttons.<br />
INPUT 2: the input source associated with<br />
the INPUT 2 buttons.<br />
INPUT 3: the input source associated with<br />
the INPUT 3 buttons.<br />
INPUT 4: the input source associated with<br />
the INPUT 4 buttons.<br />
INPUT 5: the input source associated with<br />
the INPUT 5 buttons.<br />
VIDEO OUTPUT: the currently selected output<br />
mode for the highlighted source.<br />
No changes can be made using this screen;<br />
it only provides information. To go to the rest<br />
of the menus, press the ENT button to go to<br />
the MAIN menu. Press the SETUP button on<br />
the remote to cancel the display and return<br />
to normal operation.<br />
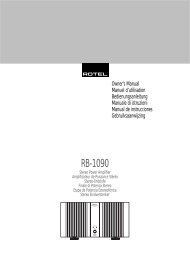
The MAIN MENU provides access to OSD<br />
screens for various configuration options.<br />
MAIN MENU is reached by pressing the<br />
ENT button from the SYSTEM STATUS menu<br />
described above or from most other menus.<br />
To go to the desired menu, move the highlight<br />
using the UP/DOWN buttons on the remote<br />
and press the ENT button. Press the SETUP<br />
button on the remote to cancel the display<br />
and return to normal operation.<br />
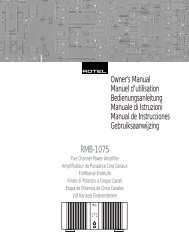
The INPUT SETUP menu configures the<br />
source inputs and is reached from the MAIN<br />
menu. The menu lists the five INPUTS and<br />
the sources currently associated with each<br />
one.<br />
To modify an INPUT, place the highlight<br />
on the desired line using the UP/DOWN<br />
buttons and press the ENT button. This takes<br />
you to an INPUT menu where changes can<br />
be made. See the next section.<br />
To return to the MAIN menu, highlight<br />
MAIN MENU and press ENT.<br />
When you select an input for changes, the<br />
following screen appears.<br />
<br />
<br />
<br />
<br />
<br />
<br />
<br />
To change the source associated<br />
with the INPUT, highlight the SOURCE<br />
line and use the LEFT/RIGHT buttons to step<br />
through the options until the desired source<br />
appears.<br />
INPUT LABEL: The twelve character label<br />
for the input can be customized. Place the<br />
highlight on this line to begin labelling. The<br />
first character in the label will be flashing.<br />
1. Press the LEFT/RIGHT buttons on the remote<br />
to change the first letter, scrolling<br />
through the list of available characters.<br />
2. Press the ENT button on the remote to<br />
confirm that letter and move to the next<br />
position.