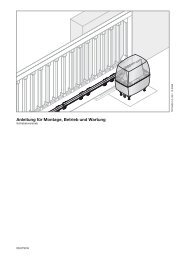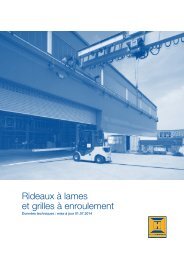
ProMatic - Hormann.fr
ProMatic - Hormann.fr
ProMatic - Hormann.fr
- No tags were found...

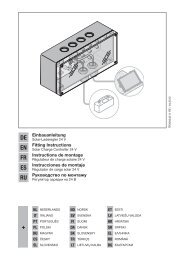
You also want an ePaper? Increase the reach of your titles
YUMPU automatically turns print PDFs into web optimized ePapers that Google loves.
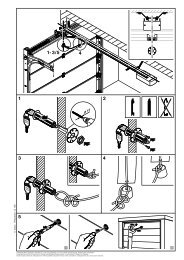
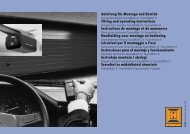
ENGLISHReducing the setting is only advisable if a light-movingdoor is involved, a higher level of safety is desired and"normal" operation is guaranteed (must be establishedthrough testing).ATTENTIONIf the potentiometer is set too low, thiswill put the operator out of action!NoteBesides having the task of limiting the maximum forces(during the OPEN reference cycle and CLOSE learn cycleand serving as an upper limit for updating), both potentiometersalso have a second function:- P1: during a normal opening cycle over the last centimetresbefore reaching the OPEN end-of-travel position,P1 assumes the task of the programmed force limit,thereby making it possible to adjust doors which requirea greater force at this stage only.- P2: during a normal closing cycle, after passing the limit,<strong>fr</strong>om which point on no reversing takes place (so calledreversing limit, located just before reaching the CLOSEend-of-travel position), P2 assumes the task of the programmedforce limit, thereby making it possible to adjustdoors which require a greater force at this point to ensuretight closing.3.4 Other adjustment options (Warning phase,Automatic closing, options relay)With the "A" and "B" DIL-switches (accessible on removingthe operator cover, see figure 10 and 17), the followingfunctions of the operator and options relay can be set:DIL-switch "A" at OFF / DIL-switch "B" at OFF- Operator / operator lighting: normal function.- Options relay: the relay picks up with the operatorlighting, but without cycling.Note: Factory setting; Connection of additional externaloperator lighting (see figure 16).DIL-switch "A" at OFF / DIL-switch "B" at ON- Operator / operator lighting: normal function.- Options relay: the relay picks up on reaching theCLOSE end-of-travel position.Note: "Close" signal.DIL-switch "A" at ON / DIL-switch "B" at OFF- Operator: Warning phase (approx. 2 s) always active.- Operator lighting: flashes rapidly during warning phase.- Options relay: cycles rapidly during warning phase;"normal" cycling continues when door in motion.Note: Connection of an external warning light (withoutautomatic flashing) (see figure 16).DIL-switch "A" at ON / DIL-switch "B" at ON- Operator: Warning phase (approx. 2 s) always active.Automatic closing <strong>fr</strong>om OPEN end-of-travel positionafter 30 s open phase and approx. 2 s warning phase.- operator lighting flashes rapidly during warning phase- Options relay: Relay cycles slowly during the openphase and rapidly during the warning phase; "normal"cycling continues when door in motion.Note: Connection of an external warning light withoutautomatic flashing (see figure 16).Explanation:Warning phaseThe time <strong>fr</strong>om when the command to move is given untilthe door starts to move. If a new command is given duringthis time, the warning phase ends without being followedby a subsequent travel cycle.Open phaseThe time the door waits at the OPEN end-of-travel limit.If a command to move is given during this time, the openphase starts anew.Automatic closingThe door automatically closes after a set time after reachingthe OPEN end-of-travel position. Pre- requisite is thefitting of a photocell and/or closing edge safety device!3.5 Connecting the additional componentsNotes on work involving electrics - Attention!The following points apply to all workinvolving electrics:- Electrical connections may only be made by aqualified electrician!- On- site electrical installation must comply withthe relevant safety regulations (230/240 V AC,50/60 Hz)!- Before working on the operator, always unplug<strong>fr</strong>om the mains!- External voltage at any of the controls connectingterminals will completely destroy the electronics(exception terminal .6, .5, .8)!- To avoid malfunctions, ensure that the controlcables of the operator (24 V DC) are laid in aninstallation system separate to other supplylines (230/240 V AC)!To connect the additional components, the operator covermust be removed (see figure 10). The terminals to whichthe remote control or additional components such aspotential-<strong>fr</strong>ee internal and external buttons, OFF-switchor wicket door contact as well as safety devices such asphotocell or closing edge safety device are connected,carry a safe low voltage of only 30 V DC max.All connecting terminals are designed for multipleoccupancy, however, please observe the maximumof 1 x 1.5 mm 2 (see figure 10.2). Before connection,always pull out the mains plug!3.5.1 Connecting the remote controlThe remote control is to be connected as follows:Plug-in connection (see figure 11)The receiver unit plug is plugged into the correspondingplug-in location on the operator head.40 06.2004 TR10A014 RE