Isofix - Chicco
Isofix - Chicco
Isofix - Chicco

Create successful ePaper yourself
Turn your PDF publications into a flip-book with our unique Google optimized e-Paper software.
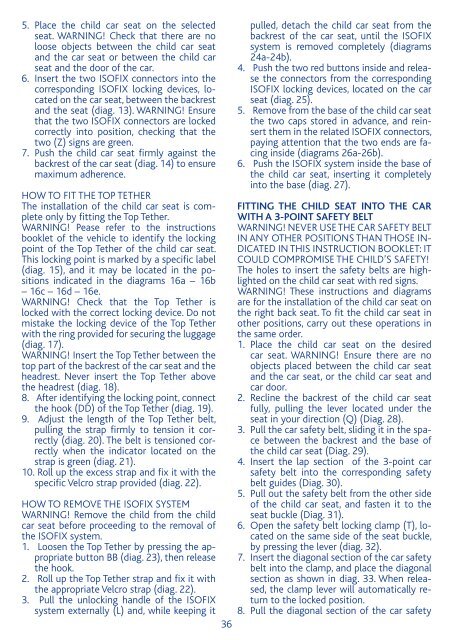
5. Place the child car seat on the selected<br />
seat. WARNING! Check that there are no<br />
loose objects between the child car seat<br />
and the car seat or between the child car<br />
seat and the door of the car.<br />
6. Insert the two ISOFIX connectors into the<br />
corresponding ISOFIX locking devices, located<br />
on the car seat, between the backrest<br />
and the seat (diag. 13). WARNING! Ensure<br />
that the two ISOFIX connectors are locked<br />
correctly into position, checking that the<br />
two (Z) signs are green.<br />
7. Push the child car seat firmly against the<br />
backrest of the car seat (diag. 14) to ensure<br />
maximum adherence.<br />
HOW TO FIT THE TOP TETHER<br />
The installation of the child car seat is complete<br />
only by fitting the Top Tether.<br />
WARNING! Pease refer to the instructions<br />
booklet of the vehicle to identify the locking<br />
point of the Top Tether of the child car seat.<br />
This locking point is marked by a specific label<br />
(diag. 15), and it may be located in the positions<br />
indicated in the diagrams 16a – 16b<br />
– 16c – 16d – 16e.<br />
WARNING! Check that the Top Tether is<br />
locked with the correct locking device. Do not<br />
mistake the locking device of the Top Tether<br />
with the ring provided for securing the luggage<br />
(diag. 17).<br />
WARNING! Insert the Top Tether between the<br />
top part of the backrest of the car seat and the<br />
headrest. Never insert the Top Tether above<br />
the headrest (diag. 18).<br />
8. After identifying the locking point, connect<br />
the hook (DD) of the Top Tether (diag. 19).<br />
9. Adjust the length of the Top Tether belt,<br />
pulling the strap firmly to tension it correctly<br />
(diag. 20). The belt is tensioned correctly<br />
when the indicator located on the<br />
strap is green (diag. 21).<br />
10. Roll up the excess strap and fix it with the<br />
specific Velcro strap provided (diag. 22).<br />
HOW TO REMOVE THE ISOFIX SYSTEM<br />
WARNING! Remove the child from the child<br />
car seat before proceeding to the removal of<br />
the ISOFIX system.<br />
1. Loosen the Top Tether by pressing the appropriate<br />
button BB (diag. 23), then release<br />
the hook.<br />
2. Roll up the Top Tether strap and fix it with<br />
the appropriate Velcro strap (diag. 22).<br />
3. Pull the unlocking handle of the ISOFIX<br />
system externally (L) and, while keeping it<br />
36<br />
pulled, detach the child car seat from the<br />
backrest of the car seat, until the ISOFIX<br />
system is removed completely (diagrams<br />
24a-24b).<br />
4. Push the two red buttons inside and release<br />
the connectors from the corresponding<br />
ISOFIX locking devices, located on the car<br />
seat (diag. 25).<br />
5. Remove from the base of the child car seat<br />
the two caps stored in advance, and reinsert<br />
them in the related ISOFIX connectors,<br />
paying attention that the two ends are facing<br />
inside (diagrams 26a-26b).<br />
6. Push the ISOFIX system inside the base of<br />
the child car seat, inserting it completely<br />
into the base (diag. 27).<br />
FITTING THE CHILD SEAT INTO THE CAR<br />
WITH A 3-POINT SAFETY BELT<br />
WARNING! NEVER USE THE CAR SAFETY BELT<br />
IN ANY OTHER POSITIONS THAN THOSE IN-<br />
DICATED IN THIS INSTRUCTION BOOKLET: IT<br />
COULD COMPROMISE THE CHILD’S SAFETY!<br />
The holes to insert the safety belts are highlighted<br />
on the child car seat with red signs.<br />
WARNING! These instructions and diagrams<br />
are for the installation of the child car seat on<br />
the right back seat. To fit the child car seat in<br />
other positions, carry out these operations in<br />
the same order.<br />
1. Place the child car seat on the desired<br />
car seat. WARNING! Ensure there are no<br />
objects placed between the child car seat<br />
and the car seat, or the child car seat and<br />
car door.<br />
2. Recline the backrest of the child car seat<br />
fully, pulling the lever located under the<br />
seat in your direction (Q) (Diag. 28).<br />
3. Pull the car safety belt, sliding it in the space<br />
between the backrest and the base of<br />
the child car seat (Diag. 29).<br />
4. Insert the lap section of the 3-point car<br />
safety belt into the corresponding safety<br />
belt guides (Diag. 30).<br />
5. Pull out the safety belt from the other side<br />
of the child car seat, and fasten it to the<br />
seat buckle (Diag. 31).<br />
6. Open the safety belt locking clamp (T), located<br />
on the same side of the seat buckle,<br />
by pressing the lever (diag. 32).<br />
7. Insert the diagonal section of the car safety<br />
belt into the clamp, and place the diagonal<br />
section as shown in diag. 33. When released,<br />
the clamp lever will automatically return<br />
to the locked position.<br />
8. Pull the diagonal section of the car safety