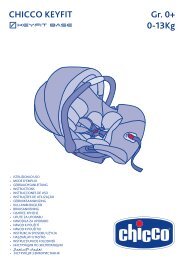
Isofix - Chicco
Isofix - Chicco
Isofix - Chicco

Create successful ePaper yourself
Turn your PDF publications into a flip-book with our unique Google optimized e-Paper software.
elt firmly, ensuring that the child car seat<br />
adheres correctly to the car seat (diag. 34).<br />
If necessary, carry out this operation exercising<br />
some pressure on the child car seat<br />
with your knee.<br />
9. Insert the upper part of the diagonal belt<br />
inside the S1 guide, placing it exactly as<br />
shown in diagram 35.<br />
10. Pull the safety belt in the direction shown<br />
in diagram 35 firmly, to tighten also the<br />
last part of the belt.<br />
11. Check that the child car seat is fitted correctly<br />
(diag. 36).<br />
WARNING: PLEASE READ THESE INSTRUC-<br />
TIONS TO ENSURE THE CHILD CAR SEAT IS<br />
FITTED CORRECTLY<br />
WARNING! To ensure your child’s safety, after<br />
fitting the child car seat ALWAYS check that:<br />
- The vehicle safety belt is not twisted at any<br />
point.<br />
- The safety belt is tightened correctly in all<br />
its parts.<br />
- At the end of the operations described above,<br />
the child car seat must be tightly fitted<br />
to the car seat. If the child car seat is not<br />
tightly and safely fitted to the car seat, repeat<br />
the installation.<br />
SEATING THE CHILD IN THE CHILD CAR<br />
SEAT<br />
- Before sitting your child in the child car<br />
seat, press the harness adjustment button<br />
and, at the same time, hold the two child<br />
car seat harnesses under the shoulder<br />
straps, and pull them in your direction to<br />
slacken them (diagram 37).<br />
- Unfasten the buckle of the child car seat<br />
harnesses by pressing the red button (diagram<br />
38), and pull the harnesses in an<br />
outward direction. Now the child can be<br />
placed in the child car seat (diag. 39).<br />
WARNING! Always check that the child is<br />
sitting with its back correctly placed against<br />
the backrest of the child car seat (diag.<br />
40).<br />
- Position the crotch strap correctly, take the<br />
harnesses, overlap the two buckle straps<br />
(diag. 41a - 41b) and push them together<br />
firmly inside the buckle slot, until a “click”<br />
is heard (diag. 42).<br />
To ensure maximum safety, the two buckle<br />
straps have been designed so as to prevent the<br />
fastening of a single strap.<br />
HARNESSES<br />
The height of the headrest and restraint harnesses<br />
can be simultaneously adjusted to 6<br />
positions by pressing the button located at<br />
the rear.<br />
WARNING! To adjust them correctly, the<br />
headrest must be fitted so as to allow that the<br />
harnesses come out from the backrest at the<br />
height of the child’s shoulders (diag. 43).<br />
To adjust the height, press the adjustment<br />
button (M), located at the rear of the backrest<br />
(diag. 44) and, at the same time, slide the<br />
headrest until the desired position is reached<br />
(diag. 45). Release the button and ease the<br />
headrest until a click is heard, indicating that<br />
it is locked correctly into position.<br />
To tighten the restraint harnesses of the child<br />
car seat, pull the adjustment strap of the restraint<br />
harnesses (diag. 46), until they are correctly<br />
fitted to the child’s body.<br />
After tightening the restraint harnesses, hold<br />
the shoulder straps and pull them in a downward<br />
direction to adjust the harnesses to the<br />
child’s body.<br />
CAUTION! Do not over-tighten the harnesses.<br />
If you can insert one finger between the harness<br />
and your child’s shoulders, it means that<br />
they are tightened correctly<br />
WARNING! Ensure that the harnesses are not<br />
twisted, especially on your child’s abdomen.<br />
ADJUSTING THE INCLINATION OF THE CHI-<br />
LD CAR SEAT<br />
The child car seat can be reclined to 5 positions.<br />
To adjust the inclination of the child car seat,<br />
pull the lever located under the seat (Q) in<br />
your direction (diag. 47).<br />
WARNING! After adjusting the child car seat<br />
to the desired position, first release the lever,<br />
and then continue to move the seat until a<br />
click is heard, indicating that the lever is<br />
locked correctly.<br />
WARNING! After adjusting the child car seat<br />
to the desired position, always check that<br />
the cars safety belts are tightened correctly<br />
around the child car seat.<br />
WARNING! During the adjustment operations,<br />
ensure that no mobile parts come into contact<br />
with the child or other children in the car.<br />
MAINTENANCE<br />
The cleaning and maintenance operations<br />
must only be carried out by an adult.<br />
ADJUSTING THE PADDED HEADREST AND How to Clean the Fabric cover<br />
37