Service Bulletin
Service Bulletin
Service Bulletin

You also want an ePaper? Increase the reach of your titles
YUMPU automatically turns print PDFs into web optimized ePapers that Google loves.
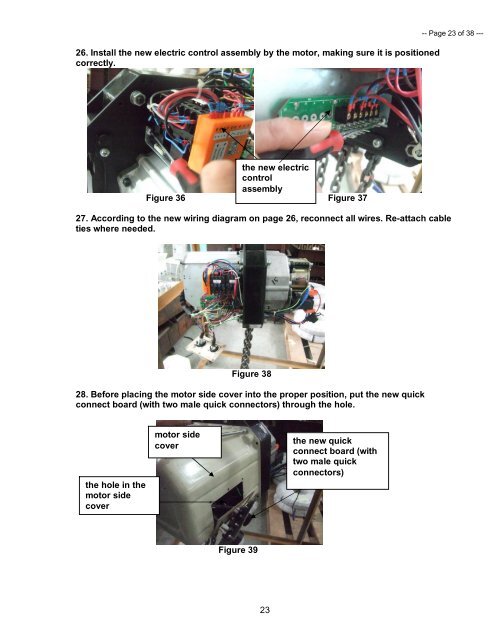
26. Install the new electric control assembly by the motor, making sure it is positioned<br />
correctly.<br />
the new electric<br />
control<br />
assembly<br />
Figure 36 Figure 37<br />
27. According to the new wiring diagram on page 26, reconnect all wires. Re-attach cable<br />
ties where needed.<br />
Figure 38<br />
28. Before placing the motor side cover into the proper position, put the new quick<br />
connect board (with two male quick connectors) through the hole.<br />
the hole in the<br />
motor side<br />
cover<br />
motor side<br />
cover<br />
Figure 39<br />
23<br />
the new quick<br />
connect board (with<br />
two male quick<br />
connectors)<br />
-- Page 23 of 38 ---