Service Bulletin
Service Bulletin
Service Bulletin

Create successful ePaper yourself
Turn your PDF publications into a flip-book with our unique Google optimized e-Paper software.
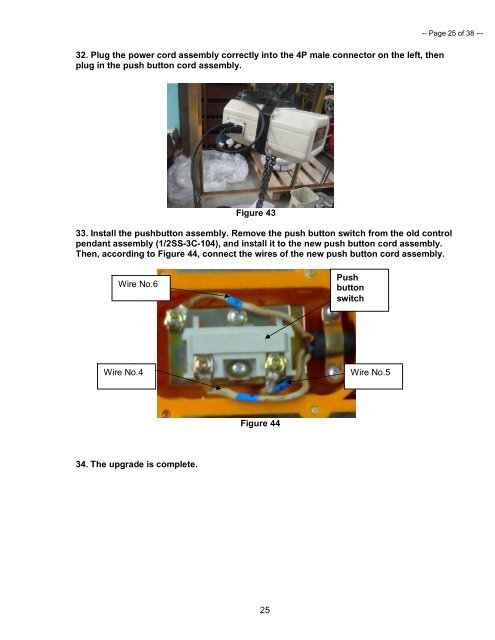
32. Plug the power cord assembly correctly into the 4P male connector on the left, then<br />
plug in the push button cord assembly.<br />
Figure 43<br />
33. Install the pushbutton assembly. Remove the push button switch from the old control<br />
pendant assembly (1/2SS-3C-104), and install it to the new push button cord assembly.<br />
Then, according to Figure 44, connect the wires of the new push button cord assembly.<br />
Wire No.6<br />
Wire No.4<br />
34. The upgrade is complete.<br />
Figure 44<br />
25<br />
Push<br />
button<br />
switch<br />
Wire No.5<br />
-- Page 25 of 38 ---