Service Bulletin
Service Bulletin
Service Bulletin

You also want an ePaper? Increase the reach of your titles
YUMPU automatically turns print PDFs into web optimized ePapers that Google loves.
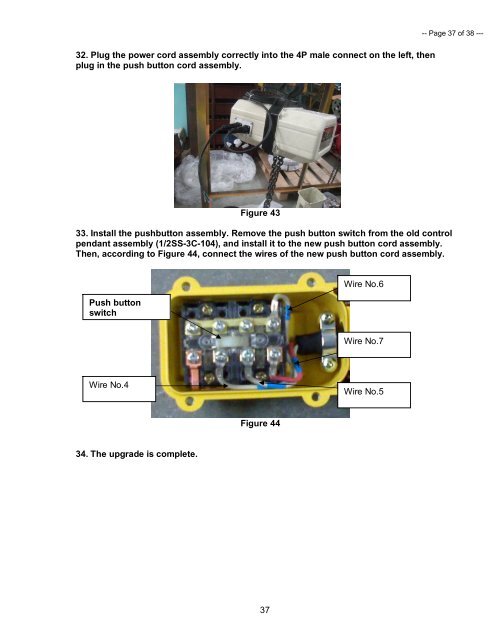
32. Plug the power cord assembly correctly into the 4P male connect on the left, then<br />
plug in the push button cord assembly.<br />
Figure 43<br />
33. Install the pushbutton assembly. Remove the push button switch from the old control<br />
pendant assembly (1/2SS-3C-104), and install it to the new push button cord assembly.<br />
Then, according to Figure 44, connect the wires of the new push button cord assembly.<br />
Push button<br />
switch<br />
Wire No.4<br />
34. The upgrade is complete.<br />
Figure 44<br />
37<br />
Wire No.6<br />
Wire No.7<br />
Wire No.5<br />
-- Page 37 of 38 ---