Therma-Tru Slim-Line Sliding Patio Door Assembly and Installation
Therma-Tru Slim-Line Sliding Patio Door Assembly and Installation
Therma-Tru Slim-Line Sliding Patio Door Assembly and Installation

You also want an ePaper? Increase the reach of your titles
YUMPU automatically turns print PDFs into web optimized ePapers that Google loves.
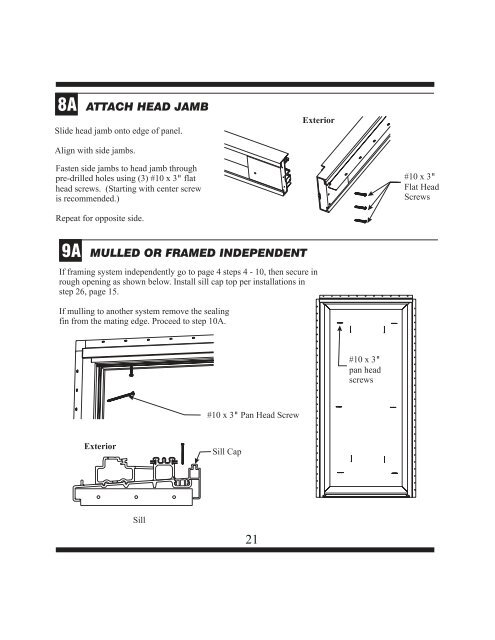
8A ATTACH HEAD JAMB<br />
Slide head jamb onto edge of panel.<br />
Align with side jambs.<br />
Fasten side jambs to head jamb through<br />
pre-drilled holes using (3) #10 x 3“ flat<br />
head screws. (Starting with center screw<br />
is recommended.)<br />
Repeat for opposite side.<br />
9A MULLED OR FRAMED INDEPENDENT<br />
If framing system independently go to page 4 steps 4 - 10, then secure in<br />
rough opening as shown below. Install sill cap top per installations in<br />
step 26, page 15.<br />
If mulling to another system remove the sealing<br />
fin from the mating edge. Proceed to step 10A.<br />
Exterior<br />
Sill<br />
#10 x 3“ Pan Head Screw<br />
Sill Cap<br />
21<br />
Exterior<br />
#10x3“<br />
pan head<br />
screws<br />
#10x3“<br />
Flat Head<br />
Screws