AFRTS Defense Media Center Satellite Handbook
AFRTS Defense Media Center Satellite Handbook
AFRTS Defense Media Center Satellite Handbook

Create successful ePaper yourself
Turn your PDF publications into a flip-book with our unique Google optimized e-Paper software.
<strong>Defense</strong> <strong>Media</strong> <strong>Center</strong> <strong>Satellite</strong> <strong>Handbook</strong> V.3.26<br />
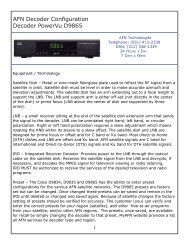
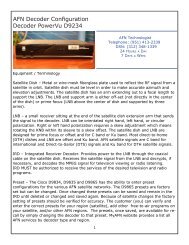
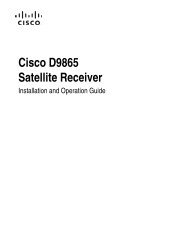
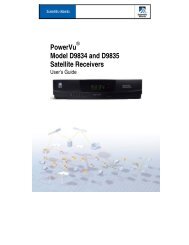
Decoder Setup Instructions Scientific Atlanta PowerVu (Model<br />
9223)<br />
Appendix D of this document is required to set the receiver decoder as it contains<br />
parameters to enter into the receiver decoder based on your geographical location.<br />
1) Unpack the receiver decoder from the shipping box and install either in a<br />
rack or on a tabletop. Warning: if installed on a tabletop, do not stack units<br />
on top of each other, as heat buildup will cause the units to fail. Allow a<br />
minimum of 2 inches of air space between receivers in racks.<br />
2. Connect the L-band RF output from your LNB to the IRD RF IN connection.<br />
3. Turn the LNB power switch located on the rear of the IRD to the 19V DC<br />
setting.<br />
4. Connect a video cable from the Video Out connector on the rear of the IRD<br />
to the Video input on the rear of the TV monitor. Connect audio cables<br />
from the L-R Audio Output connectors on the rear of the IRD to L-R Audio<br />
Input connectors on the rear of the TV Monitor.<br />
5. Connect the IRD to the AC power source. A green dot will appear in the<br />
center of the front panel display window. Push the on/off switch, located<br />
on the front lower left of the IRD, to turn the IRD on. Select Channel 0.<br />
6. On the front panel keypad, press MENU.<br />
7. Press 2, to unlock the installer MENU.<br />
8. Press 9 to bring up the first page of the installer MENU.<br />
NOTE: The INSTALLER MENU consists of two pages of selectable settings<br />
for transponder frequency and other vital decoder specific parameters<br />
including a preset frequency plan. You can exit this menu at any time by<br />
pressing VIEW.<br />
9. Press CHAN UP/DN on the front left portion of the IRD to change the Band<br />
setting to appropriate setting for your satellite region. (See PowerVu setup<br />
information in appendix D of this document).<br />
10. Press NEXT on the front keypad to select L/C-band Freq setting on the<br />
menu screen. Using the keypad enter the correct L/C-band frequency<br />
setting for your satellite region. (Refer to appendix D)<br />
11. Scroll to the Polarization block, push the SELECT button to enter H<br />
(fixed).<br />
12. Press NEXT to move the arrow down to the FEC RATE. Using the<br />
channel up/down keys enter the correct FEC RATE for your satellite<br />
region. SatNet users should select ¾ and DTS users should select 2/3.<br />
13. Press NEXT to select SYMBOL RATE. Using the keypad enter the correct<br />
SYMBOL RATE for your satellite region. (Refer to appendix D)<br />
5-9