user's manual - Ana-Digi Systems
user's manual - Ana-Digi Systems
user's manual - Ana-Digi Systems

You also want an ePaper? Increase the reach of your titles
YUMPU automatically turns print PDFs into web optimized ePapers that Google loves.
CHAPTER 6 COMMUNICATION FUNCTION<br />
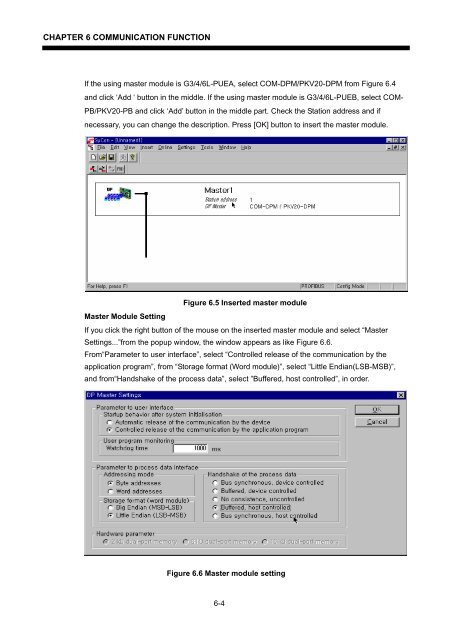
If the using master module is G3/4/6L-PUEA, select COM-DPM/PKV20-DPM from Figure 6.4<br />
and click ‘Add ‘ button in the middle. If the using master module is G3/4/6L-PUEB, select COM-<br />
PB/PKV20-PB and click ‘Add’ button in the middle part. Check the Station address and if<br />
necessary, you can change the description. Press [OK] button to insert the master module.<br />
Figure 6.5 Inserted master module<br />
Master Module Setting<br />
If you click the right button of the mouse on the inserted master module and select “Master<br />
Settings...”from the popup window, the window appears as like Figure 6.6.<br />
From“Parameter to user interface”, select “Controlled release of the communication by the<br />
application program”, from “Storage format (Word module)”, select “Little Endian(LSB-MSB)”,<br />
and from“Handshake of the process data”, select ”Buffered, host controlled”, in order.<br />
Figure 6.6 Master module setting<br />
6-4