Blu-ray Disc PLAYER - Pioneer
Blu-ray Disc PLAYER - Pioneer
Blu-ray Disc PLAYER - Pioneer

Create successful ePaper yourself
Turn your PDF publications into a flip-book with our unique Google optimized e-Paper software.
05<br />
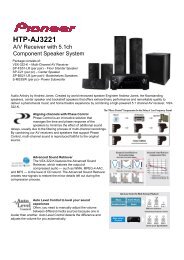
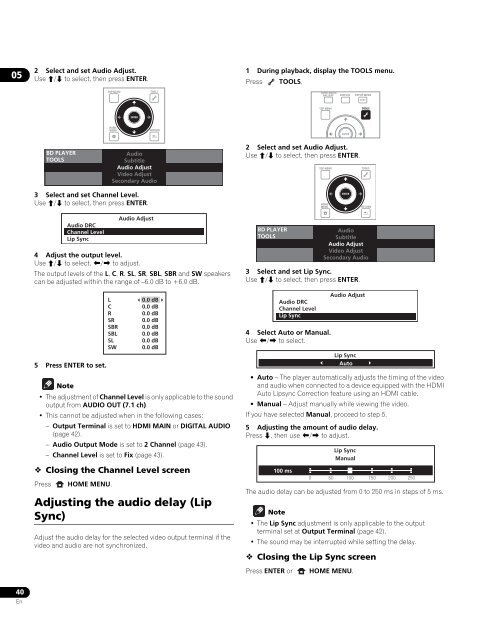
2 Select and set Audio Adjust.<br />
Use / to select, then press ENTER.<br />
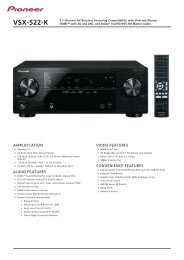
1 During playback, display the TOOLS menu.<br />
Press TOOLS.<br />
TOP MENU<br />
TOOLS<br />
HOME MEDIA<br />
GALLERY<br />
DISPLAY<br />
POPUP MENU<br />
MENU<br />
TOP MENU<br />
TOOLS<br />
ENTER<br />
HOME<br />
MENU<br />
RETURN<br />
ENTER<br />
BD <strong>PLAYER</strong><br />
TOOLS<br />
Audio<br />
Subtitle<br />
Audio Adjust<br />
Video Adjust<br />
Secondary Audio<br />
2 Select and set Audio Adjust.<br />
Use / to select, then press ENTER.<br />
TOP MENU<br />
TOOLS<br />
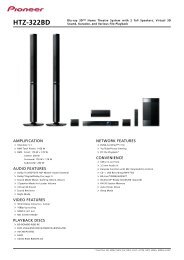
3 Select and set Channel Level.<br />
Use / to select, then press ENTER.<br />
HOME<br />
MENU<br />
ENTER<br />
RETURN<br />
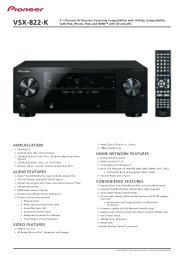
4 Adjust the output level.<br />
Use / to select, / to adjust.<br />
The output levels of the L, C, R, SL, SR, SBL, SBR and SW speakers<br />
can be adjusted within the range of –6.0 dB to +6.0 dB.<br />
5 Press ENTER to set.<br />
Note<br />
•The adjustment of Channel Level is only applicable to the sound<br />
output from AUDIO OUT (7.1 ch).<br />
• This cannot be adjusted when in the following cases:<br />
– Output Terminal is set to HDMI MAIN or DIGITAL AUDIO<br />
(page 42).<br />
– Audio Output Mode is set to 2 Channel (page 43).<br />
– Channel Level is set to Fix (page 43).<br />
Closing the Channel Level screen<br />
Press<br />
Audio DRC<br />
Channel Level<br />
Lip Sync<br />
HOME MENU.<br />
L<br />
C<br />
R<br />
SR<br />
SBR<br />
SBL<br />
SL<br />
SW<br />
Audio Adjust<br />
0.0 dB<br />
0.0 dB<br />
0.0 dB<br />
0.0 dB<br />
0.0 dB<br />
0.0 dB<br />
0.0 dB<br />
0.0 dB<br />
Adjusting the audio delay (Lip<br />
Sync)<br />
Adjust the audio delay for the selected video output terminal if the<br />
video and audio are not synchronized.<br />
BD <strong>PLAYER</strong><br />
TOOLS<br />
3 Select and set Lip Sync.<br />
Use / to select, then press ENTER.<br />
Audio DRC<br />
Channel Level<br />
Lip Sync<br />
4 Select Auto or Manual.<br />
Use / to select.<br />
•Auto– The player automatically adjusts the timing of the video<br />
and audio when connected to a device equipped with the HDMI<br />
Auto Lipsync Correction feature using an HDMI cable.<br />
• Manual – Adjust manually while viewing the video.<br />
If you have selected Manual, proceed to step 5.<br />
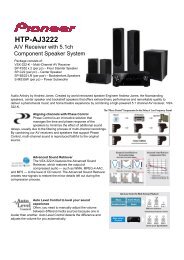
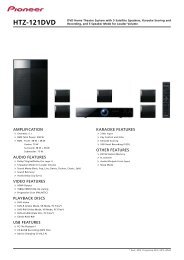
5 Adjusting the amount of audio delay.<br />
Press , then use / to adjust.<br />
100 ms<br />
Audio<br />
Subtitle<br />
Audio Adjust<br />
Video Adjust<br />
Secondary Audio<br />
Audio Adjust<br />
Lip Sync<br />
Auto<br />
Lip Sync<br />
Manual<br />
0 50 100 150 200 250<br />
The audio delay can be adjusted from 0 to 250 ms in steps of 5 ms.<br />
Note<br />
•The Lip Sync adjustment is only applicable to the output<br />
terminal set at Output Terminal (page 42).<br />
• The sound may be interrupted while setting the delay.<br />
Closing the Lip Sync screen<br />
Press ENTER or<br />
HOME MENU.<br />
40<br />
En