RAIDWatch User's Manual
RAIDWatch User's Manual
RAIDWatch User's Manual

Create successful ePaper yourself
Turn your PDF publications into a flip-book with our unique Google optimized e-Paper software.
<strong>RAIDWatch</strong> User’s <strong>Manual</strong><br />
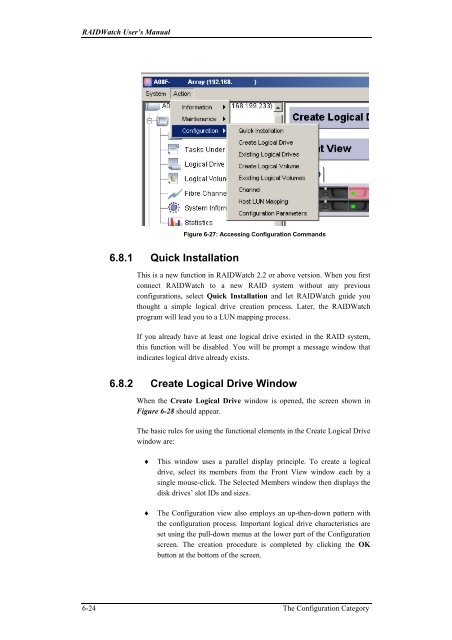
Figure 6-27: Accessing Configuration Commands<br />
6.8.1 Quick Installation<br />
This is a new function in <strong>RAIDWatch</strong> 2.2 or above version. When you first<br />
connect <strong>RAIDWatch</strong> to a new RAID system without any previous<br />
configurations, select Quick Installation and let <strong>RAIDWatch</strong> guide you<br />
thought a simple logical drive creation process. Later, the <strong>RAIDWatch</strong><br />
program will lead you to a LUN mapping process.<br />
If you already have at least one logical drive existed in the RAID system,<br />
this function will be disabled. You will be prompt a message window that<br />
indicates logical drive already exists.<br />
6.8.2 Create Logical Drive Window<br />
When the Create Logical Drive window is opened, the screen shown in<br />
Figure 6-28 should appear.<br />
The basic rules for using the functional elements in the Create Logical Drive<br />
window are:<br />
♦<br />
♦<br />
This window uses a parallel display principle. To create a logical<br />
drive, select its members from the Front View window each by a<br />
single mouse-click. The Selected Members window then displays the<br />
disk drives’ slot IDs and sizes.<br />
The Configuration view also employs an up-then-down pattern with<br />
the configuration process. Important logical drive characteristics are<br />
set using the pull-down menus at the lower part of the Configuration<br />
screen. The creation procedure is completed by clicking the OK<br />
button at the bottom of the screen.<br />
6-24 The Configuration Category