Lab Manual - eScience Labs
Lab Manual - eScience Labs
Lab Manual - eScience Labs

You also want an ePaper? Increase the reach of your titles
YUMPU automatically turns print PDFs into web optimized ePapers that Google loves.
<strong>Lab</strong> 7: Osmosis<br />
Note:<br />
• You may need dialysis tubing in subsequent experiments, so be sure to cut the amount<br />
specified in the direcons.<br />
• Dialysis tubing can be rinsed and used again if you make a mistake.<br />
• Dialysis tubing must be soaked in water before you will be able to open it up to create<br />
the dialysis “bag”. Follow the direcons for the experiment, beginning with soaking the<br />
tubing in a beaker of water. Then, place the dialysis tubing between your thumb and<br />
forefinger and rub the two digits together in a shearing manner. This should open up<br />
the "tube" so you can fill it with the different soluons.<br />
Procedure<br />
1. Submerge the four pieces of dialysis tubing into a 250 mL beaker<br />
filled with 100 ml of water for at least 10 minutes.<br />
2. Aer 10 minutes, remove one piece of tubing from the beaker.<br />
On one end (not the whole tube), gently twirl the tubing into a<br />
long, thin cylindrical piece that is able to fit into the hole of the<br />
yellow bead.<br />
3. Insert the long cylindrical end of the tube into the center hole in<br />
the yellow bead. Once it is through, pull the cylindrical end unl<br />
there is about 1.5 to 2cm of tubing extending beyond the bead<br />
Figure 2: Fold the bag unl you<br />
have a piece narrow enough to<br />
be threaded through the bead.<br />
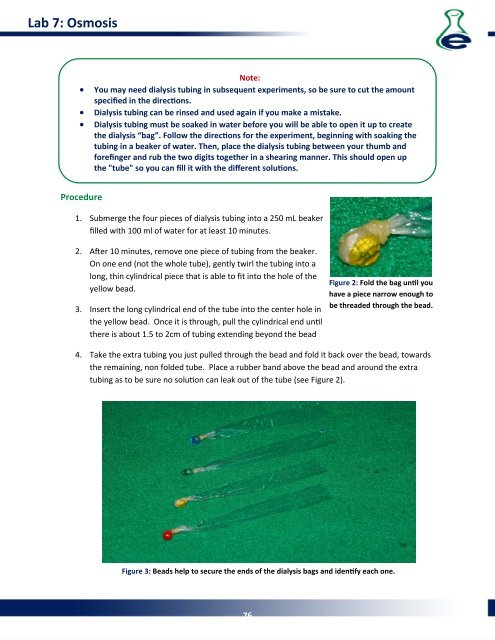
4. Take the extra tubing you just pulled through the bead and fold it back over the bead, towards<br />
the remaining, non folded tube. Place a rubber band above the bead and around the extra<br />
tubing as to be sure no soluon can leak out of the tube (see Figure 2).<br />
Figure 3: Beads help to secure the ends of the dialysis bags and idenfy each one.<br />
76