SYNCRO_V_MANUAL_EN_R1_web - Digimerge
SYNCRO_V_MANUAL_EN_R1_web - Digimerge
SYNCRO_V_MANUAL_EN_R1_web - Digimerge

Create successful ePaper yourself
Turn your PDF publications into a flip-book with our unique Google optimized e-Paper software.
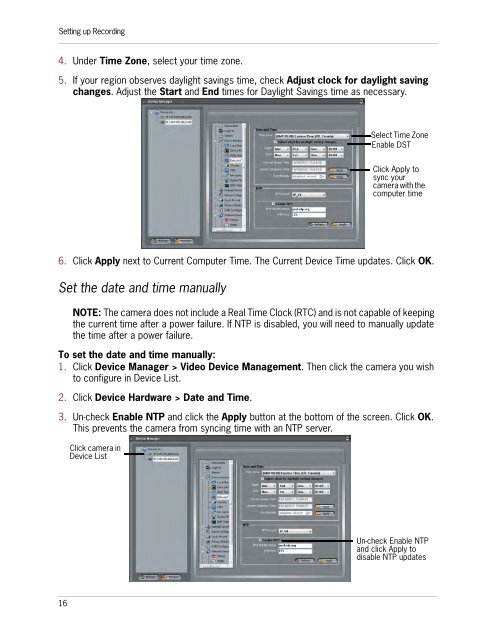
Setting up Recording4. Under Time Zone, select your time zone.5. If your region observes daylight savings time, check Adjust clock for daylight savingchanges. Adjust the Start and End times for Daylight Savings time as necessary.Select Time ZoneEnable DSTClick Apply tosync yourcamera with thecomputer time6. Click Apply next to Current Computer Time. The Current Device Time updates. Click OK.Set the date and time manuallyNOTE: The camera does not include a Real Time Clock (RTC) and is not capable of keepingthe current time after a power failure. If NTP is disabled, you will need to manually updatethe time after a power failure.To set the date and time manually:1. Click Device Manager > Video Device Management. Then click the camera you wishto configure in Device List.2. Click Device Hardware > Date and Time.3. Un-check Enable NTP and click the Apply button at the bottom of the screen. Click OK.This prevents the camera from syncing time with an NTP server.Click camera inDevice ListUn-check Enable NTPand click Apply todisable NTP updates16