SYNCRO_V_MANUAL_EN_R1_web - Digimerge
SYNCRO_V_MANUAL_EN_R1_web - Digimerge
SYNCRO_V_MANUAL_EN_R1_web - Digimerge

You also want an ePaper? Increase the reach of your titles
YUMPU automatically turns print PDFs into web optimized ePapers that Google loves.
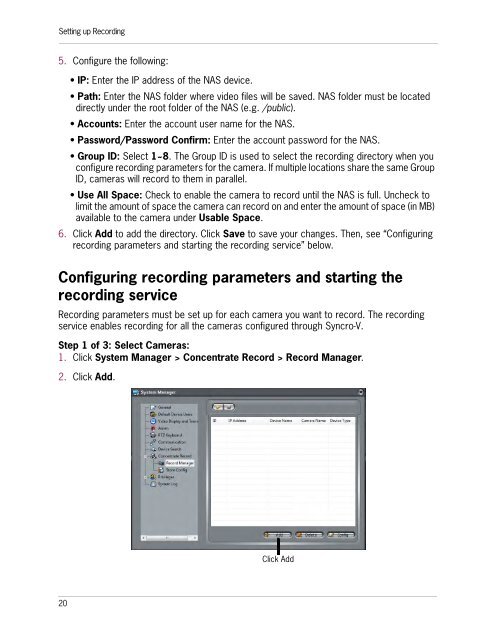
Setting up Recording5. Configure the following:• IP: Enter the IP address of the NAS device.• Path: Enter the NAS folder where video files will be saved. NAS folder must be locateddirectly under the root folder of the NAS (e.g. /public).• Accounts: Enter the account user name for the NAS.• Password/Password Confirm: Enter the account password for the NAS.• Group ID: Select 1~8. The Group ID is used to select the recording directory when youconfigure recording parameters for the camera. If multiple locations share the same GroupID, cameras will record to them in parallel.• Use All Space: Check to enable the camera to record until the NAS is full. Uncheck tolimit the amount of space the camera can record on and enter the amount of space (in MB)available to the camera under Usable Space.6. Click Add to add the directory. Click Save to save your changes. Then, see “Configuringrecording parameters and starting the recording service” below.Configuring recording parameters and starting therecording serviceRecording parameters must be set up for each camera you want to record. The recordingservice enables recording for all the cameras configured through Syncro-V.Step 1 of 3: Select Cameras:1. Click System Manager > Concentrate Record > Record Manager.2. Click Add.Click Add20