Grundoram Manual (PDF 1.7MB) - TT Technologies Inc.
Grundoram Manual (PDF 1.7MB) - TT Technologies Inc.
Grundoram Manual (PDF 1.7MB) - TT Technologies Inc.
- No tags were found...

You also want an ePaper? Increase the reach of your titles
YUMPU automatically turns print PDFs into web optimized ePapers that Google loves.
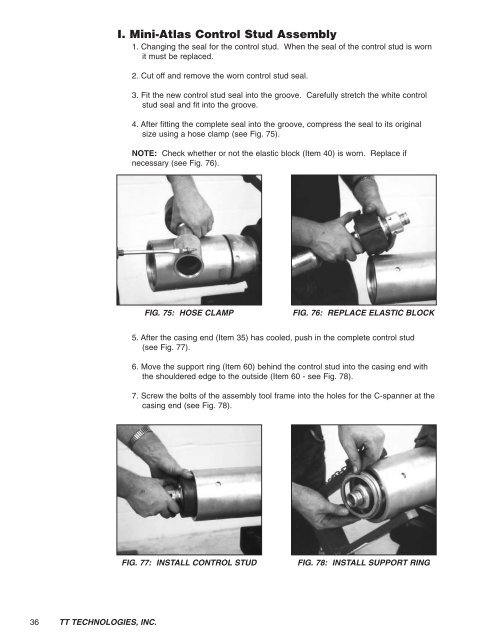
I. Mini-Atlas Control Stud Assembly1. Changing the seal for the control stud. When the seal of the control stud is wornit must be replaced.2. Cut off and remove the worn control stud seal.3. Fit the new control stud seal into the groove. Carefully stretch the white controlstud seal and fit into the groove.4. After fitting the complete seal into the groove, compress the seal to its originalsize using a hose clamp (see Fig. 75).NOTE: Check whether or not the elastic block (Item 40) is worn. Replace ifnecessary (see Fig. 76).FIG. 75: HOSE CLAMPFIG. 76: REPLACE ELASTIC BLOCK5. After the casing end (Item 35) has cooled, push in the complete control stud(see Fig. 77).6. Move the support ring (Item 60) behind the control stud into the casing end withthe shouldered edge to the outside (Item 60 - see Fig. 78).7. Screw the bolts of the assembly tool frame into the holes for the C-spanner at thecasing end (see Fig. 78).FIG. 77: INSTALL CONTROL STUDFIG. 78: INSTALL SUPPORT RING36 <strong>TT</strong> TECHNOLOGIES, INC.