Grundoram Manual (PDF 1.7MB) - TT Technologies Inc.
Grundoram Manual (PDF 1.7MB) - TT Technologies Inc.
Grundoram Manual (PDF 1.7MB) - TT Technologies Inc.
- No tags were found...

Create successful ePaper yourself
Turn your PDF publications into a flip-book with our unique Google optimized e-Paper software.
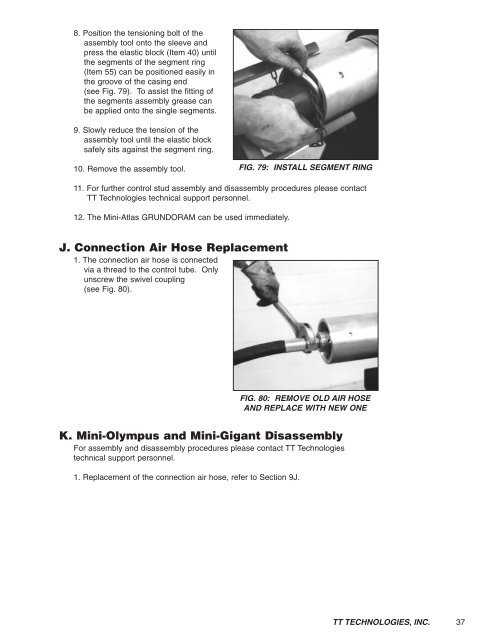
8. Position the tensioning bolt of theassembly tool onto the sleeve andpress the elastic block (Item 40) untilthe segments of the segment ring(Item 55) can be positioned easily inthe groove of the casing end(see Fig. 79). To assist the fitting ofthe segments assembly grease canbe applied onto the single segments.9. Slowly reduce the tension of theassembly tool until the elastic blocksafely sits against the segment ring.10. Remove the assembly tool.FIG. 79: INSTALL SEGMENT RING11. For further control stud assembly and disassembly procedures please contact<strong>TT</strong> <strong>Technologies</strong> technical support personnel.12. The Mini-Atlas GRUNDORAM can be used immediately.J. Connection Air Hose Replacement1. The connection air hose is connectedvia a thread to the control tube. Onlyunscrew the swivel coupling(see Fig. 80).FIG. 80: REMOVE OLD AIR HOSEAND REPLACE WITH NEW ONEK. Mini-Olympus and Mini-Gigant DisassemblyFor assembly and disassembly procedures please contact <strong>TT</strong> <strong>Technologies</strong>technical support personnel.1. Replacement of the connection air hose, refer to Section 9J.<strong>TT</strong> TECHNOLOGIES, INC.37