- Page 1 and 2:
DocuPrint P255 d/P255 dwUser Guide
- Page 3 and 4: User Setup Disk Creating Tool (Wind
- Page 5 and 6: Random Spots/Blurred Images........
- Page 7 and 8: PrefaceThank you for purchasing the
- Page 9 and 10: About LicenseRSA BSAFEYour printer
- Page 11 and 12: Using This GuideThis section includ
- Page 13 and 14: Safety NotesBefore using this produ
- Page 15 and 16: Always switch off and unplug the ma
- Page 18 and 19: • Operational SafetyWARNINGThe op
- Page 20 and 21: • ConsumableWARNINGStore all cons
- Page 22 and 23: Environment• For environmental pr
- Page 24 and 25: Illegal Copies and PrintoutsCopying
- Page 26 and 27: 26 Product Features
- Page 28 and 29: Paper SizePaper TypeItemsDescriptio
- Page 30 and 31: WeightItemsUsage Environment6.8 kg
- Page 32 and 33: Main ComponentsThis section provide
- Page 34 and 35: • Operator PanelThe operator pane
- Page 36 and 37: Printing the Panel Settings PageThe
- Page 38 and 39: 38 Basic Operation
- Page 40 and 41: Print DriversTo access all of your
- Page 42 and 43: Printer Setting Utility (Windows On
- Page 44 and 45: Launcher (Windows Only)Using the La
- Page 46 and 47: 6 Select your printer and click Cre
- Page 48 and 49: Overview of Network Setup and Confi
- Page 50 and 51: • Connecting Printer to a Compute
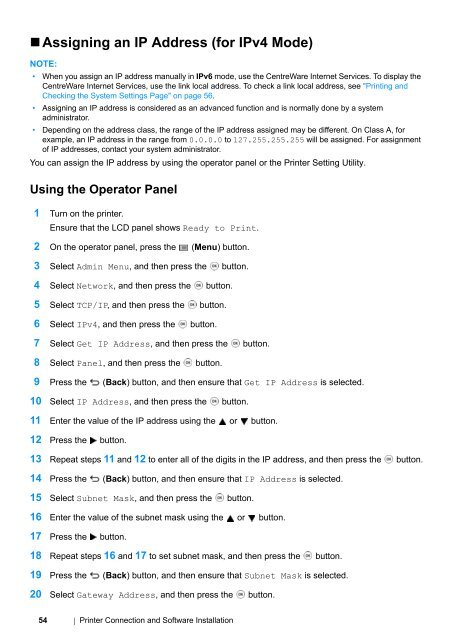
- Page 52 and 53: Setting the IP AddressThis section
- Page 56 and 57: • Verifying the IP SettingsThe fo
- Page 58 and 59: Installing Print Drivers on Compute
- Page 60 and 61: Disabling the Firewall Before Insta
- Page 62 and 63: • Configuring Wireless Network Se
- Page 64 and 65: 5 Ensure that Wizard is selected, a
- Page 66 and 67: 12 Click Next.The Confirm the setti
- Page 68 and 69: Using Advanced Setup to Configure W
- Page 70 and 71: • Select a connection method from
- Page 72 and 73: 8 Click Next.The Confirm the settin
- Page 74 and 75: •WPS-PINNOTE:• WPS-PIN (Wi-Fi P
- Page 76 and 77: When the WPS-PBC operation is succe
- Page 78 and 79: Setting Up a New Wireless Network E
- Page 80 and 81: For Windows Server 2008 R2 and Wind
- Page 82 and 83: For Windows Vista:a Display Control
- Page 84 and 85: For Windows Server 2008 R2 and Wind
- Page 86 and 87: g Click Add to display Wireless net
- Page 88 and 89: • For Windows Server 2008 and Win
- Page 90 and 91: For Windows Vista and Windows Vista
- Page 92 and 93: • Using the Peer-to-Peer FeatureW
- Page 94 and 95: For Windows Server 2008 and Windows
- Page 96 and 97: • Using the XML Paper Specificati
- Page 98 and 99: • Mac OS X Wireless Settings on t
- Page 100 and 101: • Using Ad Hoc ConnectionTo confi
- Page 102 and 103: •WPS-PINNOTE:• WPS-PIN is a met
- Page 104 and 105:
• Installing Print DriversNOTE:
- Page 106 and 107:
8 Select FX DocuPrint P255 xxx from
- Page 108 and 109:
• Specifying the Default Queue•
- Page 110 and 111:
• For Ubuntu 10 (x86)1 Open the U
- Page 112 and 113:
• Uninstalling Print Drivers• F
- Page 114 and 115:
114 Printer Connection and Software
- Page 116 and 117:
About Print MediaUsing paper that i
- Page 118 and 119:
Supported Print MediaUsing unsuitab
- Page 120 and 121:
Priority Sheet Inserter (PSI)Paper
- Page 122 and 123:
SupportedPaper(Cont’d)SpecialPape
- Page 124 and 125:
IBG Paper(Cont’d)Paper Name Size
- Page 126 and 127:
• Loading Print Media in the Pape
- Page 128 and 129:
5 Load the print media into the pap
- Page 130 and 131:
Loading Envelopes in the Paper Tray
- Page 132 and 133:
Loading Postcards in the Paper Tray
- Page 134 and 135:
• Loading Print Media in the Prio
- Page 136 and 137:
4 Load print media in the PSI with
- Page 138 and 139:
• Loading Com-10, DL, Yougata 4,
- Page 140 and 141:
Setting Paper Sizes and TypesWhen l
- Page 142 and 143:
• Canceling a Print JobThere are
- Page 144 and 145:
Manual Duplex Printing (PCL Print D
- Page 146 and 147:
4 Replace the paper tray cover, ins
- Page 148 and 149:
• Selecting Printing OptionsThis
- Page 150 and 151:
Operating System Driver Tab Printin
- Page 152 and 153:
ItemPrinter FeaturesSummaryPrinting
- Page 154 and 155:
Printing on Custom Size PaperUse th
- Page 156 and 157:
• Printing a Report PageYou can p
- Page 158 and 159:
• Using the Printer Setting Utili
- Page 160 and 161:
• Printer SetupYou can install yo
- Page 162 and 163:
Understanding the Operator Panel Me
- Page 164 and 165:
• Meter ReadingsUse Meter Reading
- Page 166 and 167:
• WPS Setup (DocuPrint P255 dw on
- Page 168 and 169:
• Initialize NVMPurpose:To initia
- Page 170 and 171:
• Low Toner Alert MsgPurpose:To s
- Page 172 and 173:
• Toner RefreshPurpose:To use up
- Page 174 and 175:
Secure SettingsUse the Secure Setti
- Page 176 and 177:
Env Younaga3Env Nagagata3Env Nagaga
- Page 178 and 179:
• Symbol SetPurpose:To specify a
- Page 180 and 181:
• Line TerminationPurpose:To add
- Page 182 and 183:
• Output SizePurpose:To specify t
- Page 184 and 185:
Paper Type Plain*Light CardLabelsEn
- Page 186 and 187:
• Disabling the Panel Lock Featur
- Page 188 and 189:
Resetting to Factory DefaultsEnabli
- Page 190 and 191:
Clearing JamsCareful selection of a
- Page 192 and 193:
• Identifying the Location of Pap
- Page 194 and 195:
3 Pull the paper tray out of the pr
- Page 196 and 197:
Clearing Paper Jams From the Priori
- Page 198 and 199:
• Clearing Paper Jams From the Re
- Page 200 and 201:
• Clearing Paper Jams From the Ce
- Page 202 and 203:
• Jam ProblemsThis section includ
- Page 204 and 205:
Display ProblemsProblemAfter the pr
- Page 206 and 207:
ProblemPrint media does not stack n
- Page 208 and 209:
• The Output Is Too LightProblemT
- Page 210 and 211:
• Random Spots/Blurred ImagesProb
- Page 212 and 213:
• GhostingProblemThe printed resu
- Page 214 and 215:
• Auger MarkProblemThe printed re
- Page 216 and 217:
• The Top Margin Is IncorrectProb
- Page 218 and 219:
Understanding Printer MessagesThe p
- Page 220 and 221:
Error MessageLoad Paperthen Press O
- Page 222 and 223:
Getting HelpThis section includes:
- Page 224 and 225:
Enabling Non-Genuine ModeWhen toner
- Page 226 and 227:
226 Troubleshooting
- Page 228 and 229:
Replacing the Toner CartridgeGenuin
- Page 230 and 231:
• Removing the Toner Cartridge1 T
- Page 232 and 233:
• Installing a Toner Cartridge1 U
- Page 234 and 235:
Ordering SuppliesThe toner cartridg
- Page 236 and 237:
Storing ConsumablesStore consumable
- Page 238 and 239:
• Checking Printer Status with th
- Page 240 and 241:
Conserving SuppliesYou can change s
- Page 242 and 243:
Moving the PrinterIMPORTANT:• Pri
- Page 244 and 245:
4 Remove the paper tray from the pr
- Page 246 and 247:
Technical SupportFuji Xerox recomme
- Page 248 and 249:
248 Contacting Fuji Xerox
- Page 250 and 251:
LLabels 170, 171Launcher 44Layout 1
- Page 252:
XXML Paper Specification print driv