Deep Sky Imager™: The Basics - Meade
Deep Sky Imager™: The Basics - Meade
Deep Sky Imager™: The Basics - Meade
- TAGS
- deep
- basics
- meade
- www.meade.com
Create successful ePaper yourself
Turn your PDF publications into a flip-book with our unique Google optimized e-Paper software.
Connect the <strong>Deep</strong> <strong>Sky</strong> Imager Camera to Your Telescope<br />
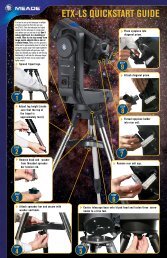
To connect the <strong>Deep</strong> <strong>Sky</strong> Imager camera to an ETX Telescope:<br />
• While looking at the back of the telescope, orient the <strong>Deep</strong> <strong>Sky</strong> Imager camera into the eyepiece holder so<br />
that the USB cable points to the left of the telescope’s optical tube.<br />
To connect the <strong>Deep</strong> <strong>Sky</strong> Imager camera to an LX-200 ® or LX-90 ® Telescope:<br />
• While looking at the back of the telescope, orient the <strong>Deep</strong> <strong>Sky</strong> Imager camera into the eyepiece holder so<br />
that the USB cable points to the right of the telescope’s optical tube.<br />
To connect the <strong>Deep</strong> <strong>Sky</strong> Imager camera to other telescopes:<br />
• Move the <strong>Deep</strong> <strong>Sky</strong> Imager camera around in the eyepiece holder until the image on the <strong>Deep</strong> <strong>Sky</strong> Imager<br />
display screen (39) is upright.<br />
To connect the <strong>Deep</strong> <strong>Sky</strong> Imager camera as an autoguider:<br />
• Attach the correct serial cable from the telescope’s control panel RS-232 port to the comm port of your PC<br />
(see the Autoguider instruction sheet for more information). Also see “Autoguider and Telescope Controls,”<br />
page 31, for more information.<br />
• Click on the telescope tab (16). Enter the PC’s comm port number or Netscope Server.<br />
• Click the Connect button (27).<br />
6


