Front-Loading Automatic Washer Lavadora automática de ... - Sears
Front-Loading Automatic Washer Lavadora automática de ... - Sears
Front-Loading Automatic Washer Lavadora automática de ... - Sears

Create successful ePaper yourself
Turn your PDF publications into a flip-book with our unique Google optimized e-Paper software.
The <strong>Washer</strong> Maintenance Procedure should be performed on a<br />
monthly basis.<br />
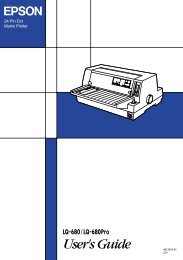
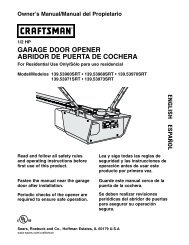
Cleaning the door seal<br />
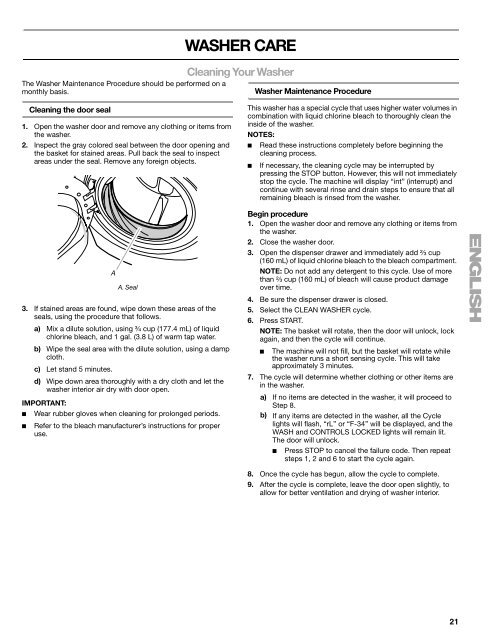
1. Open the washer door and remove any clothing or items from<br />
the washer.<br />
2. Inspect the gray colored seal between the door opening and<br />
the basket for stained areas. Pull back the seal to inspect<br />
areas un<strong>de</strong>r the seal. Remove any foreign objects.<br />
3. If stained areas are found, wipe down these areas of the<br />
seals, using the procedure that follows.<br />
a) Mix a dilute solution, using ³₄ cup (177.4 mL) of liquid<br />
chlorine bleach, and 1 gal. (3.8 L) of warm tap water.<br />
b) Wipe the seal area with the dilute solution, using a damp<br />
cloth.<br />
c) Let stand 5 minutes.<br />
d) Wipe down area thoroughly with a dry cloth and let the<br />
washer interior air dry with door open.<br />
IMPORTANT:<br />
A<br />
A. Seal<br />
■ Wear rubber gloves when cleaning for prolonged periods.<br />
■ Refer to the bleach manufacturer’s instructions for proper<br />
use.<br />
WASHER CARE<br />
Cleaning Your <strong>Washer</strong><br />
<strong>Washer</strong> Maintenance Procedure<br />
This washer has a special cycle that uses higher water volumes in<br />
combination with liquid chlorine bleach to thoroughly clean the<br />
insi<strong>de</strong> of the washer.<br />
NOTES:<br />
■ Read these instructions completely before beginning the<br />
cleaning process.<br />
■ If necessary, the cleaning cycle may be interrupted by<br />
pressing the STOP button. However, this will not immediately<br />
stop the cycle. The machine will display “int” (interrupt) and<br />
continue with several rinse and drain steps to ensure that all<br />
remaining bleach is rinsed from the washer.<br />
Begin procedure<br />
1. Open the washer door and remove any clothing or items from<br />
the washer.<br />
2. Close the washer door.<br />
3. Open the dispenser drawer and immediately add ²⁄₃ cup<br />
(160 mL) of liquid chlorine bleach to the bleach compartment.<br />
NOTE: Do not add any <strong>de</strong>tergent to this cycle. Use of more<br />
than ²⁄₃ cup (160 mL) of bleach will cause product damage<br />
over time.<br />
4. Be sure the dispenser drawer is closed.<br />
5. Select the CLEAN WASHER cycle.<br />
6. Press START.<br />
NOTE: The basket will rotate, then the door will unlock, lock<br />
again, and then the cycle will continue.<br />
■ The machine will not fill, but the basket will rotate while<br />
the washer runs a short sensing cycle. This will take<br />
approximately 3 minutes.<br />
7. The cycle will <strong>de</strong>termine whether clothing or other items are<br />
in the washer.<br />
a) If no items are <strong>de</strong>tected in the washer, it will proceed to<br />
Step 8.<br />
b) If any items are <strong>de</strong>tected in the washer, all the Cycle<br />
lights will flash, “rL” or “F-34” will be displayed, and the<br />
WASH and CONTROLS LOCKED lights will remain lit.<br />
The door will unlock.<br />
■ Press STOP to cancel the failure co<strong>de</strong>. Then repeat<br />
steps 1, 2 and 6 to start the cycle again.<br />
8. Once the cycle has begun, allow the cycle to complete.<br />
9. After the cycle is complete, leave the door open slightly, to<br />
allow for better ventilation and drying of washer interior.<br />
21