


Create successful ePaper yourself
Turn your PDF publications into a flip-book with our unique Google optimized e-Paper software.
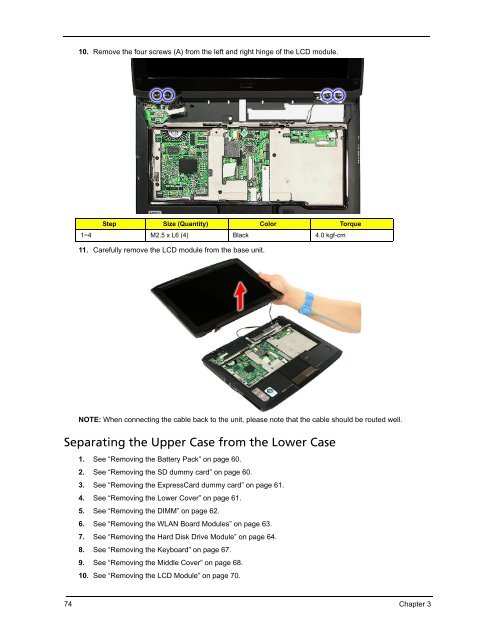
10. Remove the four screws (A) from the left and right hinge of the LCD module.<br />
Step Size (Quantity) Color Torque<br />
1~4 M2.5 x L6 (4) Black 4.0 kgf-cm<br />
11. Carefully remove the LCD module from the base unit.<br />
NOTE: When connecting the cable back to the unit, please note that the cable should be routed well.<br />
Separating the Upper Case from the Lower Case<br />
1. See “Removing the Battery Pack” on page 60.<br />
2. See “Removing the SD dummy card” on page 60.<br />
3. See “Removing the ExpressCard dummy card” on page 61.<br />
4. See “Removing the Lower Cover” on page 61.<br />
5. See “Removing the DIMM” on page 62.<br />
6. See “Removing the WLAN Board Modules” on page 63.<br />
7. See “Removing the Hard Disk Drive Module” on page 64.<br />
8. See “Removing the Keyboard” on page 67.<br />
9. See “Removing the M<strong>id</strong>dle Cover” on page 68.<br />
10. See “Removing the LCD Module” on page 70.<br />
74 Chapter 3


