Getting Started with Ektron OnTrek
Getting Started with Ektron OnTrek
Getting Started with Ektron OnTrek

You also want an ePaper? Increase the reach of your titles
YUMPU automatically turns print PDFs into web optimized ePapers that Google loves.
n Create a permanent link to a specific blog post that you can access it via the URL in the<br />
browser’s address bar. (Most blog pages show only recent posts. After a post is moved off<br />
the blog’s front page, it is still accessible via this link.)<br />
n Subscribe to RSS or Email notifications.<br />
n View highlighted and clickable days on the calendar indicating when a blog entry was<br />
posted.<br />
n View an automatic roll of blog entries.<br />
n View a list of archived blog entries.<br />
n View a list of blog post subjects.<br />
n View the most recent blog entries.<br />
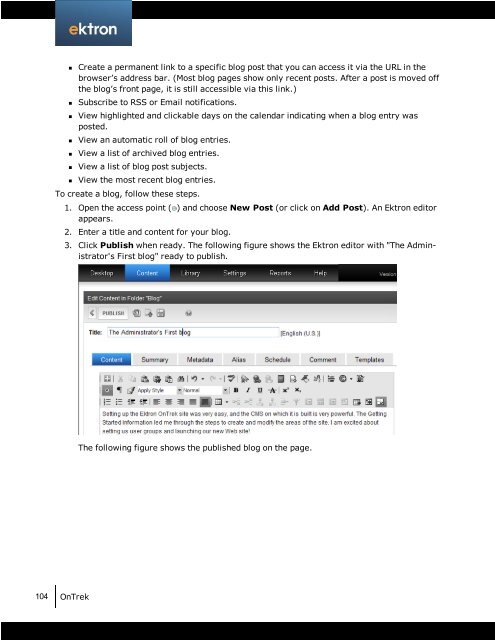
To create a blog, follow these steps.<br />
104 <strong>OnTrek</strong><br />
1. Open the access point ( ) and choose New Post (or click on Add Post). An <strong>Ektron</strong> editor<br />
appears.<br />
2. Enter a title and content for your blog.<br />
3. Click Publish when ready. The following figure shows the <strong>Ektron</strong> editor <strong>with</strong> "The Administrator's<br />
First blog" ready to publish.<br />
The following figure shows the published blog on the page.