2006 LSSV Owner's Manual Supplement (PDF) - GM Fleet
2006 LSSV Owner's Manual Supplement (PDF) - GM Fleet
2006 LSSV Owner's Manual Supplement (PDF) - GM Fleet

You also want an ePaper? Increase the reach of your titles
YUMPU automatically turns print PDFs into web optimized ePapers that Google loves.
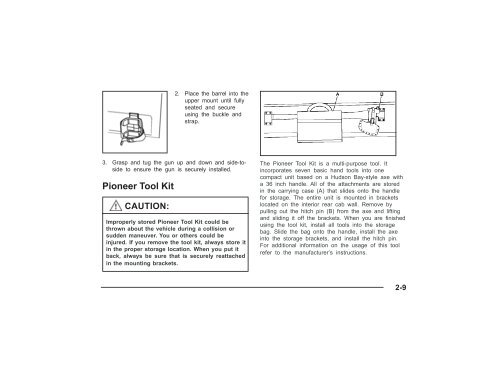
2. Place the barrel into the<br />
upper mount until fully<br />
seated and secure<br />
using the buckle and<br />
strap.<br />
3. Grasp and tug the gun up and down and side-toside<br />
to ensure the gun is securely installed.<br />
Pioneer Tool Kit<br />
CAUTION:<br />
Improperly stored Pioneer Tool Kit could be<br />
thrown about the vehicle during a collision or<br />
sudden maneuver. You or others could be<br />
injured. If you remove the tool kit, always store it<br />
in the proper storage location. When you put it<br />
back, always be sure that is securely reattached<br />
in the mounting brackets.<br />
The Pioneer Tool Kit is a multi-purpose tool. It<br />
incorporates seven basic hand tools into one<br />
compact unit based on a Hudson Bay-style axe with<br />
a 36 inch handle. All of the attachments are stored<br />
in the carrying case (A) that slides onto the handle<br />
for storage. The entire unit is mounted in brackets<br />
located on the interior rear cab wall. Remove by<br />
pulling out the hitch pin (B) from the axe and lifting<br />
and sliding it off the brackets. When you are finished<br />
using the tool kit, install all tools into the storage<br />
bag. Slide the bag onto the handle, install the axe<br />
into the storage brackets, and install the hitch pin.<br />
For additional information on the usage of this tool<br />
refer to the manufacturer’s instructions.<br />
2-9