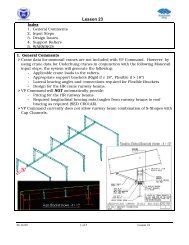
Lesson 20 Anchor Bolt Plan Frame Cross Section ... - VP Buildings
Lesson 20 Anchor Bolt Plan Frame Cross Section ... - VP Buildings
Lesson 20 Anchor Bolt Plan Frame Cross Section ... - VP Buildings

Create successful ePaper yourself
Turn your PDF publications into a flip-book with our unique Google optimized e-Paper software.
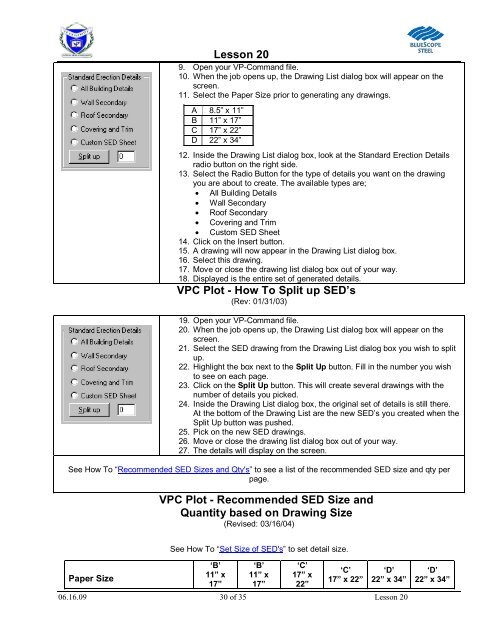
<strong>Lesson</strong> <strong>20</strong><br />
9. Open your <strong>VP</strong>-Command file.<br />
10. When the job opens up, the Drawing List dialog box will appear on the<br />
screen.<br />
11. Select the Paper Size prior to generating any drawings.<br />
A 8.5” x 11”<br />
B 11” x 17”<br />
C 17” x 22”<br />
D 22” x 34”<br />
12. Inside the Drawing List dialog box, look at the Standard Erection Details<br />
radio button on the right side.<br />
13. Select the Radio Button for the type of details you want on the drawing<br />
you are about to create. The available types are;<br />
All Building Details<br />
Wall Secondary<br />
Roof Secondary<br />
Covering and Trim<br />
Custom SED Sheet<br />
14. Click on the Insert button.<br />
15. A drawing will now appear in the Drawing List dialog box.<br />
16. Select this drawing.<br />
17. Move or close the drawing list dialog box out of your way.<br />
18. Displayed is the entire set of generated details.<br />
<strong>VP</strong>C Plot - How To Split up SED’s<br />
(Rev: 01/31/03)<br />
19. Open your <strong>VP</strong>-Command file.<br />
<strong>20</strong>. When the job opens up, the Drawing List dialog box will appear on the<br />
screen.<br />
21. Select the SED drawing from the Drawing List dialog box you wish to split<br />
up.<br />
22. Highlight the box next to the Split Up button. Fill in the number you wish<br />
to see on each page.<br />
23. Click on the Split Up button. This will create several drawings with the<br />
number of details you picked.<br />
24. Inside the Drawing List dialog box, the original set of details is still there.<br />
At the bottom of the Drawing List are the new SED’s you created when the<br />
Split Up button was pushed.<br />
25. Pick on the new SED drawings.<br />
26. Move or close the drawing list dialog box out of your way.<br />
27. The details will display on the screen.<br />
See How To “Recommended SED Sizes and Qty's” to see a list of the recommended SED size and qty per<br />
page.<br />
<strong>VP</strong>C Plot - Recommended SED Size and<br />
Quantity based on Drawing Size<br />
(Revised: 03/16/04)<br />
See How To “Set Size of SED's” to set detail size.<br />
Paper Size<br />
‘B’<br />
11” x<br />
17”<br />
‘B’<br />
11” x<br />
17”<br />
‘C’<br />
17” x<br />
22”<br />
‘C’<br />
17” x 22”<br />
‘D’<br />
22” x 34”<br />
06.16.09 30 of 35 <strong>Lesson</strong> <strong>20</strong><br />
‘D’<br />
22” x 34”