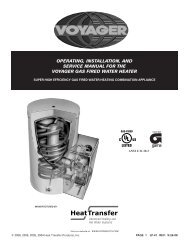
MC Series Gas-Fired Circulating Heater - Heat Transfer Products, Inc
MC Series Gas-Fired Circulating Heater - Heat Transfer Products, Inc
MC Series Gas-Fired Circulating Heater - Heat Transfer Products, Inc

You also want an ePaper? Increase the reach of your titles
YUMPU automatically turns print PDFs into web optimized ePapers that Google loves.
59<br />
Never open the manual air vent while the heater is hot. Allow heater to cool to room temperature to avoid scalding while purging.<br />
g. Close the quick-fill water valve and purge valve and remove the hose. Open all isolation valves. Watch that system pressure<br />
rises to correct cold-fill pressure.<br />
h. After the system has operated for a while, eliminate any residual air by using the manual air vents located throughout the<br />
system.<br />
i. If purge valves are not installed in system, open manual air vents in system one at a time, beginning with lowest floor. Close<br />
vent when water squirts out. Repeat with remaining vents.<br />
j. Refill to correct pressure.<br />
F. CHECK FOR GAS LEAKS<br />
Before starting the heater, and during initial operation, smell near the floor and around the heater for gas odorant or any unusual odor.<br />
Remove heater front door and smell interior of heater enclosure. Do not proceed with startup if there is any indication of a gas leak.<br />
Repair any leak at once.<br />
Propane heater only – Your propane supplier mixes an odorant with the propane to make its presence detectable. In some instances,<br />
the odorant can face, and the gas may no longer have an odor. Before startup (and periodically thereafter), have the propane supplier<br />
verify the correct odorant level in the gas.<br />
G. CHECK THERMOSTAT CIRCUIT(S)<br />
1. Disconnect the two external wires connected to the heater thermostat terminals (low voltage terminal strip terminals 5 and 6).<br />
2. Connect a voltmeter across these two incoming wires. Close each thermostat, zone valve and relay in the external circuit one at a<br />
time and check the voltmeter reading across the incoming wires.<br />
3. There should NEVER be a voltage reading.<br />
4. If a voltage does occur under any condition, check and correct the external wiring. (This is a common problem when using 3-wire<br />
zone valves.)<br />
5. Once the external thermostat circuit wiring is checked and corrected if necessary, reconnect the external thermostat circuit wires to<br />
heater low voltage terminal strip. Allow the heater to cycle.<br />
H. CONDENSATE REMOVAL<br />
1. This a high efficiency condensing heater, there, the unit has a condensation drain. Condensate is nothing more than water vapor,<br />
derived from combustion products, similar to an automobile when it is initially started. The condensation is slightly acidic (typically with<br />
pH of 3 to 5) and must be piped with the correct materials. Never pipe the condensate using steel, copper, brass or other materials that<br />
will be subject to corrosion. Plastic PVC or CPVC pipe are the only approved materials. A condensate filter, if required by local<br />
authorities, can be made up of lime crystals marble or phosphate chips that will neutralize the condensate. This may be done by the<br />
installer or you may purchase a condensate neutralizer from HTP (p/n N1100).<br />
2. The heater is equipped with a ¾ pipe connection that runs the condensation line to a local drain. It is very important that the<br />
condensate line is sloped away from the heater and down to a suitable inside drain. If the condensate outlet is lower than the drain, you<br />
must use a condensate removal pump, available at HTP (#554200). This pump is equipped with two leads that can be connected to an<br />
alarm or another type of warning device to alert residents of a condensate overflow, which, if not corrected, could cause property<br />
damage.<br />
3. If a long horizontal run is used, it may be necessary to create a second vent to prevent a vacuum lock in the condensate line. Do not<br />
expose the condensate to freezing temperatures.<br />
4. Do not expose the condensate to freezing temperatures.<br />
5. It is very important you support the condensation line to assure proper drainage.<br />
I. FINAL CHECKS BEFORE STARTING HEATER<br />
1. Read Startup Procedures within this manual for proper steps to start heater. (See Startup Report to record steps for future<br />
reference.)<br />
2. Verify the heater and system are full of water and all system components are correctly set for operation.<br />
LP-171 Rev. 10.2.13