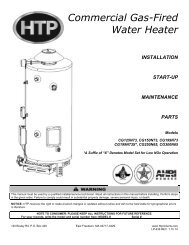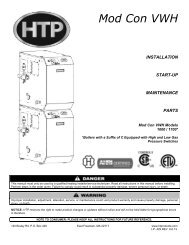
MC Series Gas-Fired Circulating Heater - Heat Transfer Products, Inc
MC Series Gas-Fired Circulating Heater - Heat Transfer Products, Inc
MC Series Gas-Fired Circulating Heater - Heat Transfer Products, Inc

You also want an ePaper? Increase the reach of your titles
YUMPU automatically turns print PDFs into web optimized ePapers that Google loves.
d. Remove the (4) screws on the aluminum ½” NPT connector on the gas valve.<br />
e. Disconnect the wiring connected to the combustion blower motor.<br />
f. Remove the (4) 10MM nuts from the burner plate assembly to access the coils.<br />
g. Pull the entire burner plate assembly with blower still attached towards you, while removing or pushing aside any wiring to<br />
allow the removal of the assembly.<br />
2. Using a spray bottle filled with calcium and lime deposit remover, spray liberally on the coils, making sure the solution penetrates and<br />
funnels down through the condensate hose. If the condensate hose is blocked, let the chemical penetrate for at least 15 minutes or until<br />
it drains.<br />
3. Use the nylon, stainless or brass brush (do not use steel) and scrub coils to remove any buildup. Then vacuum the debris from the<br />
coils. WARNING: Follow above precautions.<br />
4. Spray the coils with clear water, making sure to confine the spray to the area being cleaned (try to avoid getting the back ceramic<br />
wall of the unit wet). Flush the combustion chamber with fresh water. At this point, the heater should be ready to power back up.<br />
Before powering up the heater follow the steps below:<br />
a. Re-install the burner assembly.<br />
b. Replace the (4) 10MM nuts to the burner plate.<br />
c. Re-connect all wiring connections.<br />
e. Replace the (4) screws on the aluminum ½” NPT connector on the gas valve. Turn the gas back on. (IMPORTANT: CHECK<br />
FOR GAS LEAKS.)<br />
f. Re-set thermostats (IMPORTANT: MAKE SURE EXHAUST VENT IS NO LONGER BLOCKED!)<br />
g. Turn the heater back on and observe condensate flow.<br />
h. Re-connect the condensate hose to the outside connection.<br />
68<br />
Do not use solvents to clean any of the burner components. The components could be damaged, resulting in unreliable or unsafe<br />
operation. Failure to do so could result in death or serious injury.<br />
D. MAINTENANCE SCHEDULE FOR THE OWNER<br />
The following information provides detailed instruction for completing maintenance items. In addition to this maintenance, the heater<br />
should be serviced at the beginning of the heating season by a qualified service technician.<br />
Periodically<br />
<br />
<br />
<br />
Monthly<br />
<br />
Check area around the unit.<br />
o<br />
Review Table 1 - Contaminant Table, p. 13. If contaminates are found:<br />
• Remove contaminates immediately from area.<br />
• If contaminates have been in the area for an extended period, call a qualified service technician to inspect<br />
the unit for possible acid corrosion damage.<br />
• If contaminates cannot be removed, immediately call a qualified service technician to re-pipe the combustion<br />
air inlet piping and locate the intake away from contaminated areas.<br />
o Do not store combustible materials, gasoline, or other flammable vapors or liquids near the unit. If found, remove<br />
these materials immediately.<br />
Check and remove any blockage from the combustion air inlet and ventilation openings.<br />
o If removing debris does not allow the unit to operate correctly, contact a qualified service technician to inspect the unit<br />
and the vent/combustion air system.<br />
Check the temperature and pressure gauge.<br />
o Ensure the pressure reading on the gauge does not exceed 25 psig. Higher pressure readings may indicate a<br />
problem with the expansion tank.<br />
o Ensure the temperature on the LED display panel does not exceed 180 o F. Higher temperature readings may indicate<br />
a problem with the thermostat operating controls.<br />
o Contact a qualified service technician if problem persists.<br />
Check vent piping.<br />
o<br />
Visually inspect the flue gas vent piping for any signs of blockage, leakage, or deterioration. Ensure that vent piping is<br />
properly supported as described in this manual. Notify a qualified service technician immediately if any problems are<br />
found.<br />
Failure to inspect the venting system and have it repaired by a qualified service technician can result in vent system failure, causing<br />
substantial property damage, severe personal injury, or death.<br />
LP-171 Rev. 10.2.13